TYPE R TROPHY BUILD – PART 2
TYPE R TROPHY BUILD – PART 2
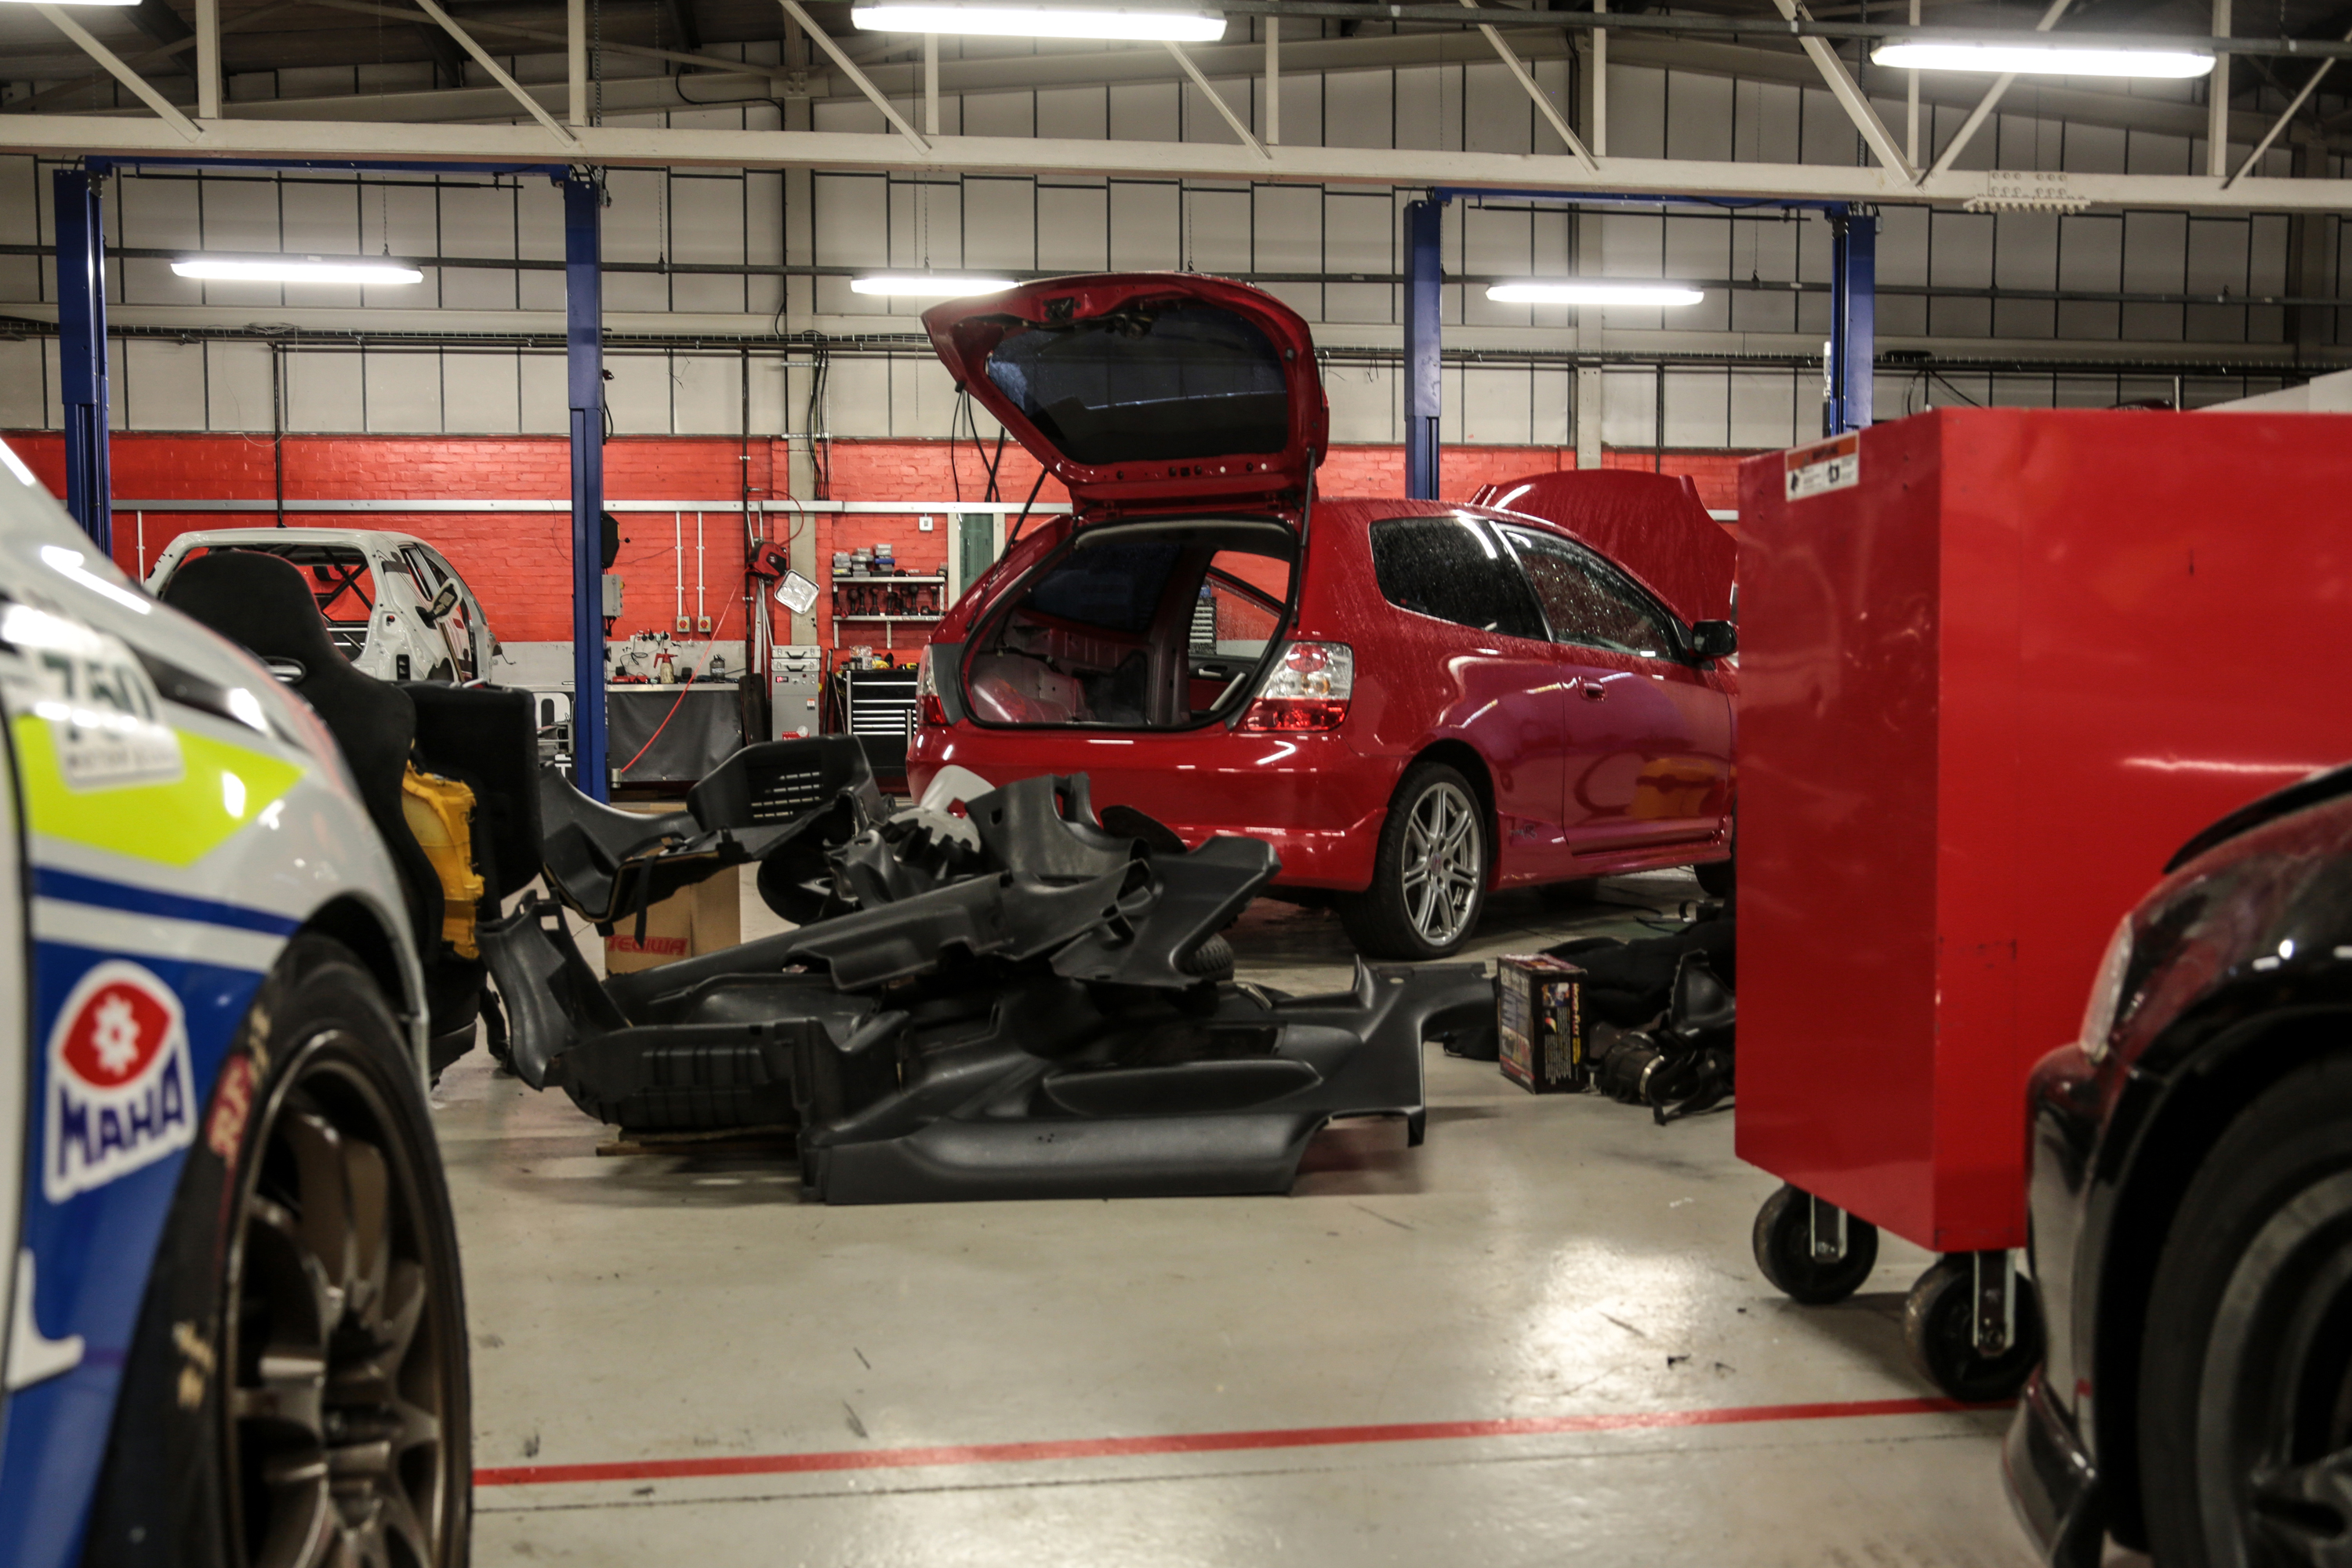
We’re back after the Christmas break and have been as keen as ever to get cracking with our Type R Trophy build. Especially as we’ve bit the bullet and booked our first track day. We’ll be taking the car to Oulton Park in the middle of next month, so we need to get the car as prepared as possible for then!
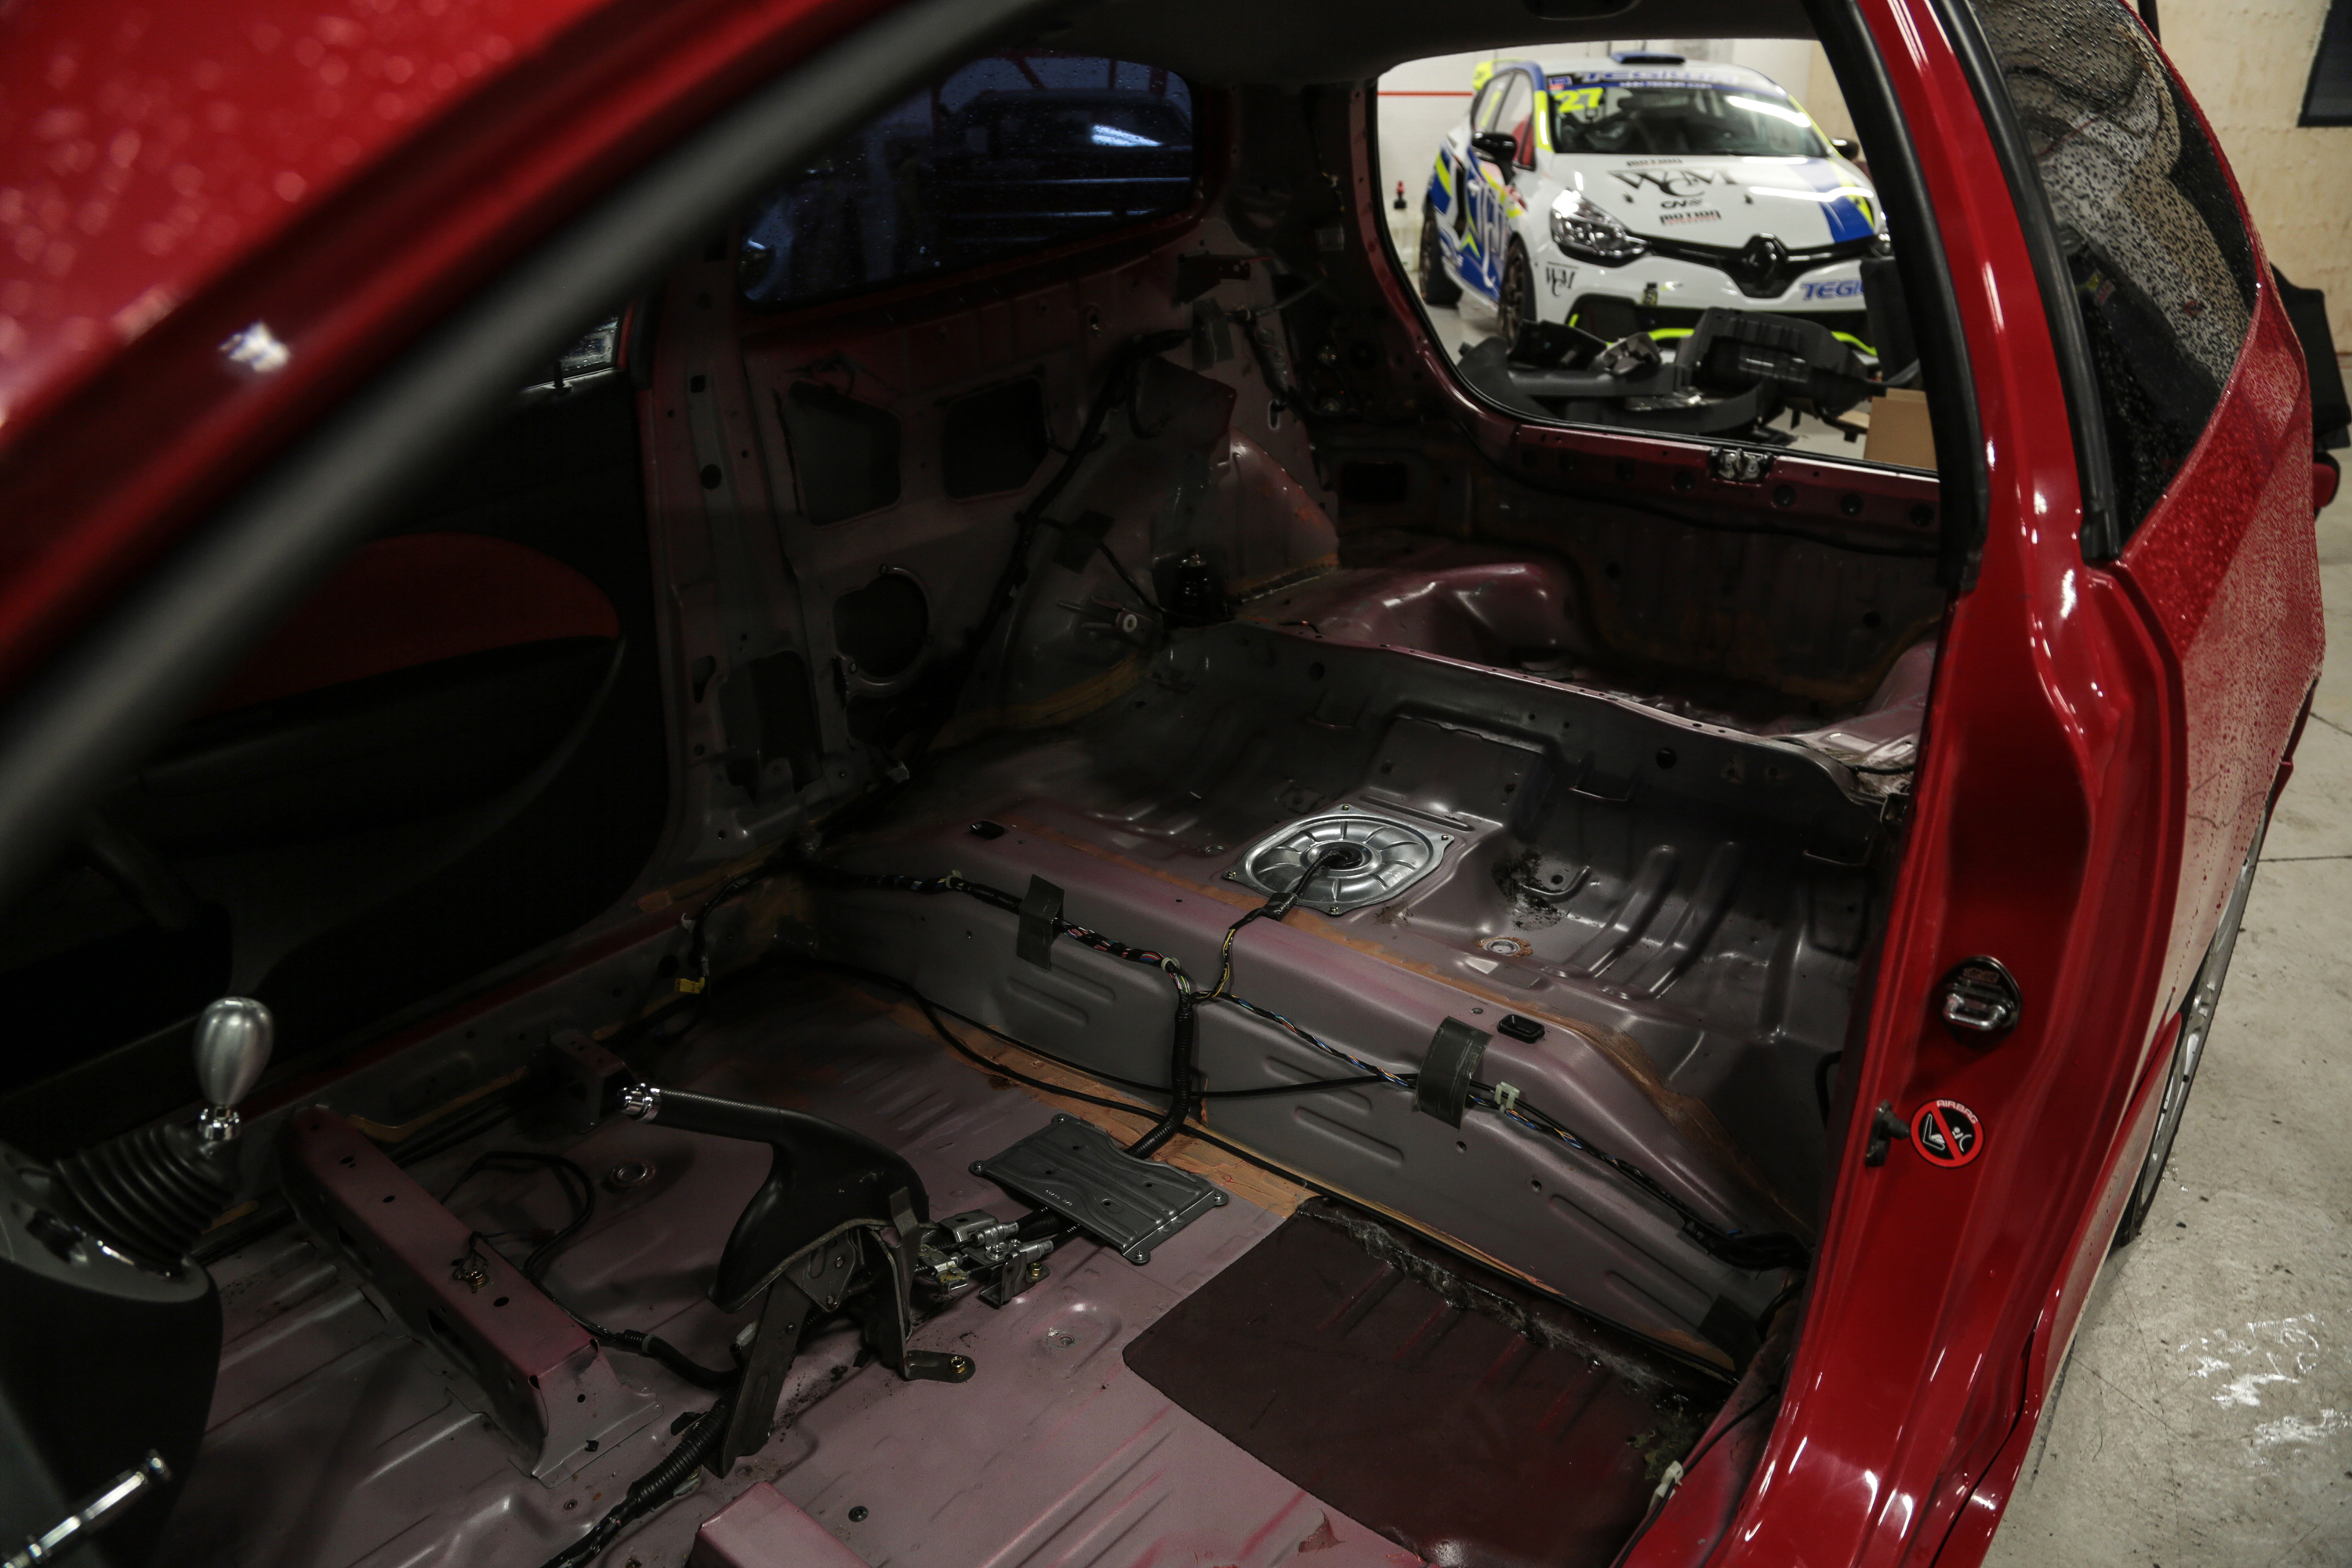
Strip Down
First things first, in the name of weight reduction we gutted the interior and removed the premier edition Recaro’s to make way for some tasty new bucket seats that we’ll get to in a later instalment of this blog.
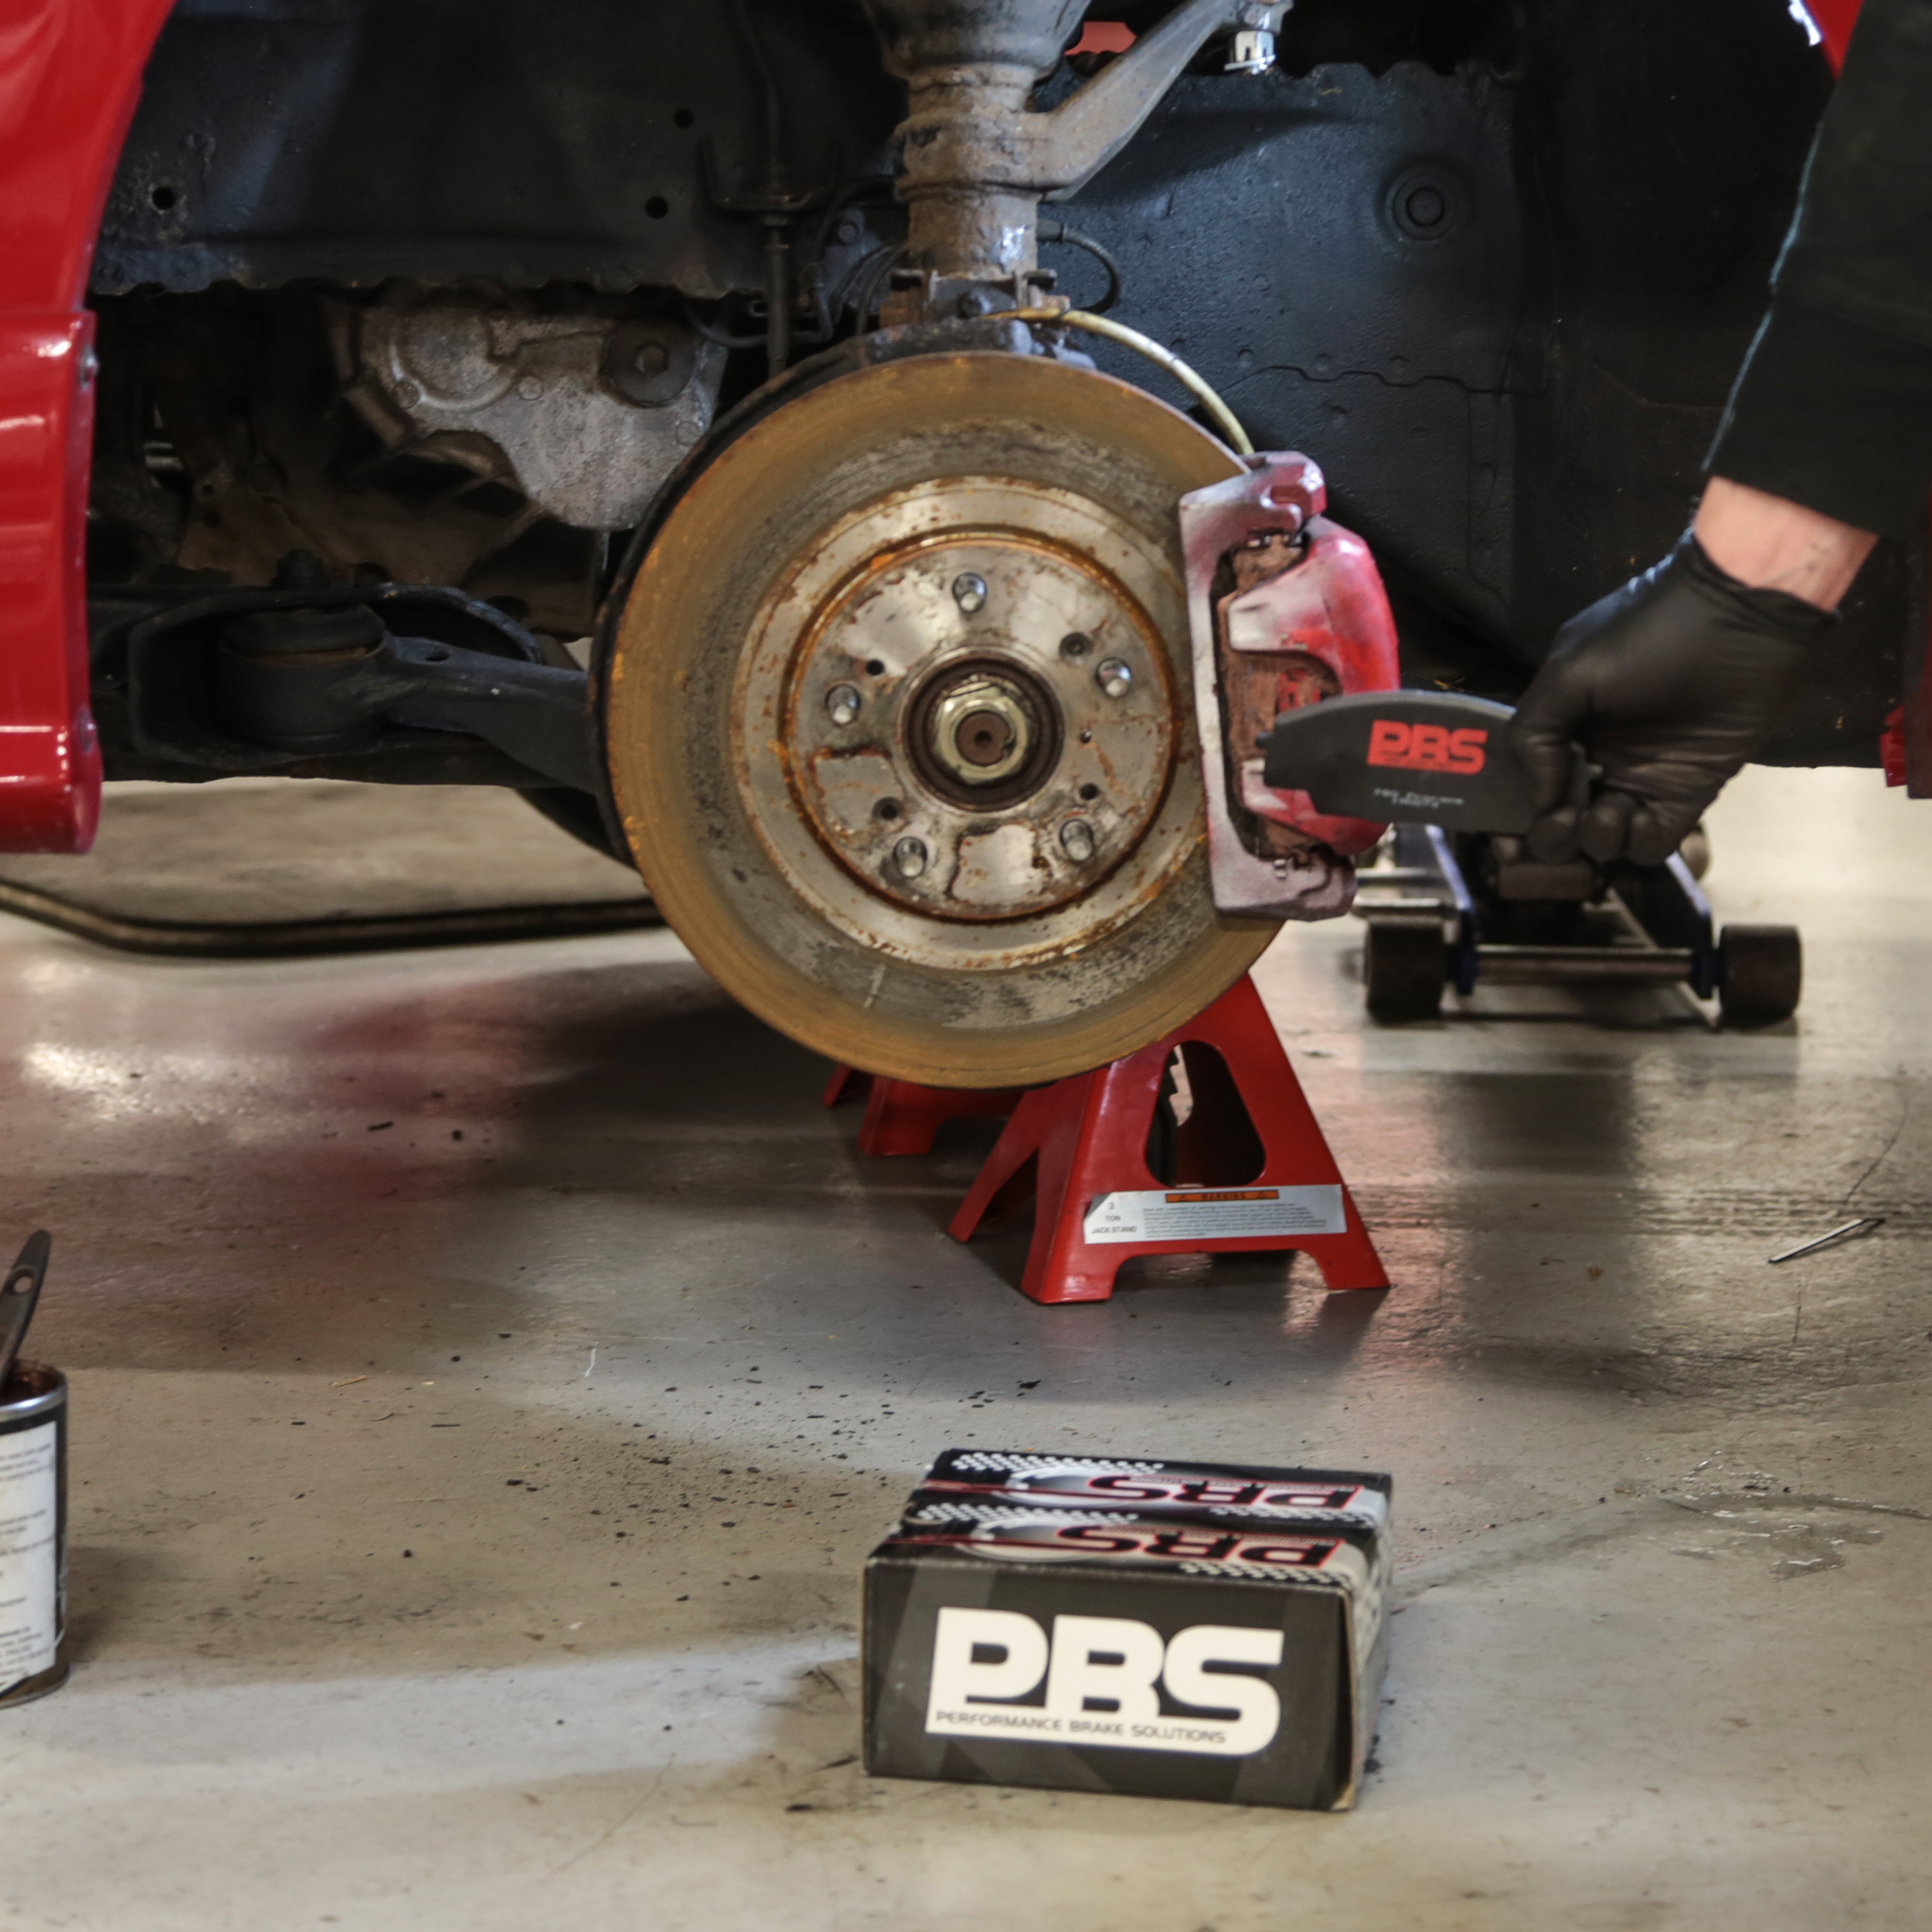
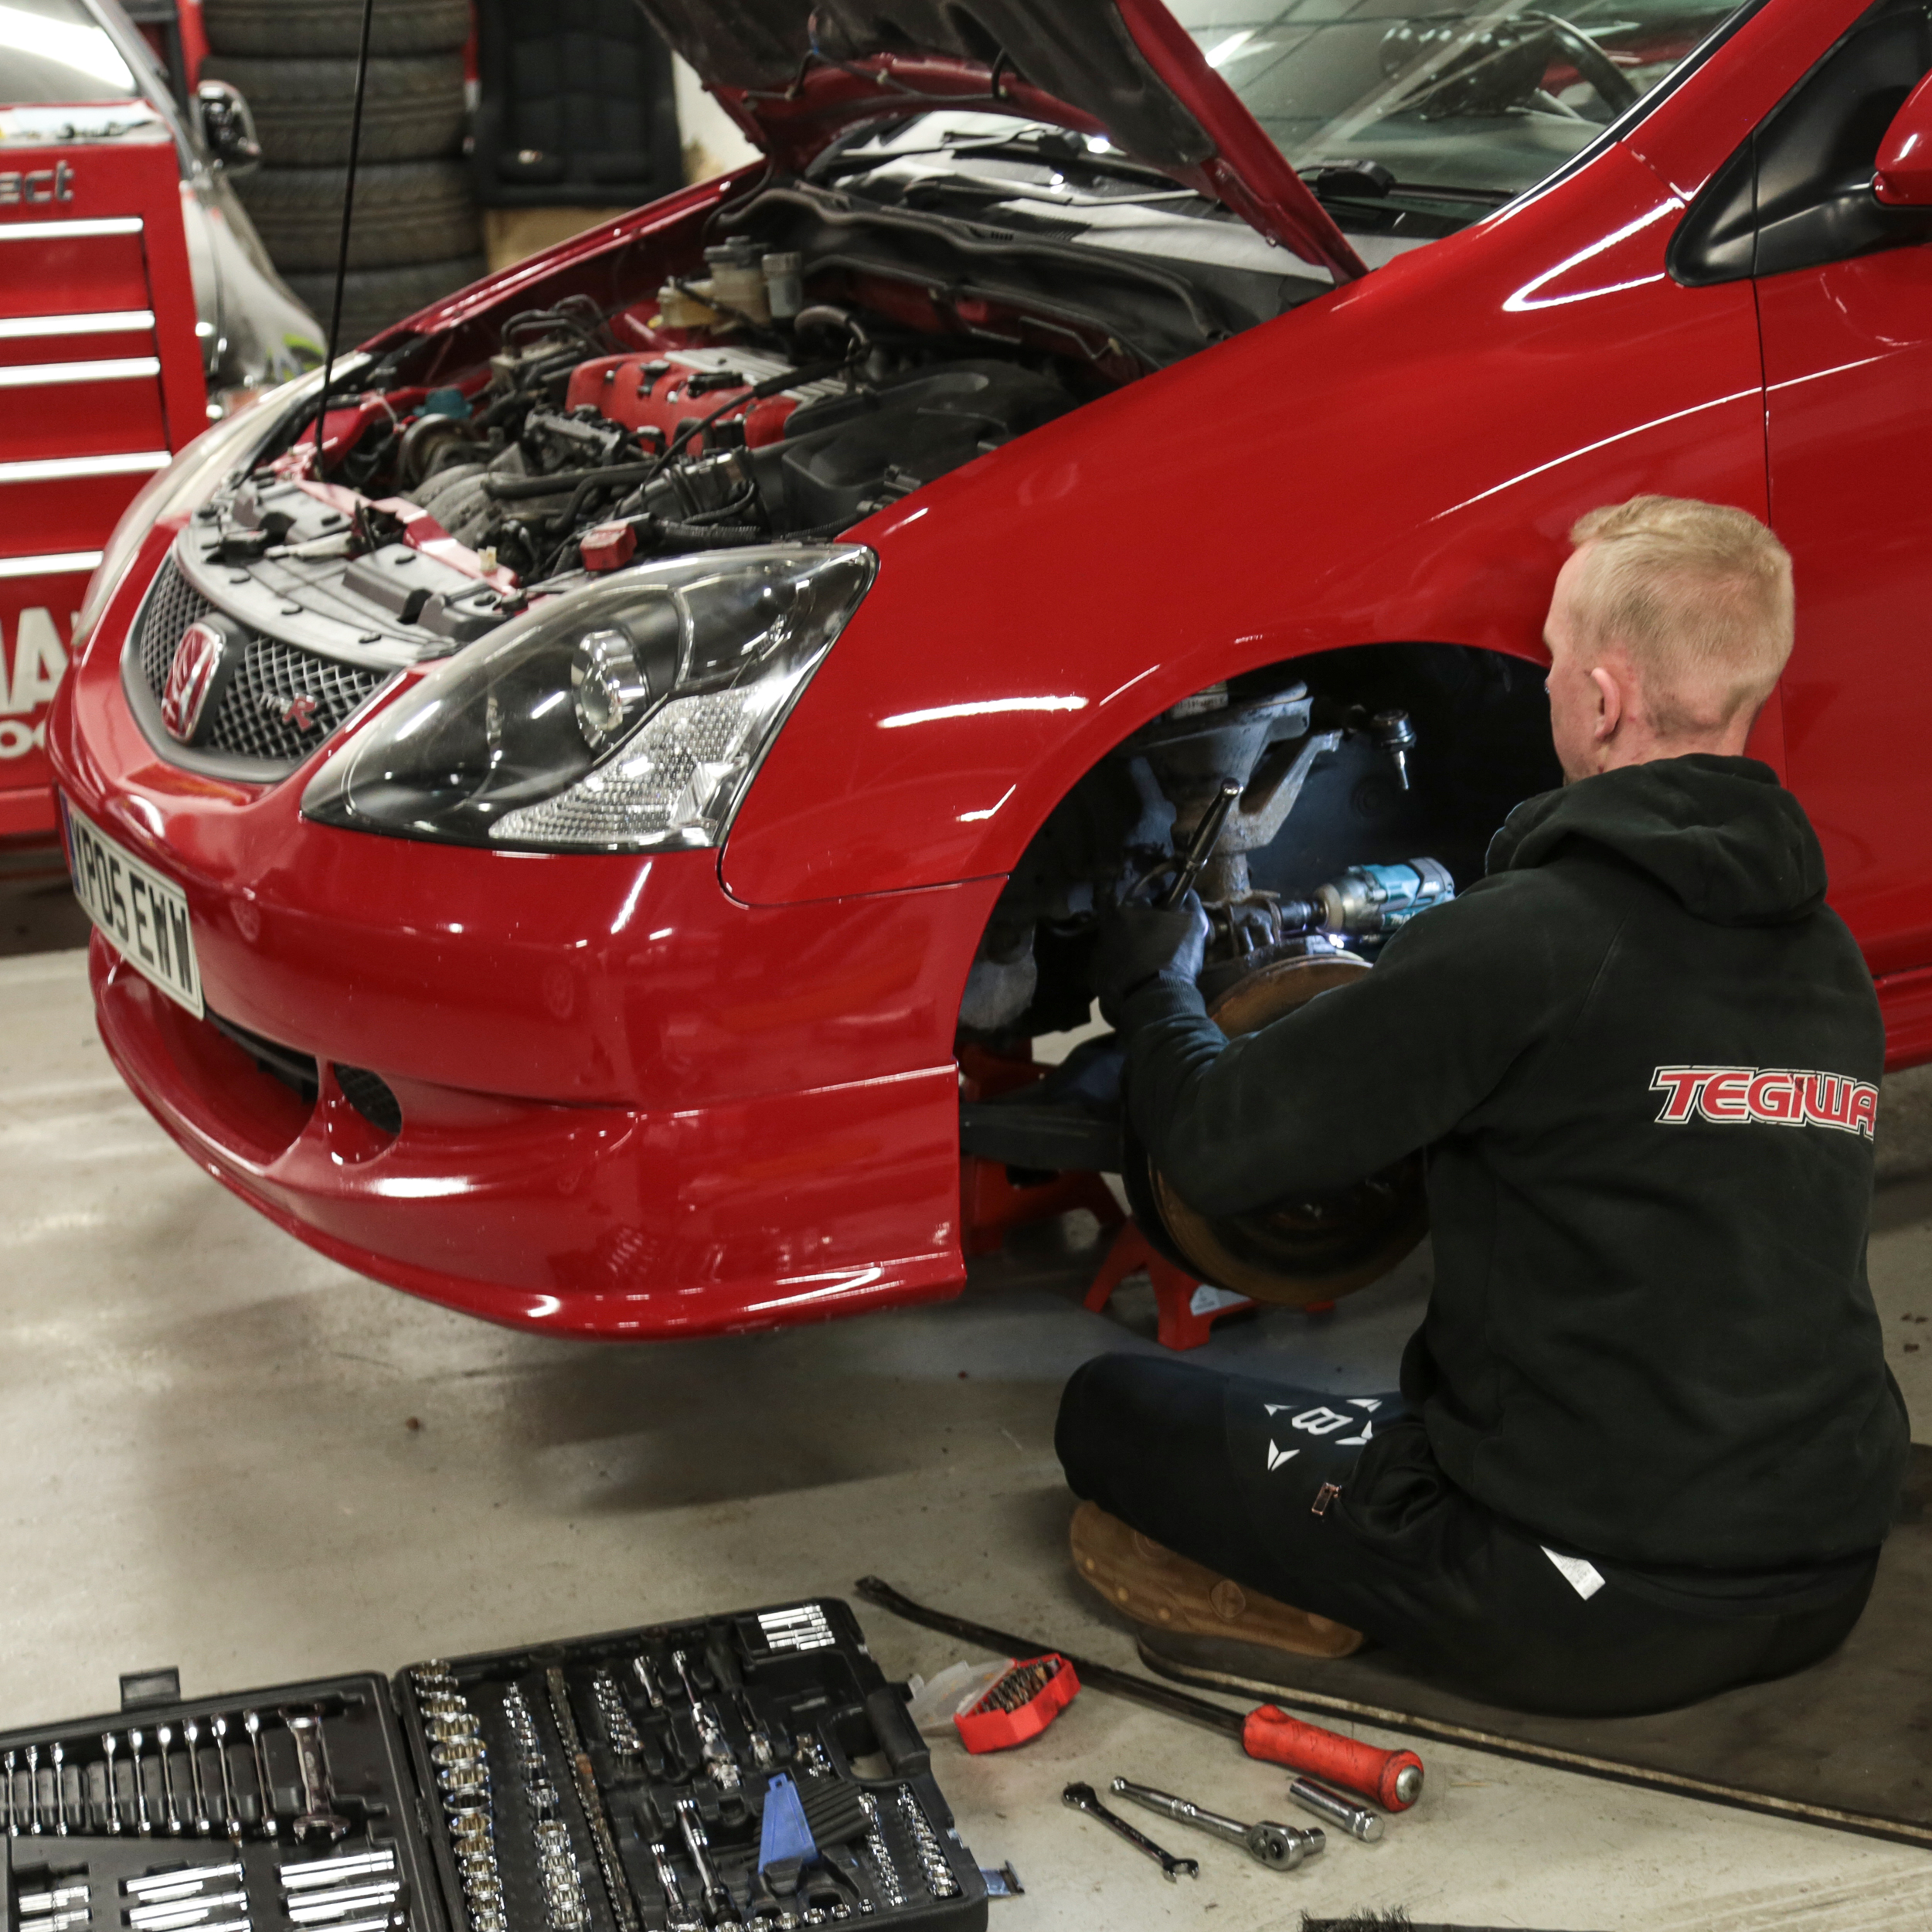
Braking
Next up was an upgrade in the braking department, this should be a major priority for anybody planning on tracking their car. We’re not saying go out and buy the biggest brake kit that will fit on your car, there’s some fairly straightforward and relatively inexpensive upgrades that can be done first. A decent brake fluid such as Motul’s RBF 600, HEL braided brake lines and good brake pads like the PBS Pro Track’s that we’re using will make a world of difference over the standard setup, plus, this costs a fraction of a big brake kit too.
Handling Upgrades
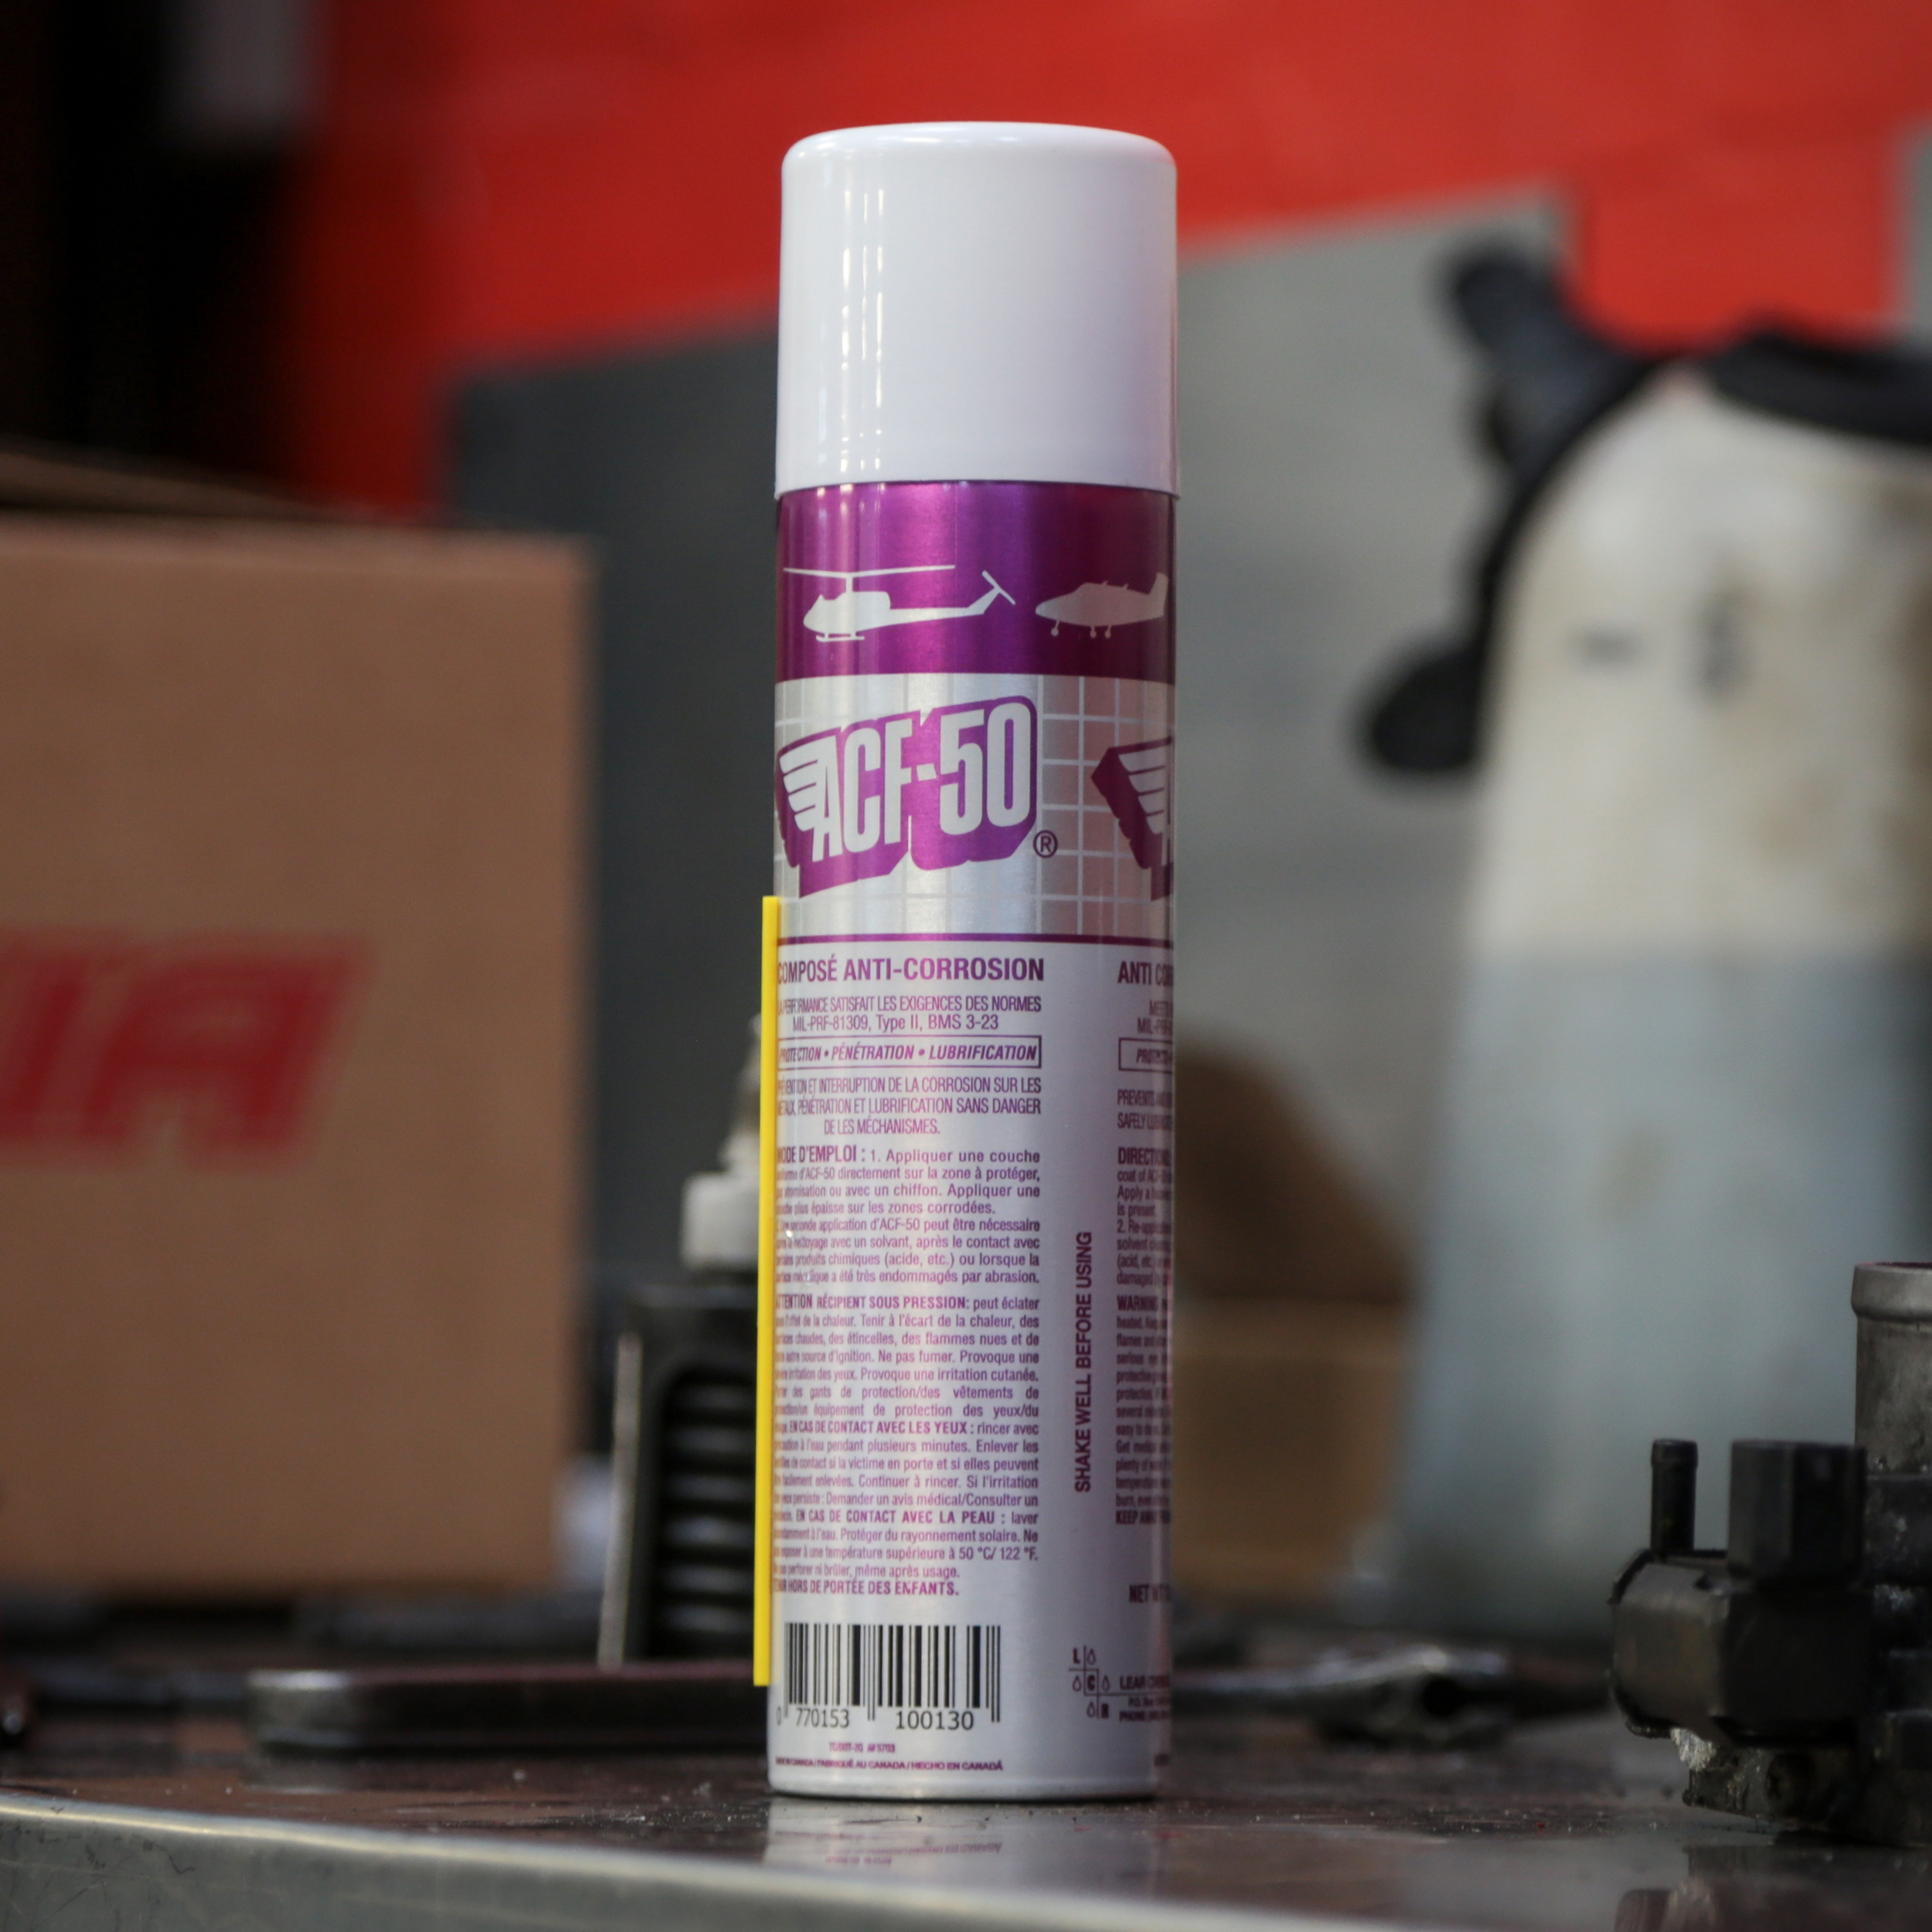
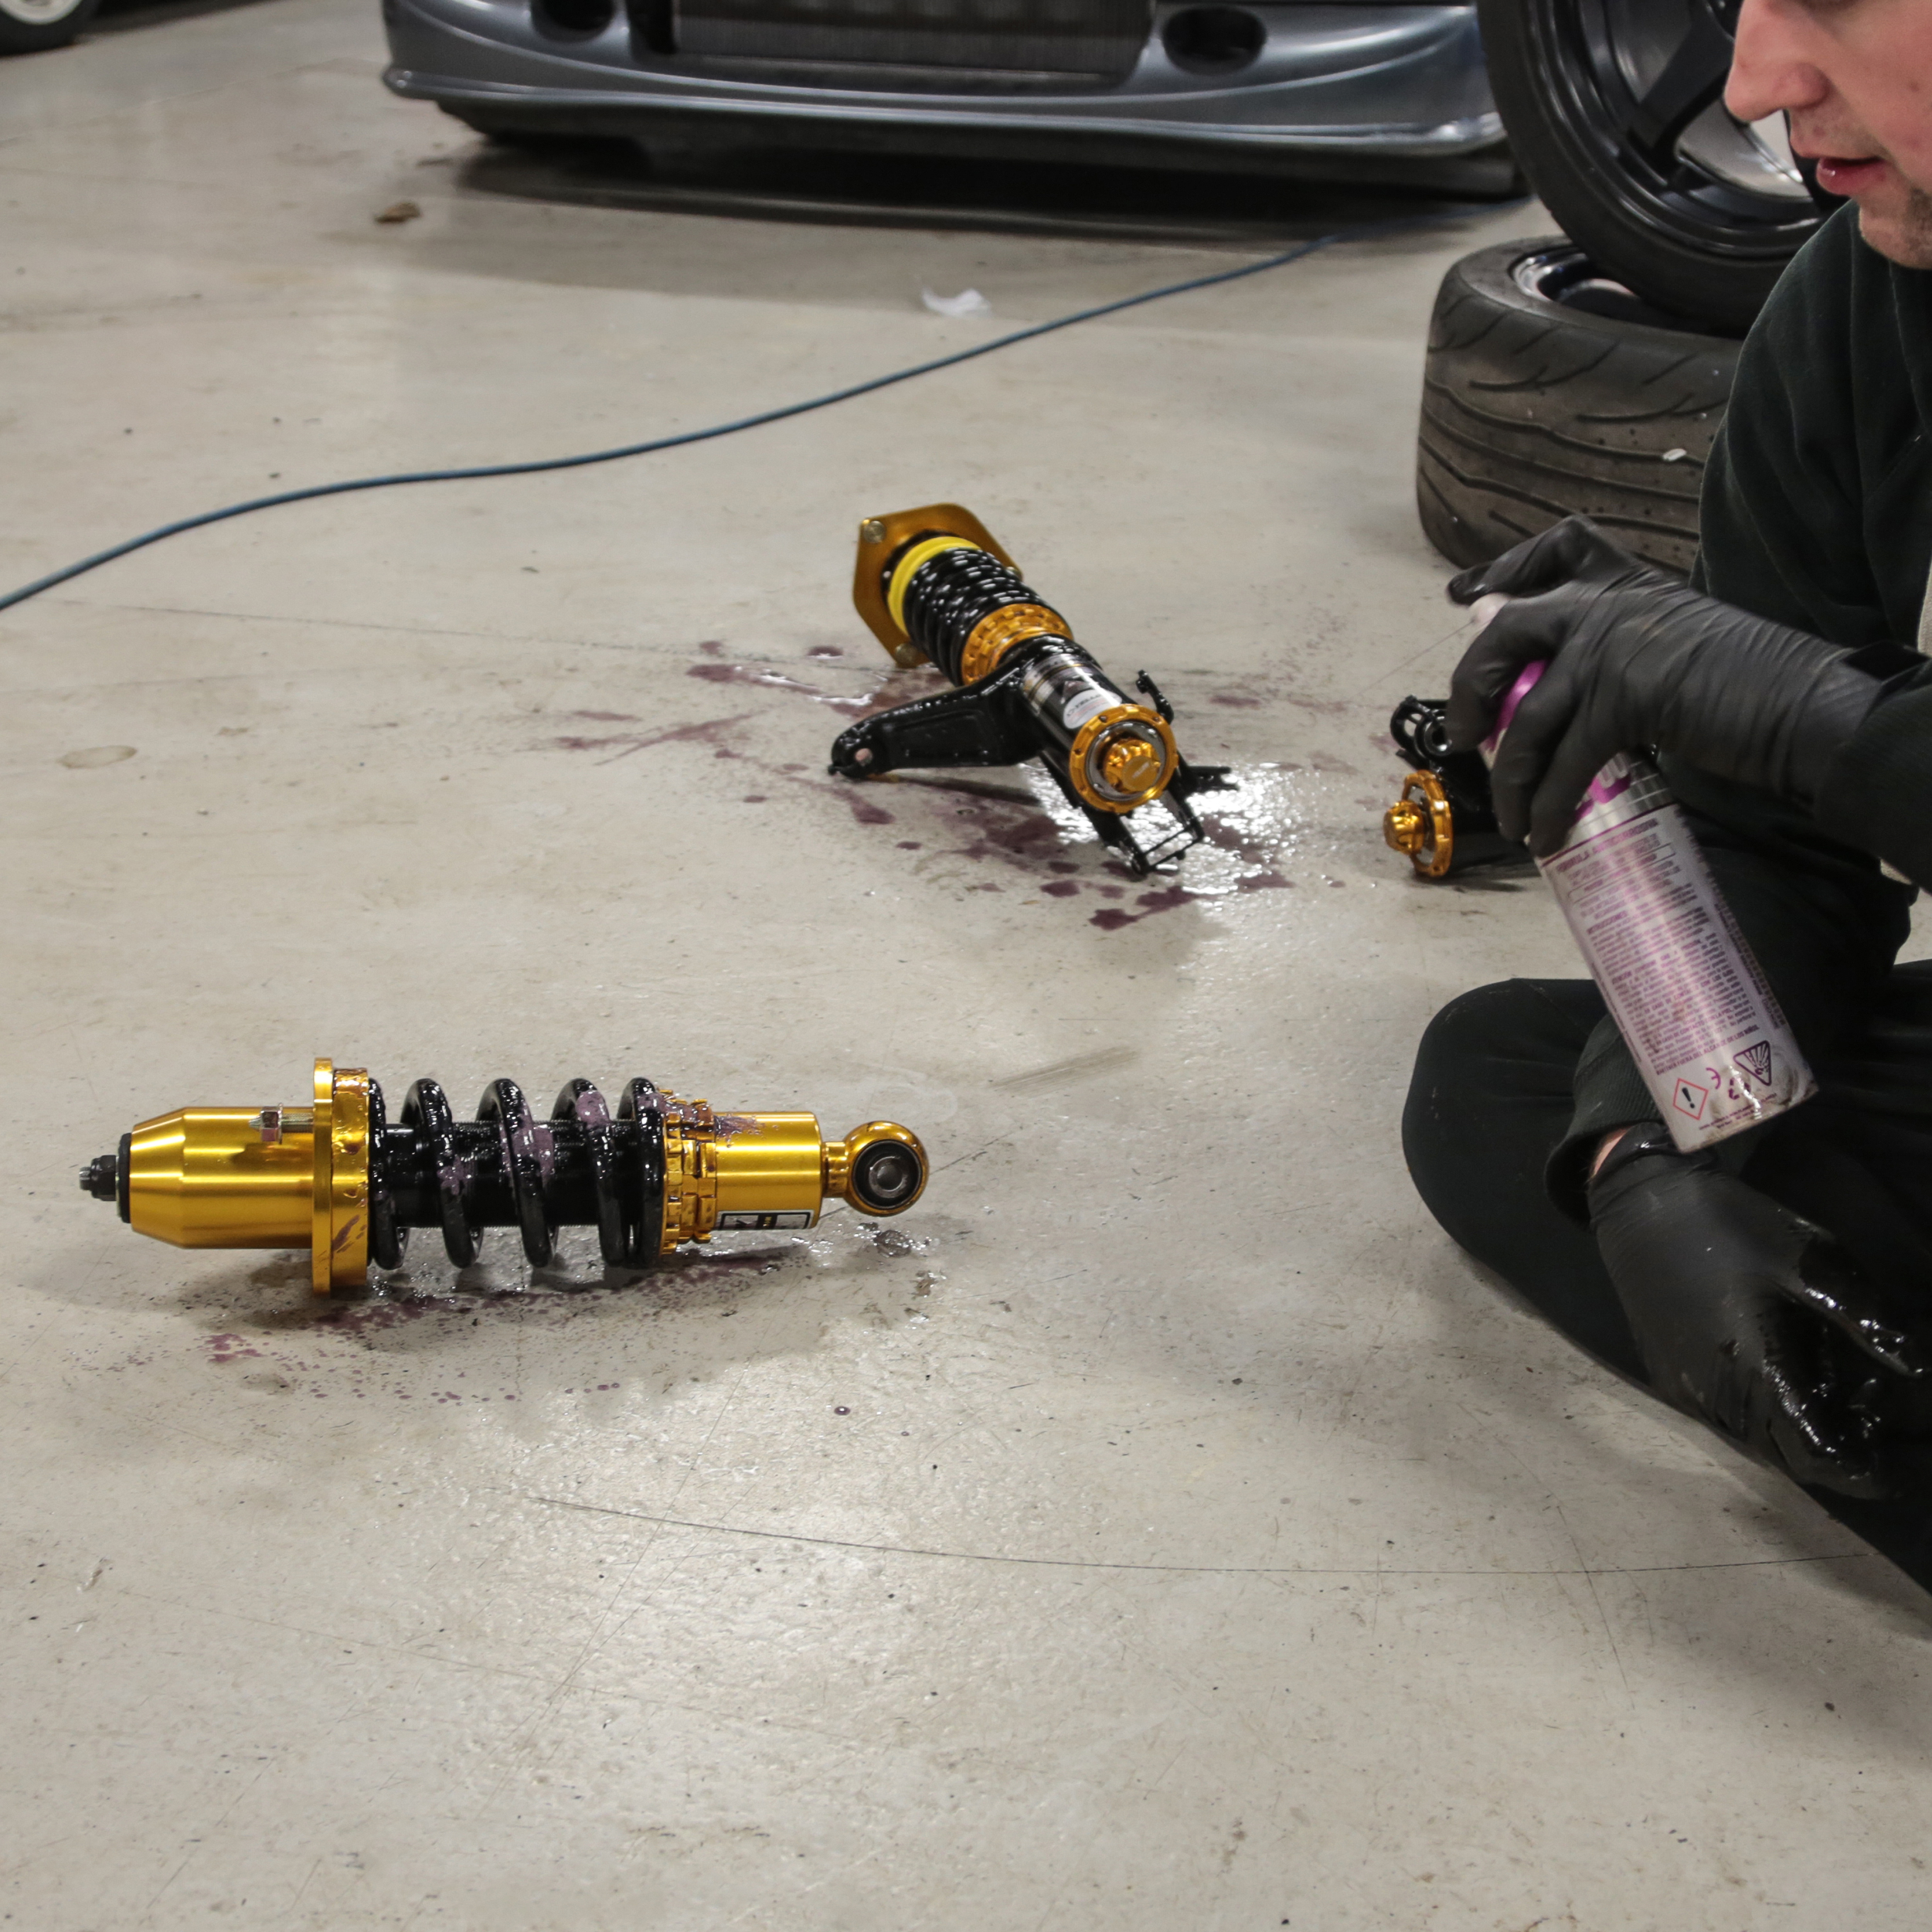
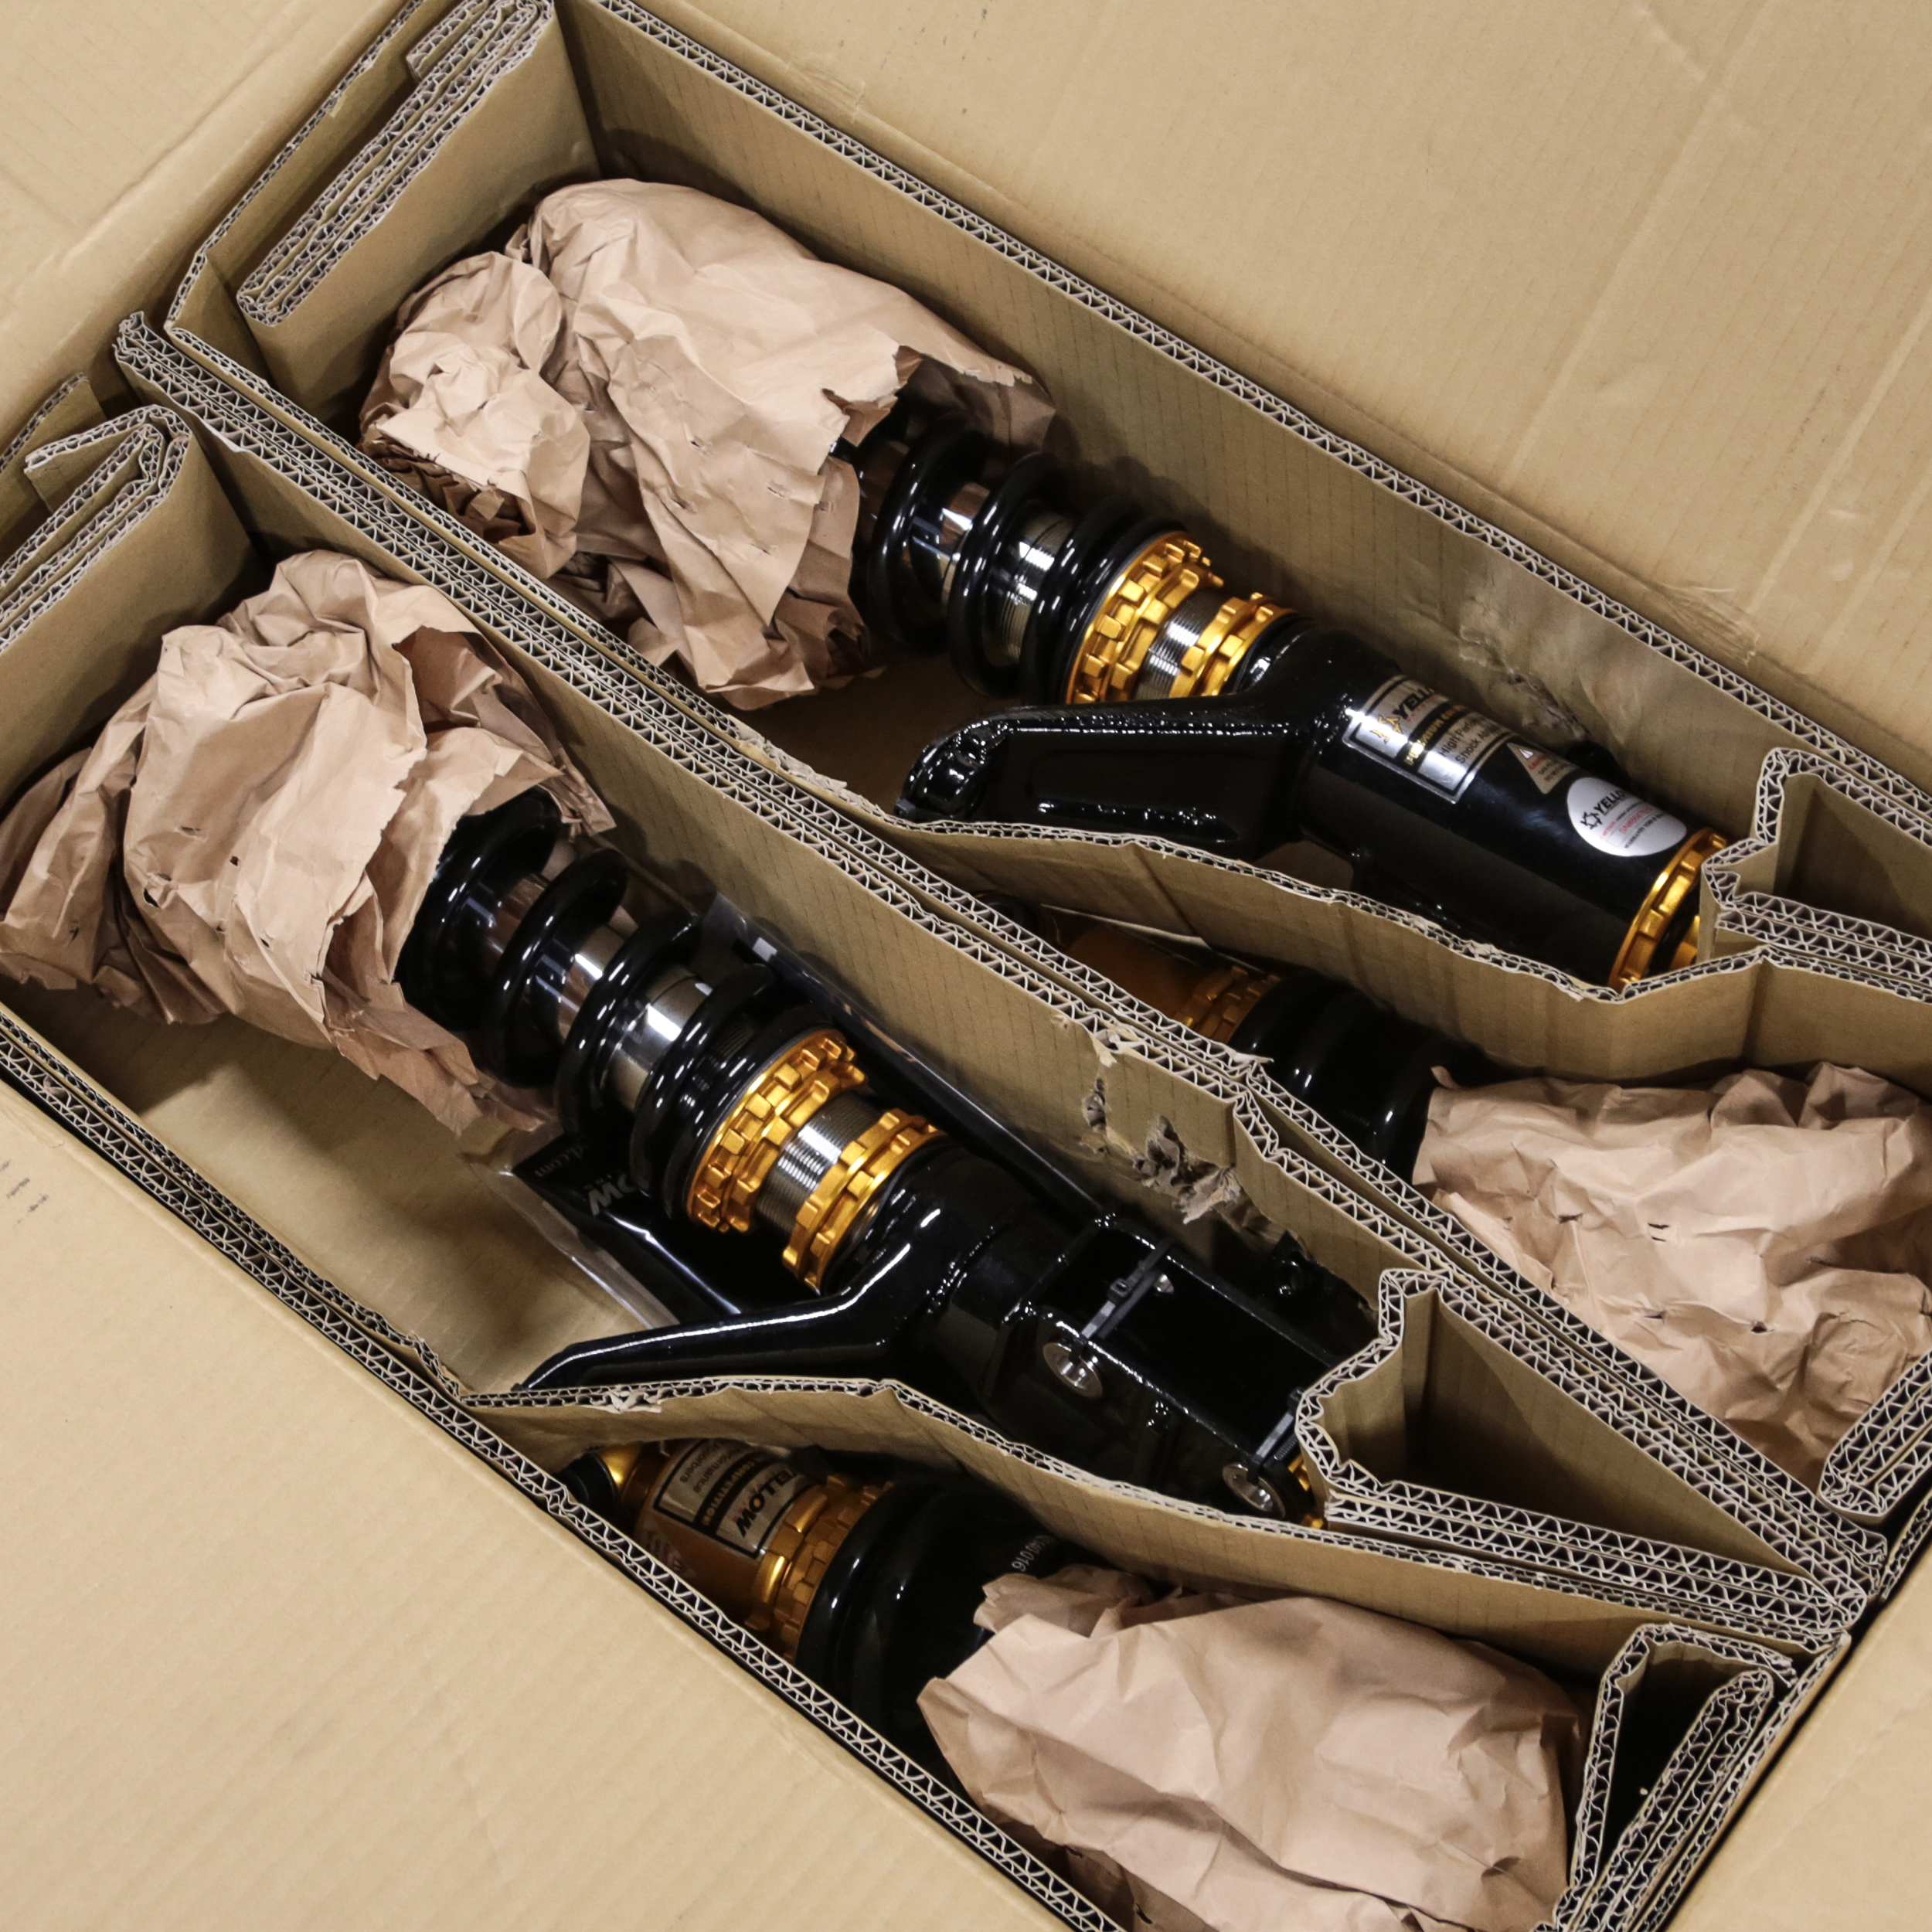
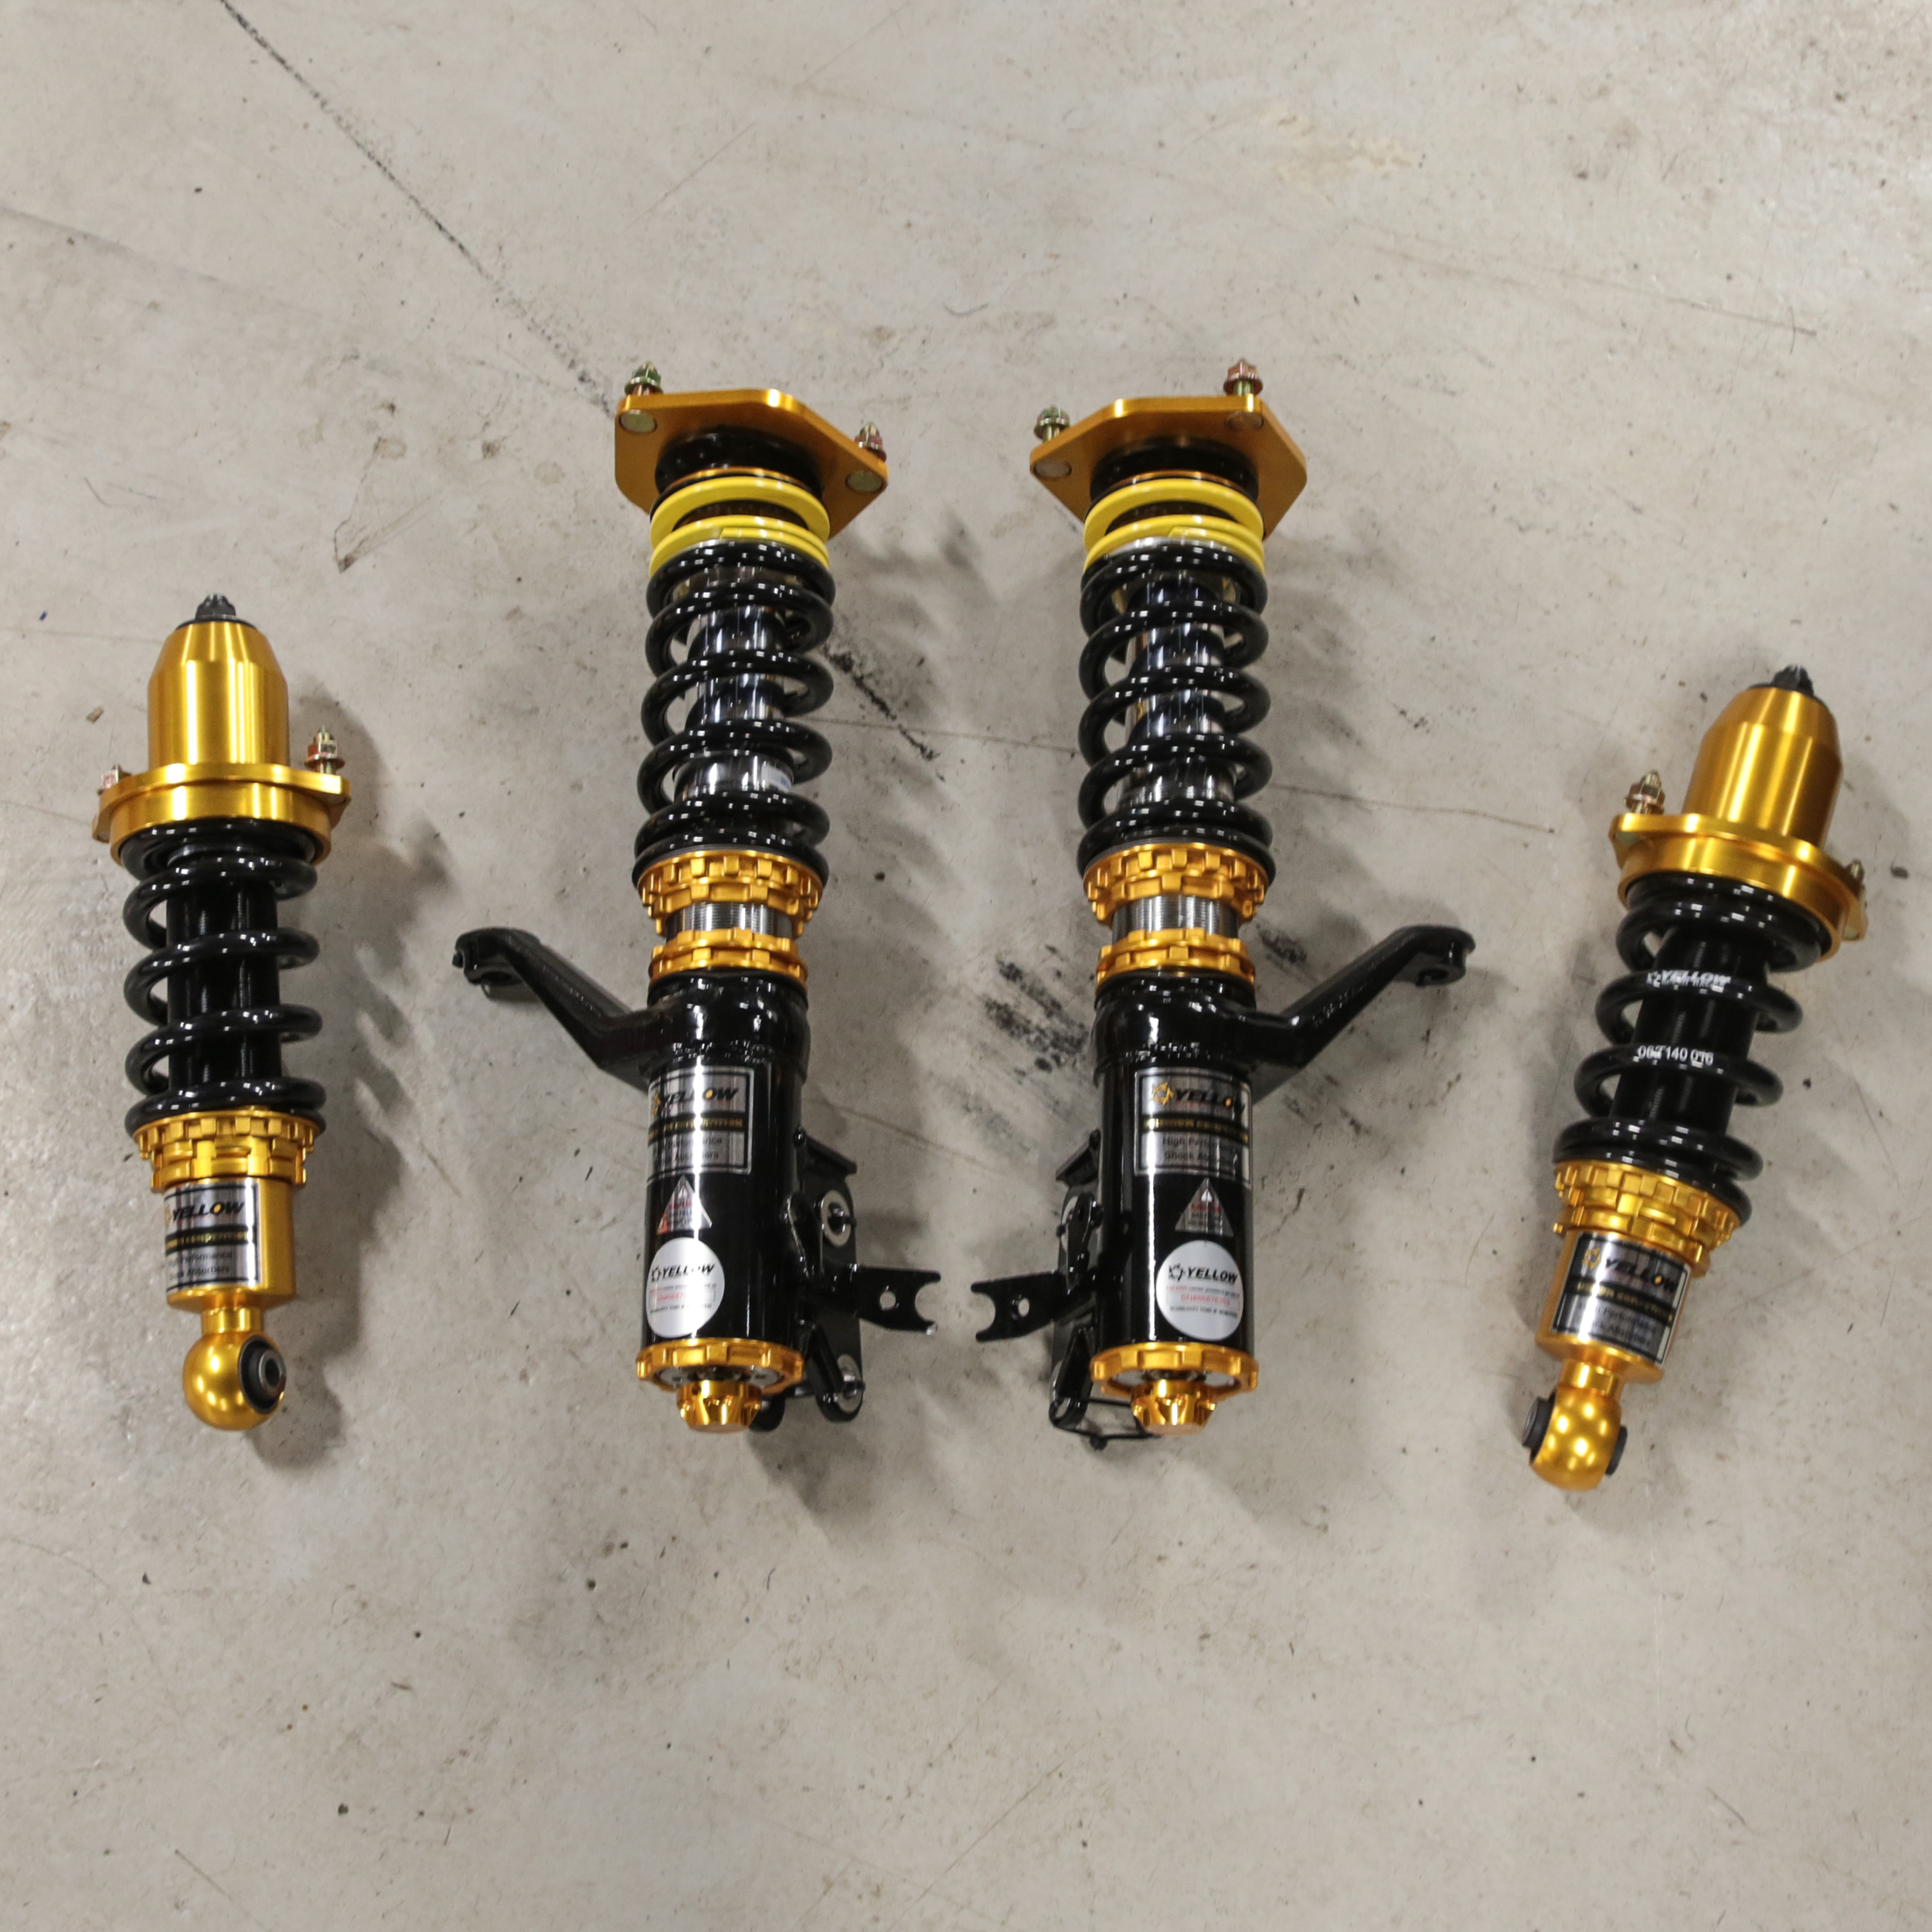
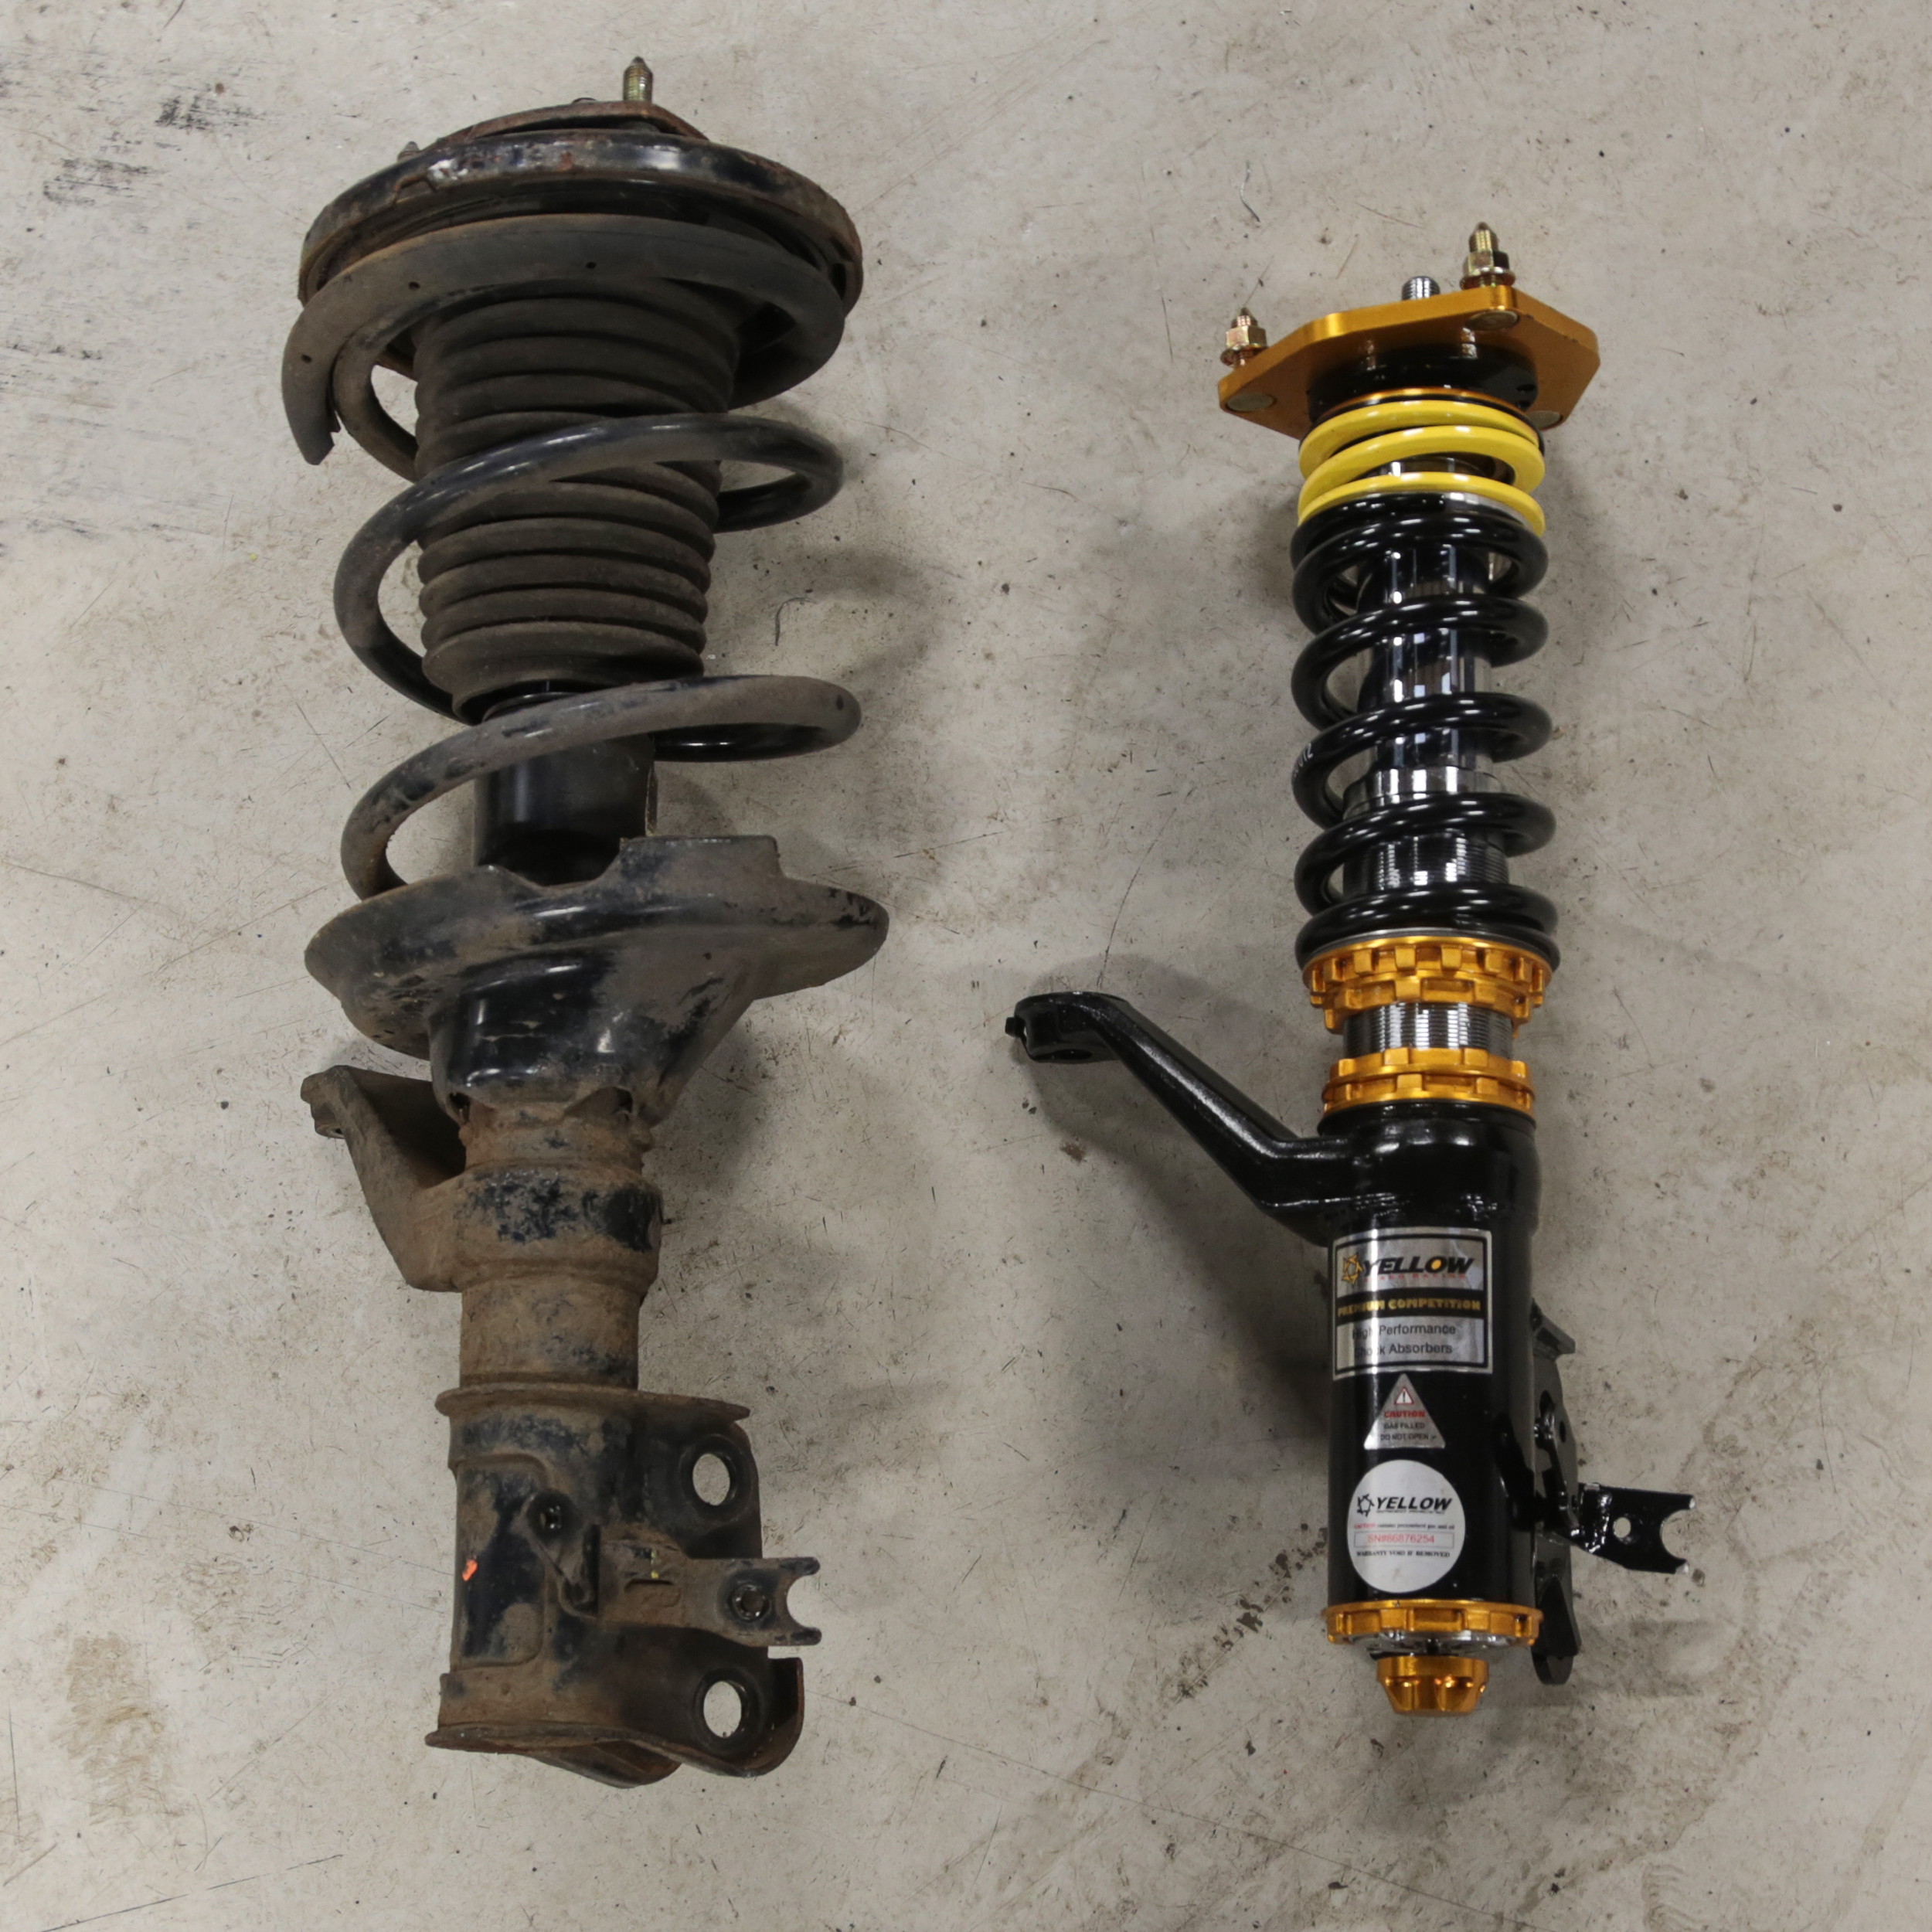
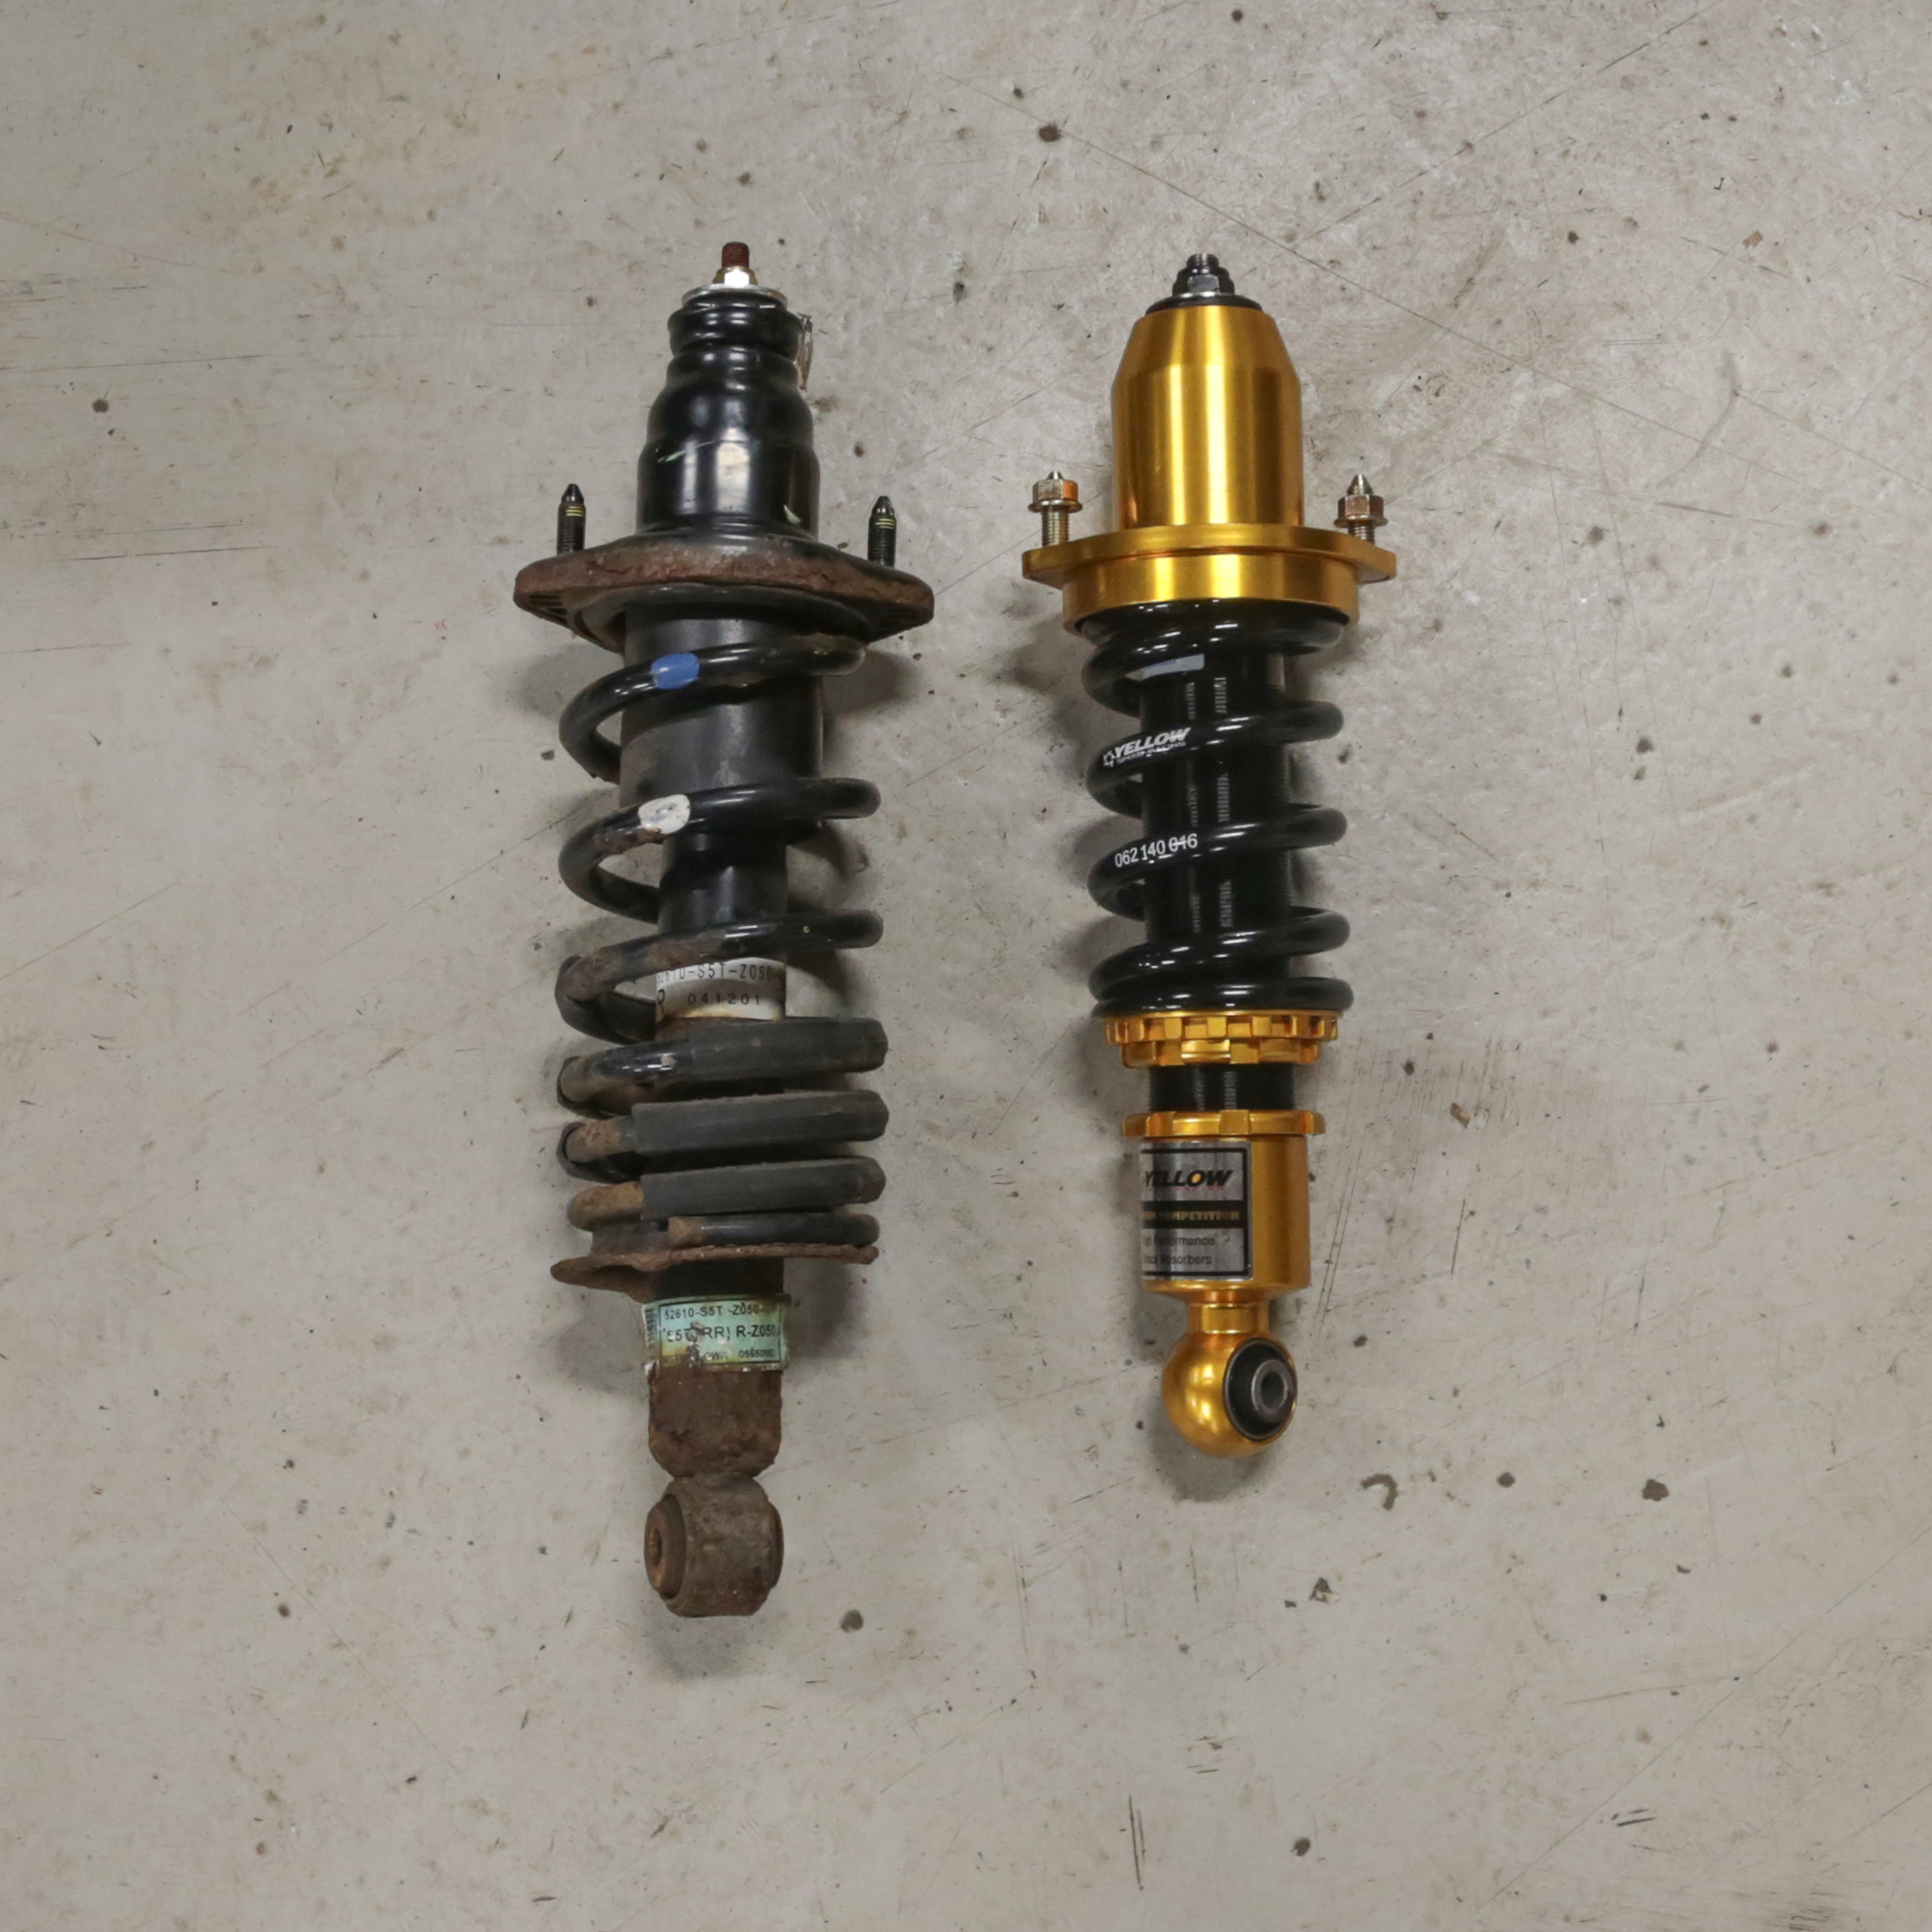
With the brakes taken care off, it was then time to move onto handling modifications. With the car being built to Type R Trophy regulations, a set of Yellow Speed Racing Inverted Premium Competition Coilovers made an appearance. Before fitting them, we doused them in a coat of ACF-50, an anti-corrosion spray. We rate this stuff very highly at Tegiwa, we’ve seen coilovers that maintain their shine after upwards of 7 years of use when ACF has been used! It’s really simple to apply too, just spray the coilovers with the spray and then get a cloth and work the compound into the product. Job done.
You might wonder why the TRT championship uses inverted coilovers. Well, it has more structural strength due to the significantly greater diameter, and because the body is upside down above the strut housing, it’s far more resistant to side loads than a conventional strut design.
Alignment
Mike did a pretty good job at guessing the ride height, but we’ll drop the rear coilovers to get rid of that old school ‘Saxo rake’. We’ll fit roll centre adjusters and steering arms before we let the lads at Motion Motorsport work their magic on the car with a full geometry setup ready for us to hit the track. It’s important to consider the benefits of a proper geometry setup after fitting coilovers as you’ve essentially knocked some of the components off-kilter and caused the wheels to sit at improper angles which can make the car drive terribly, much the case with our EP at the moment.
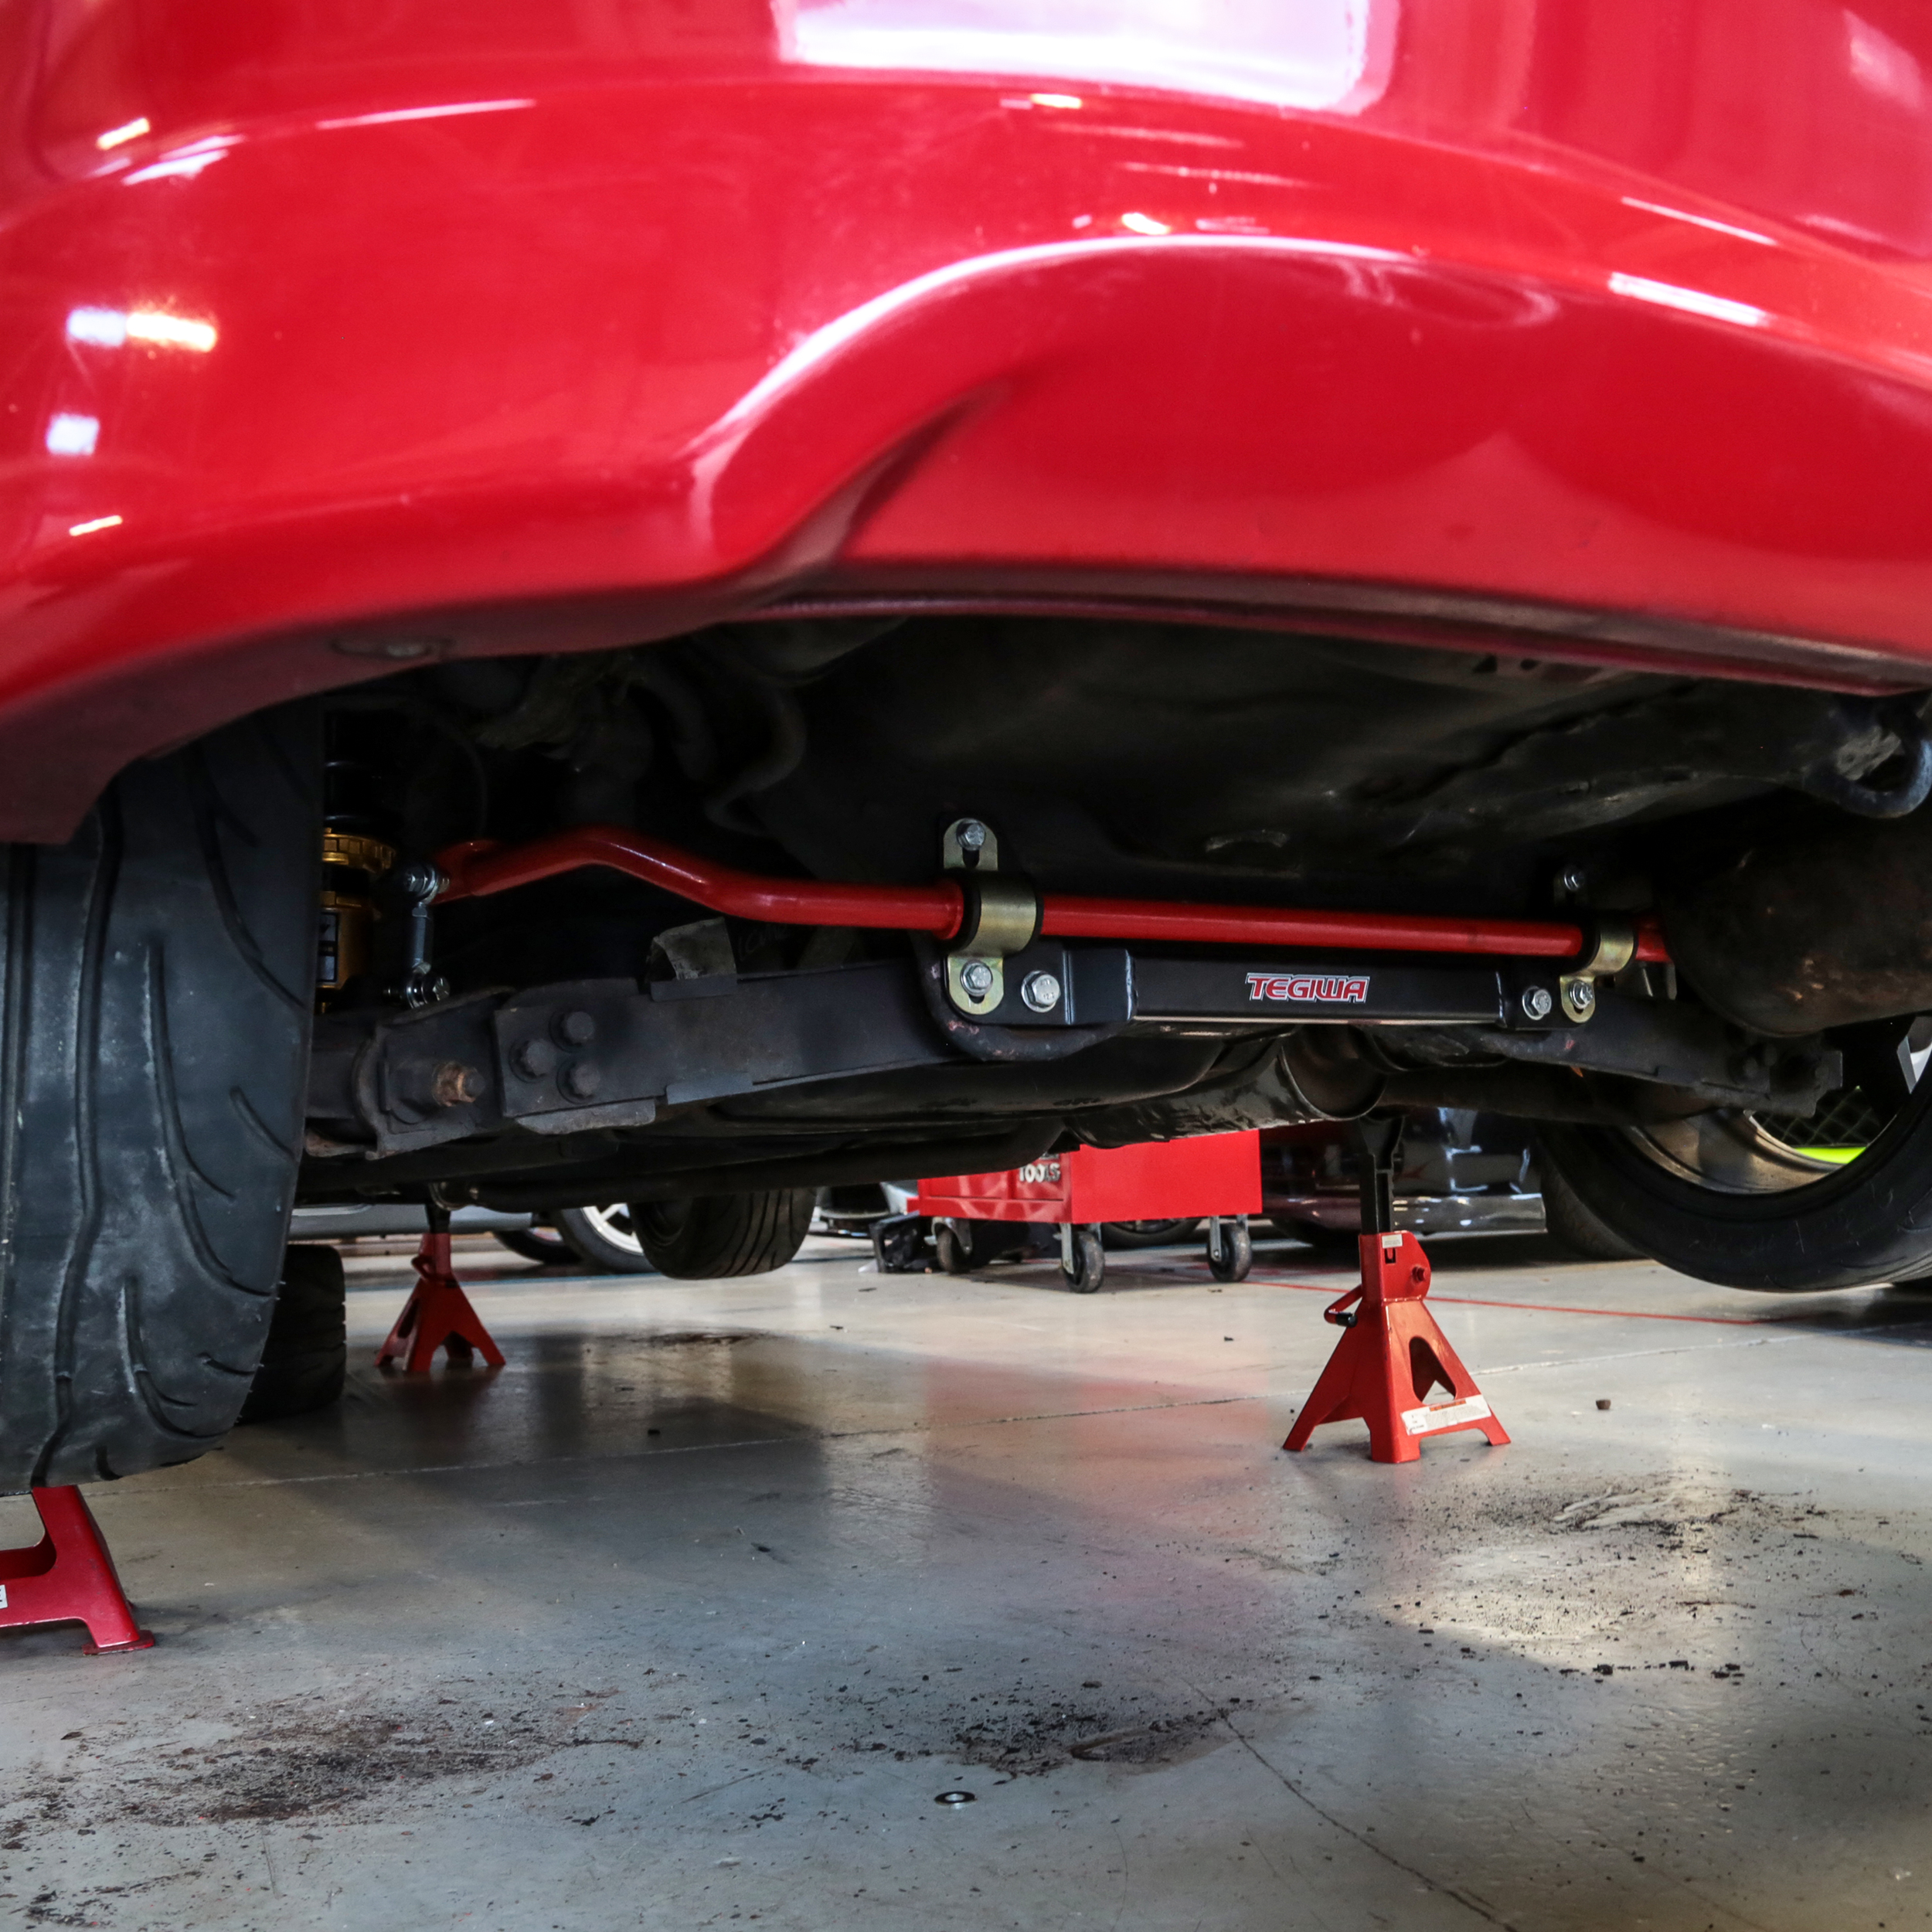
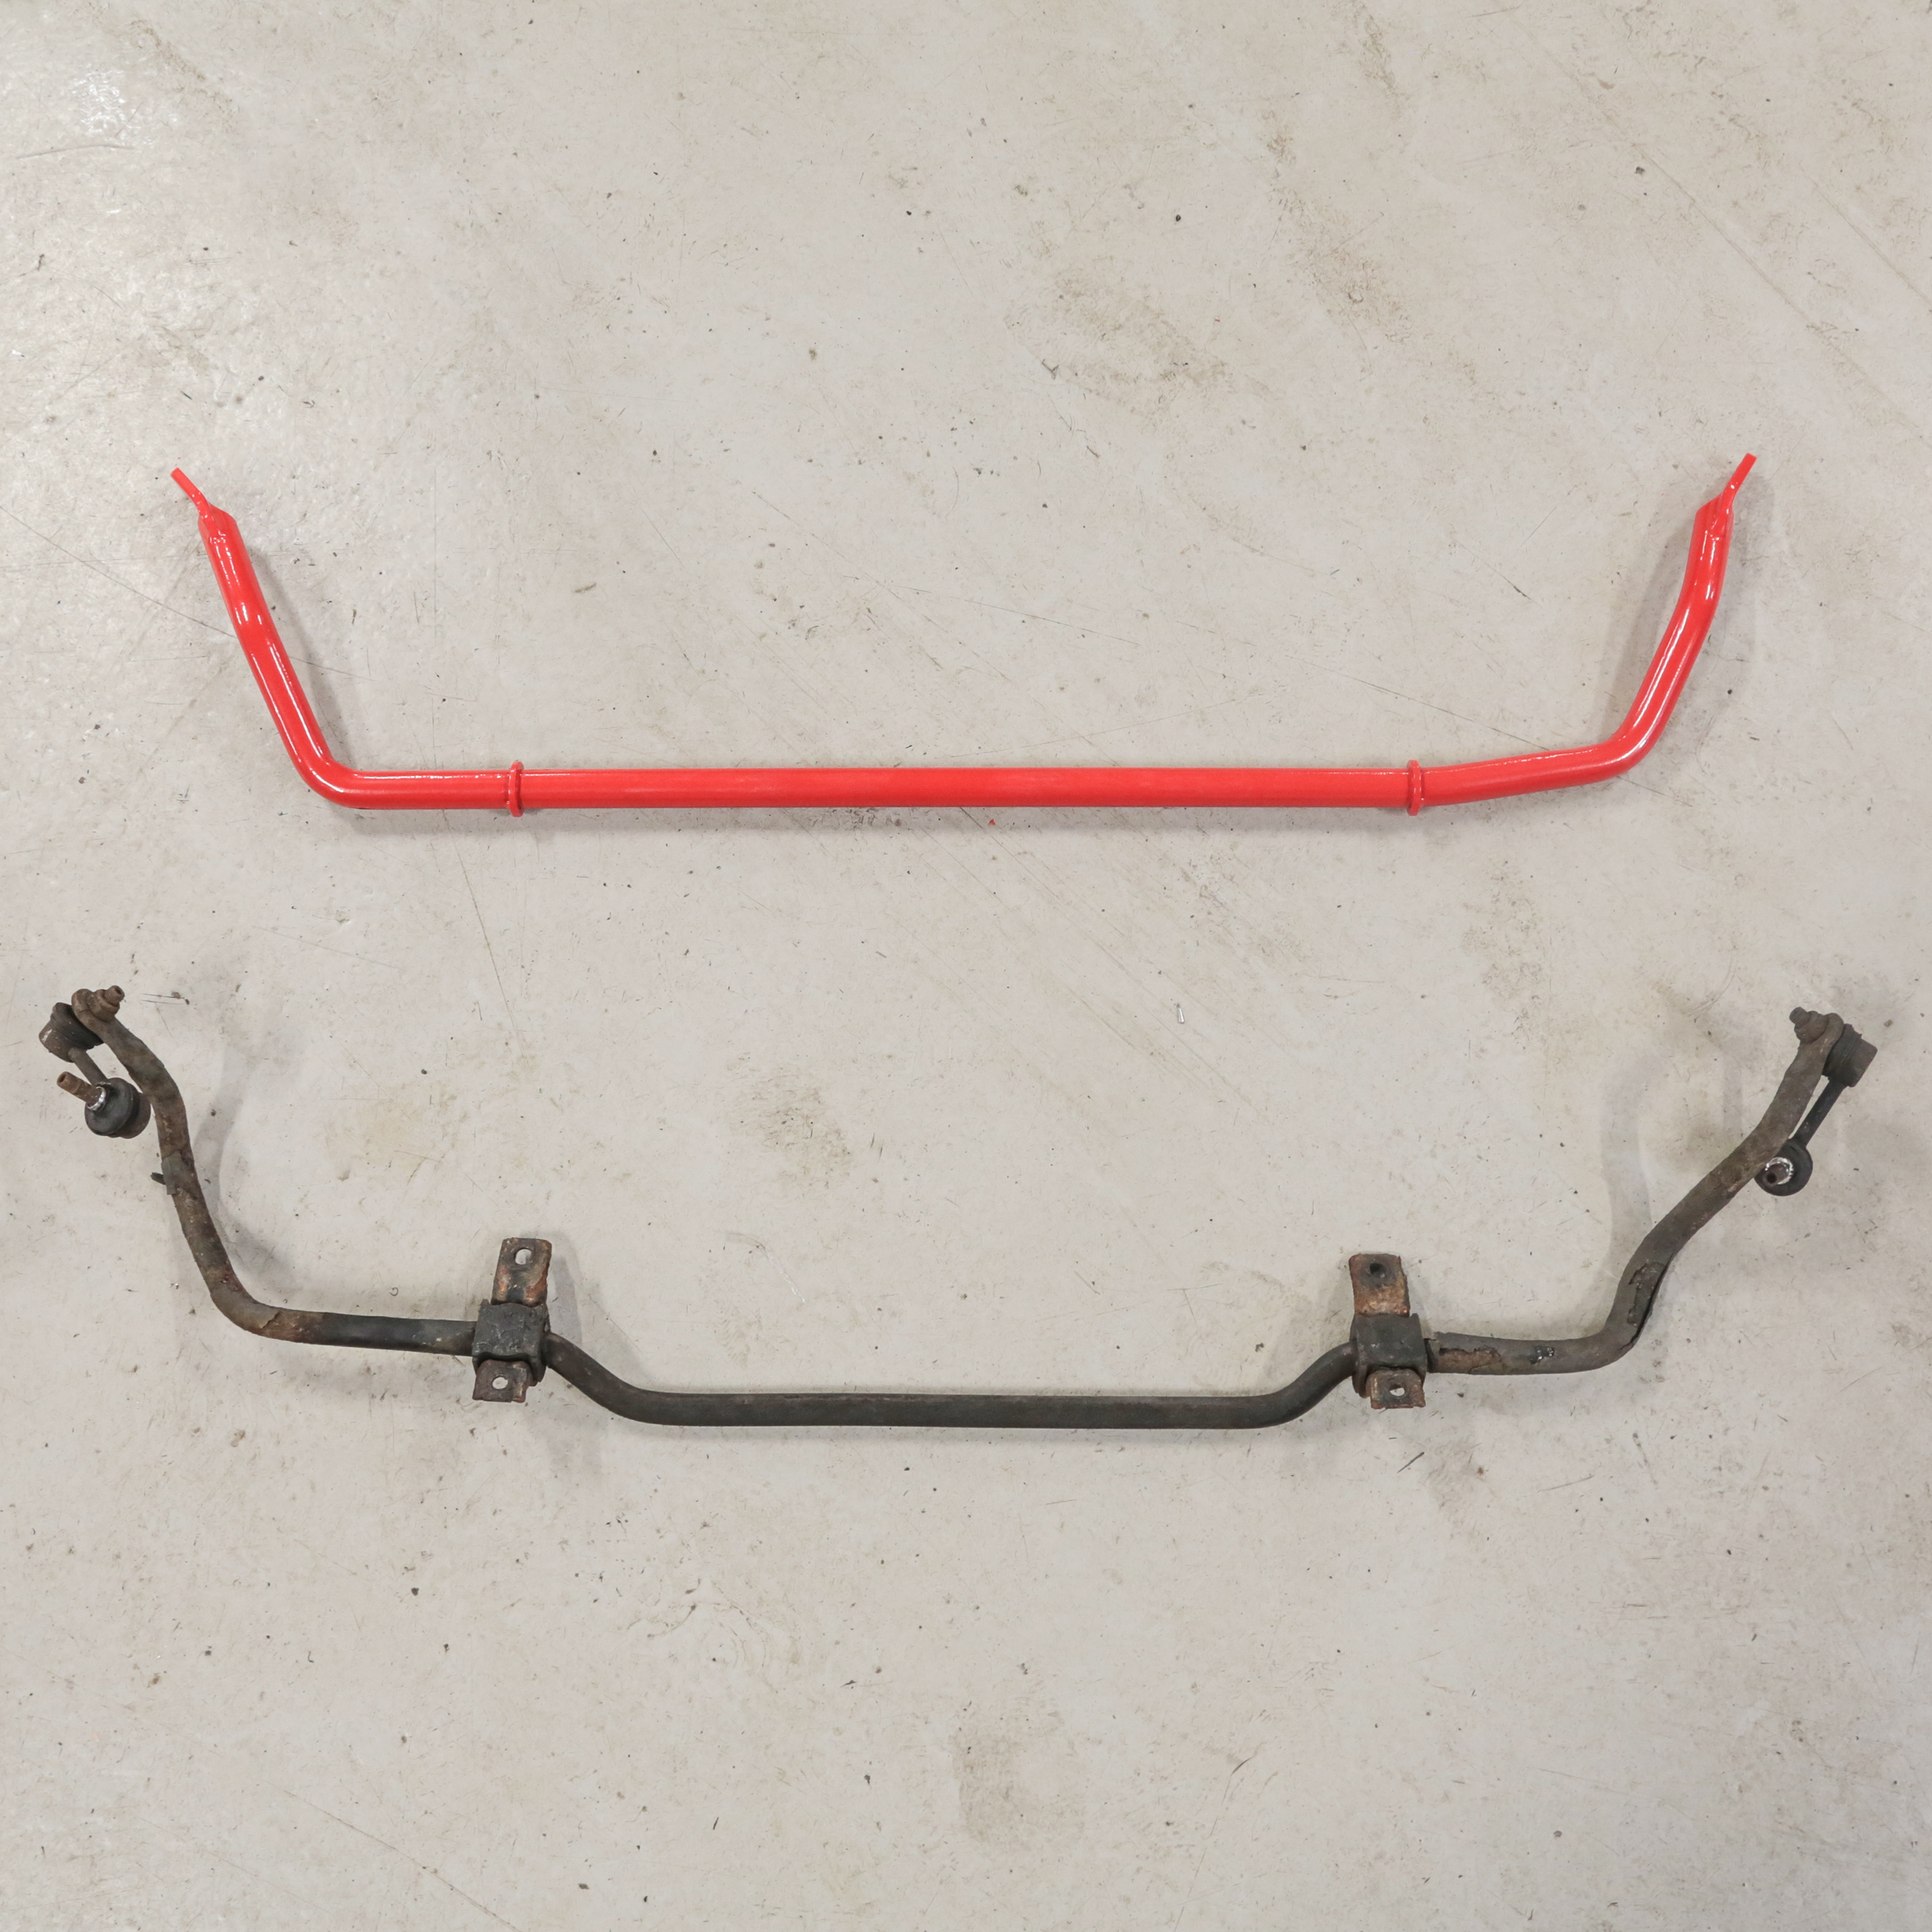
Next up on the handling front was a Tegiwa 24mm rear anti-roll bar. By running one of these we’ll improve lateral stability and minimise body roll too. This will stabilise the tyre contact patch for maximum traction in the corners and it’ll also help eliminate moderate understeer by improving the overall balance by the use of a proportionately stiffer rear bar which’ll give the car a more neutral feel.
Wheels
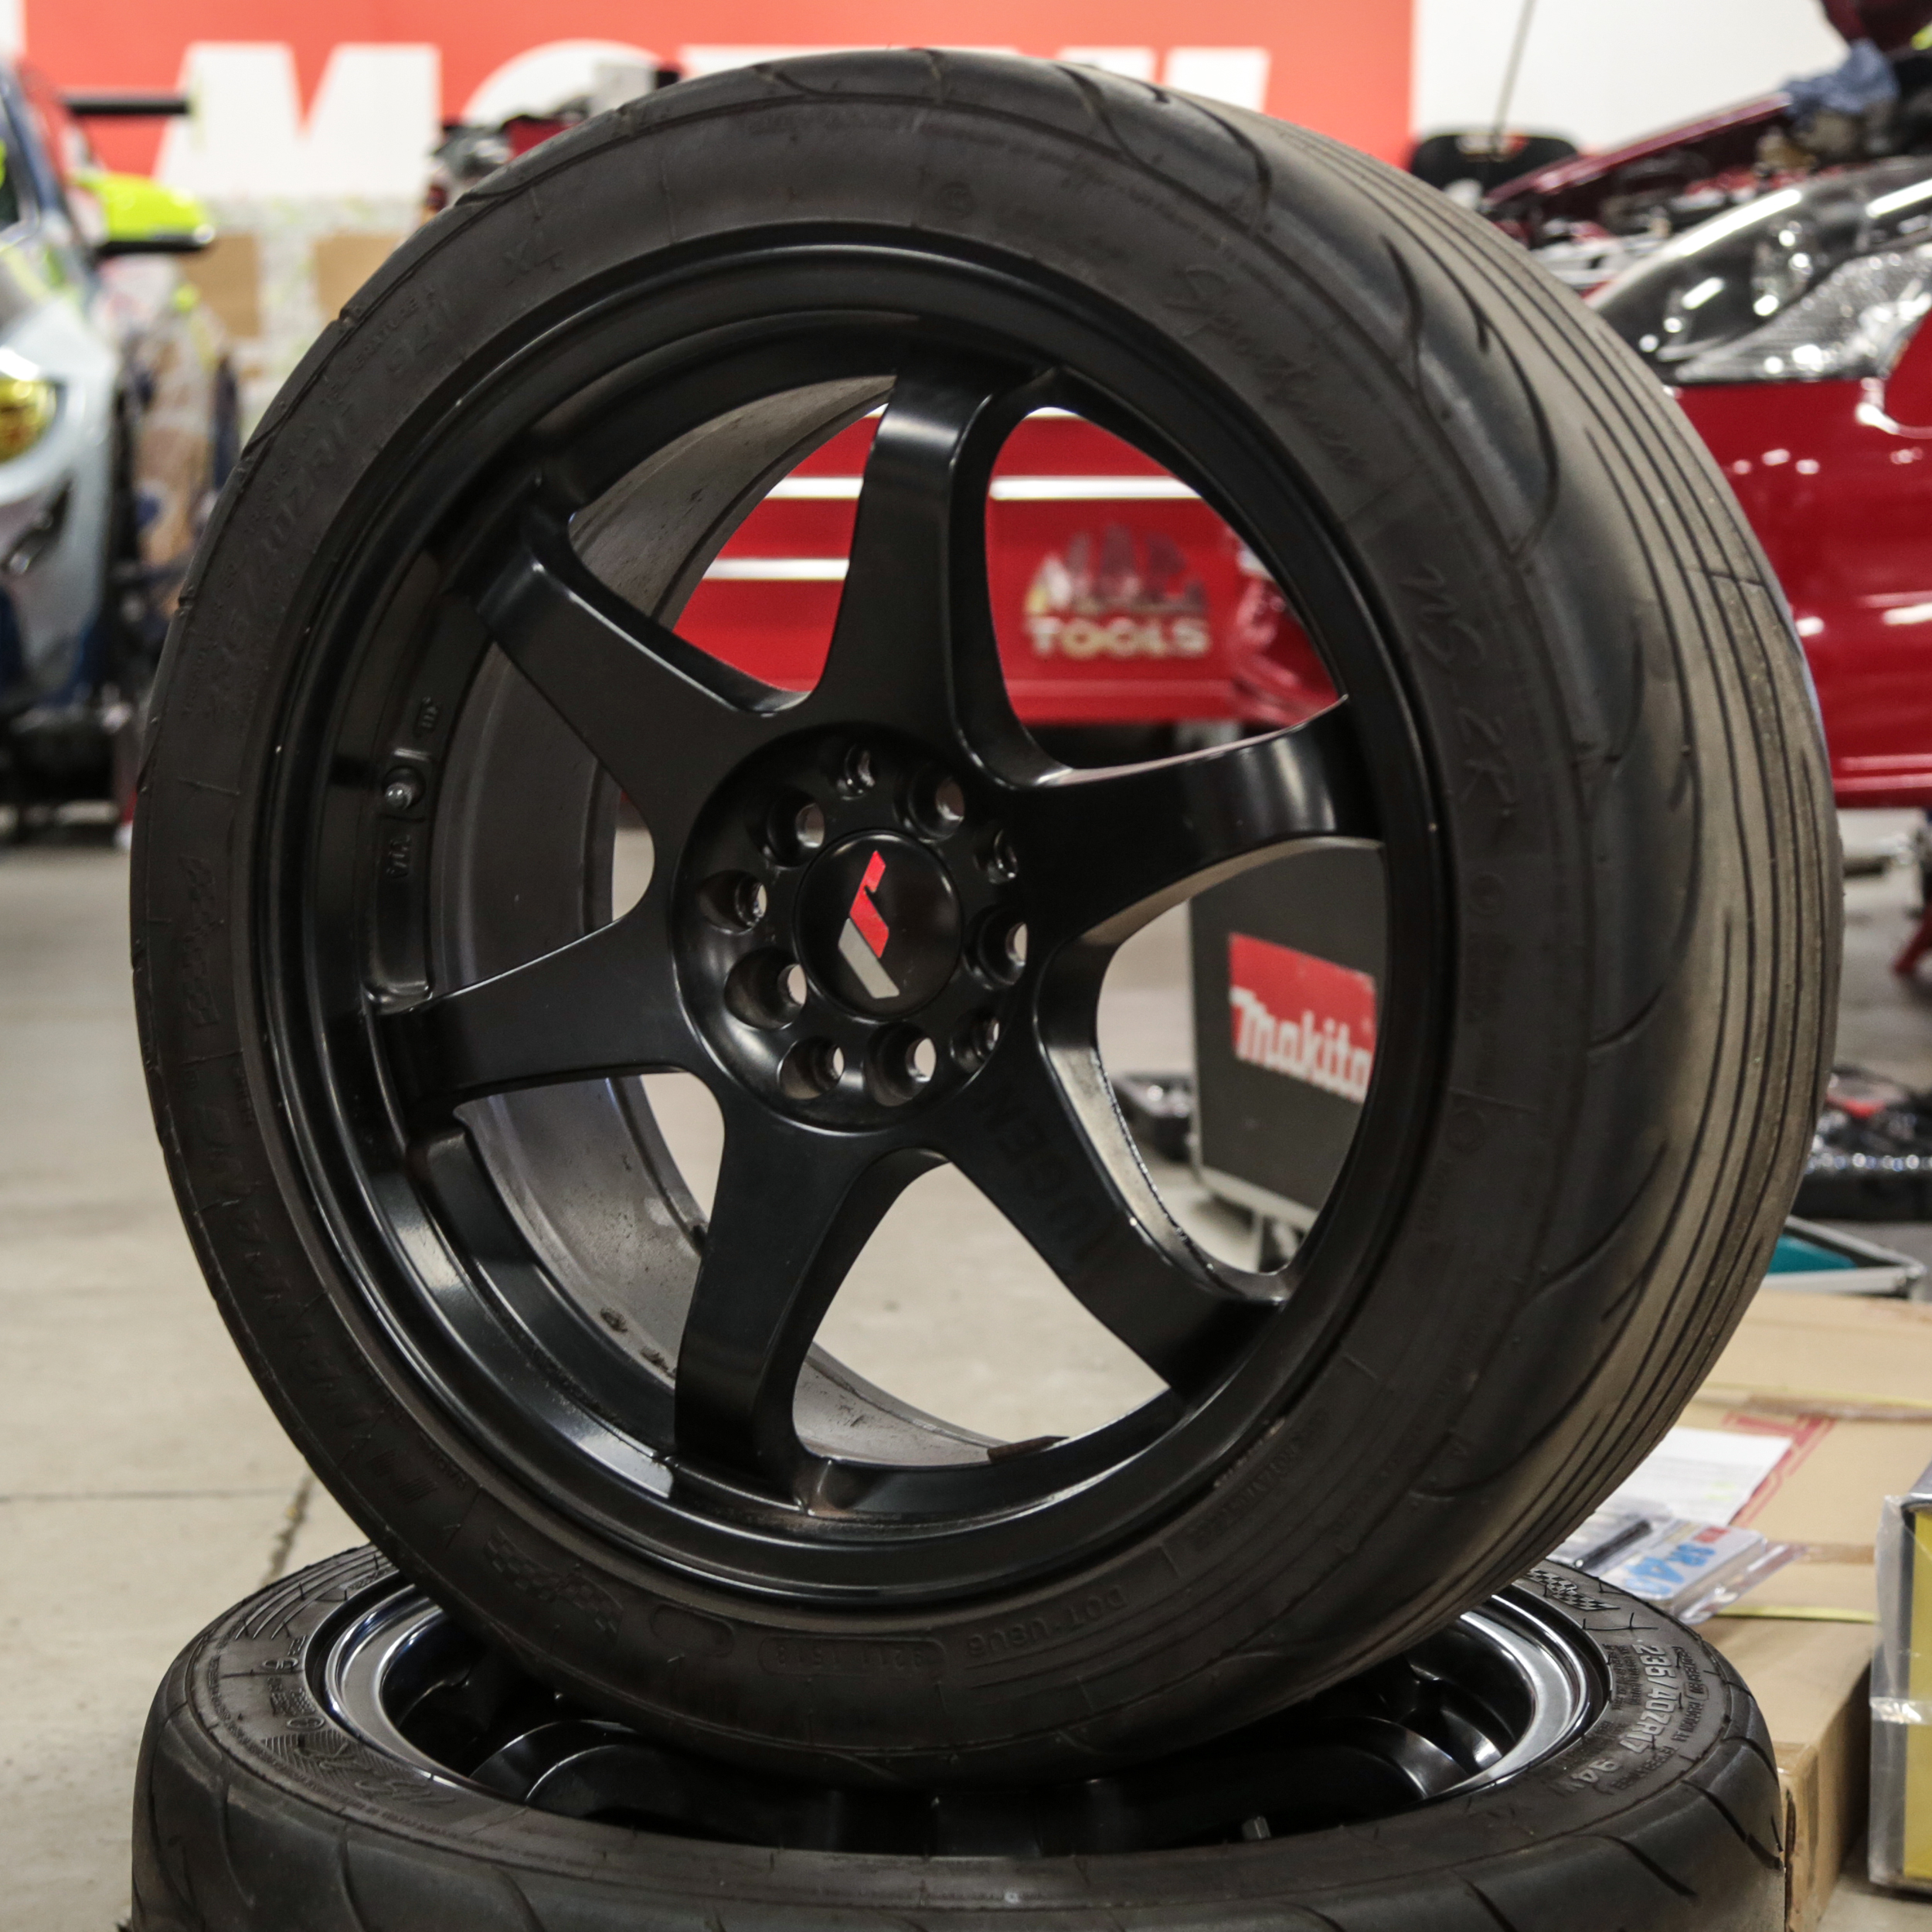
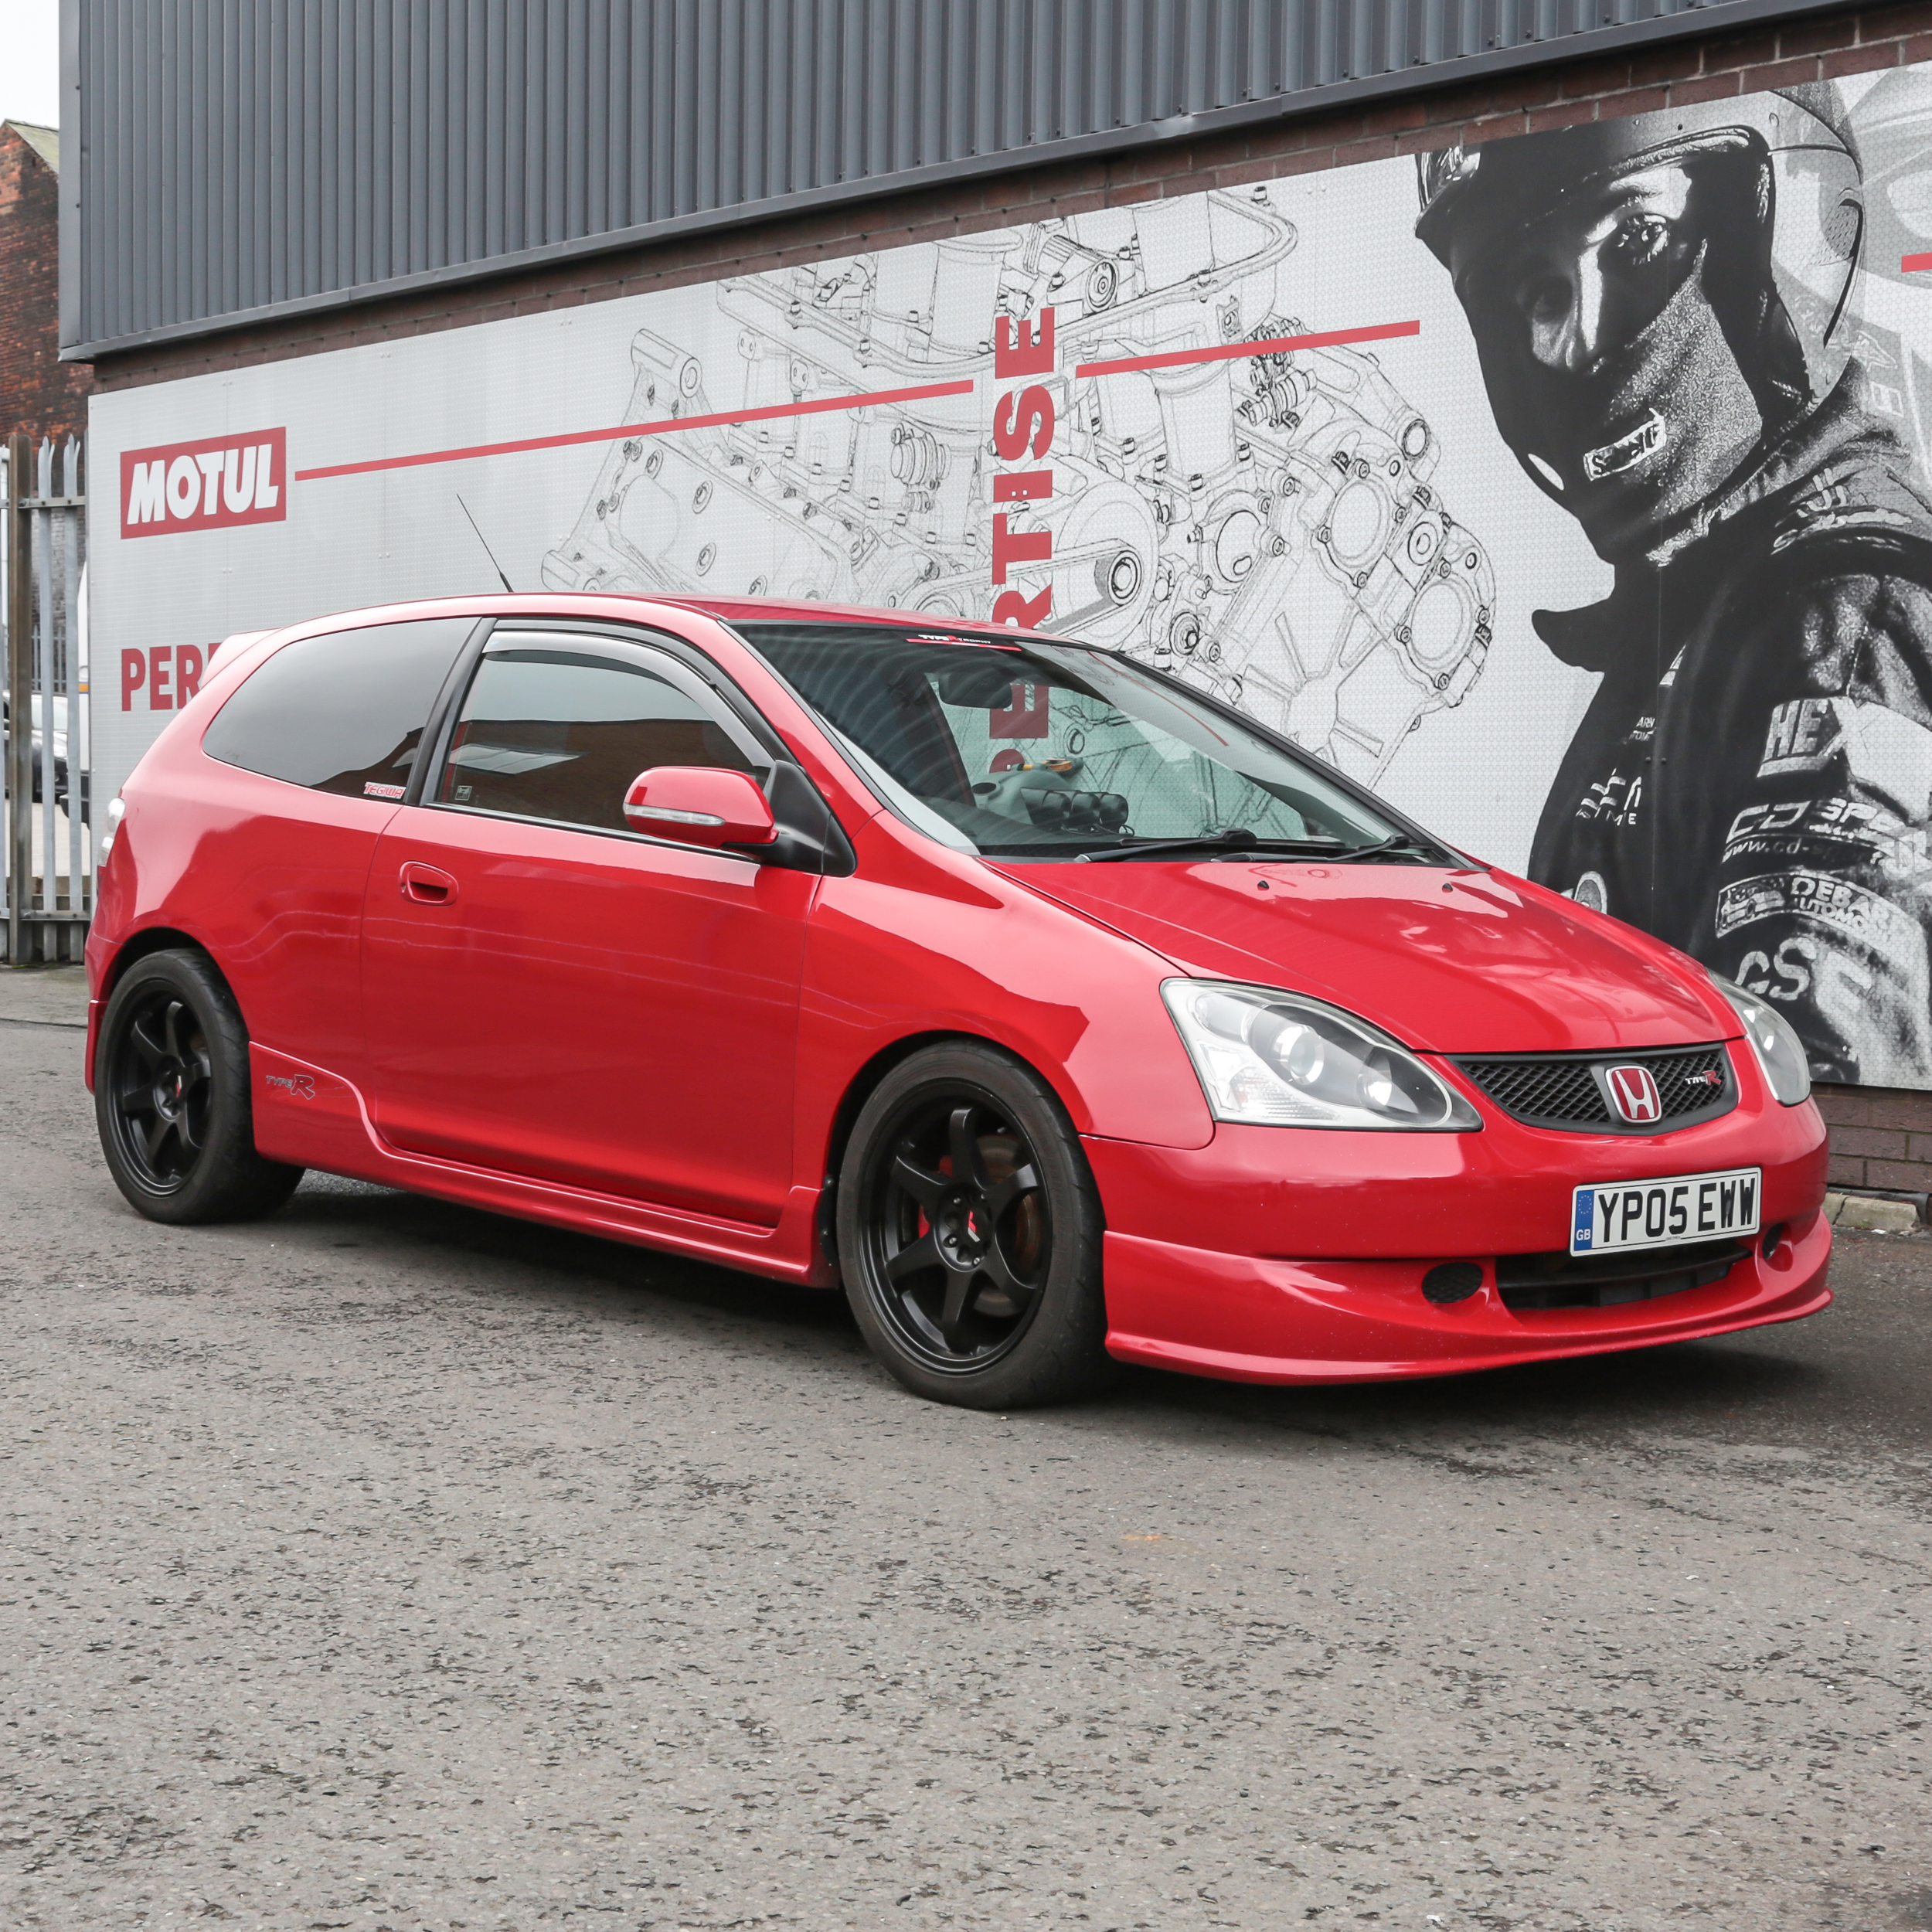
When we got the car, it came on a set of OEM EP3 wheels, which we’ll use to run wet tyres, but it also came with a set of matte black Japan Racing JR3’s too. Like the OEM wheels, they’re 17” but slightly wider as they’re an 8J with an offset of ET35. This means we can run a wider tyre to increase the contact patch of our tyres. Fortunately for us the JR’s also came wearing some 235 wide Nankang NS-2R’s which we plan on using for the next couple of track days before we’ll eventually upgrade to some Nankang AR-1’s. The car definitely looks 10x better than it does on the standard wheels with the JR3’s filling the arches nicely.

Next on the big list of things to do before we head over to Oulton will be installing bucket seats, Raemco harnesses, a Personal steering wheel, Clockwise baffled sump and hopefully the MFactory differential too!