M4 BUILD PART 6 – WIRING, AERO & FINAL DETAILS
Yes it has certainly been a while, and Autosport International has passed with great success. We aren’t quite finished with our story though, so to speak, so here’s part 6.
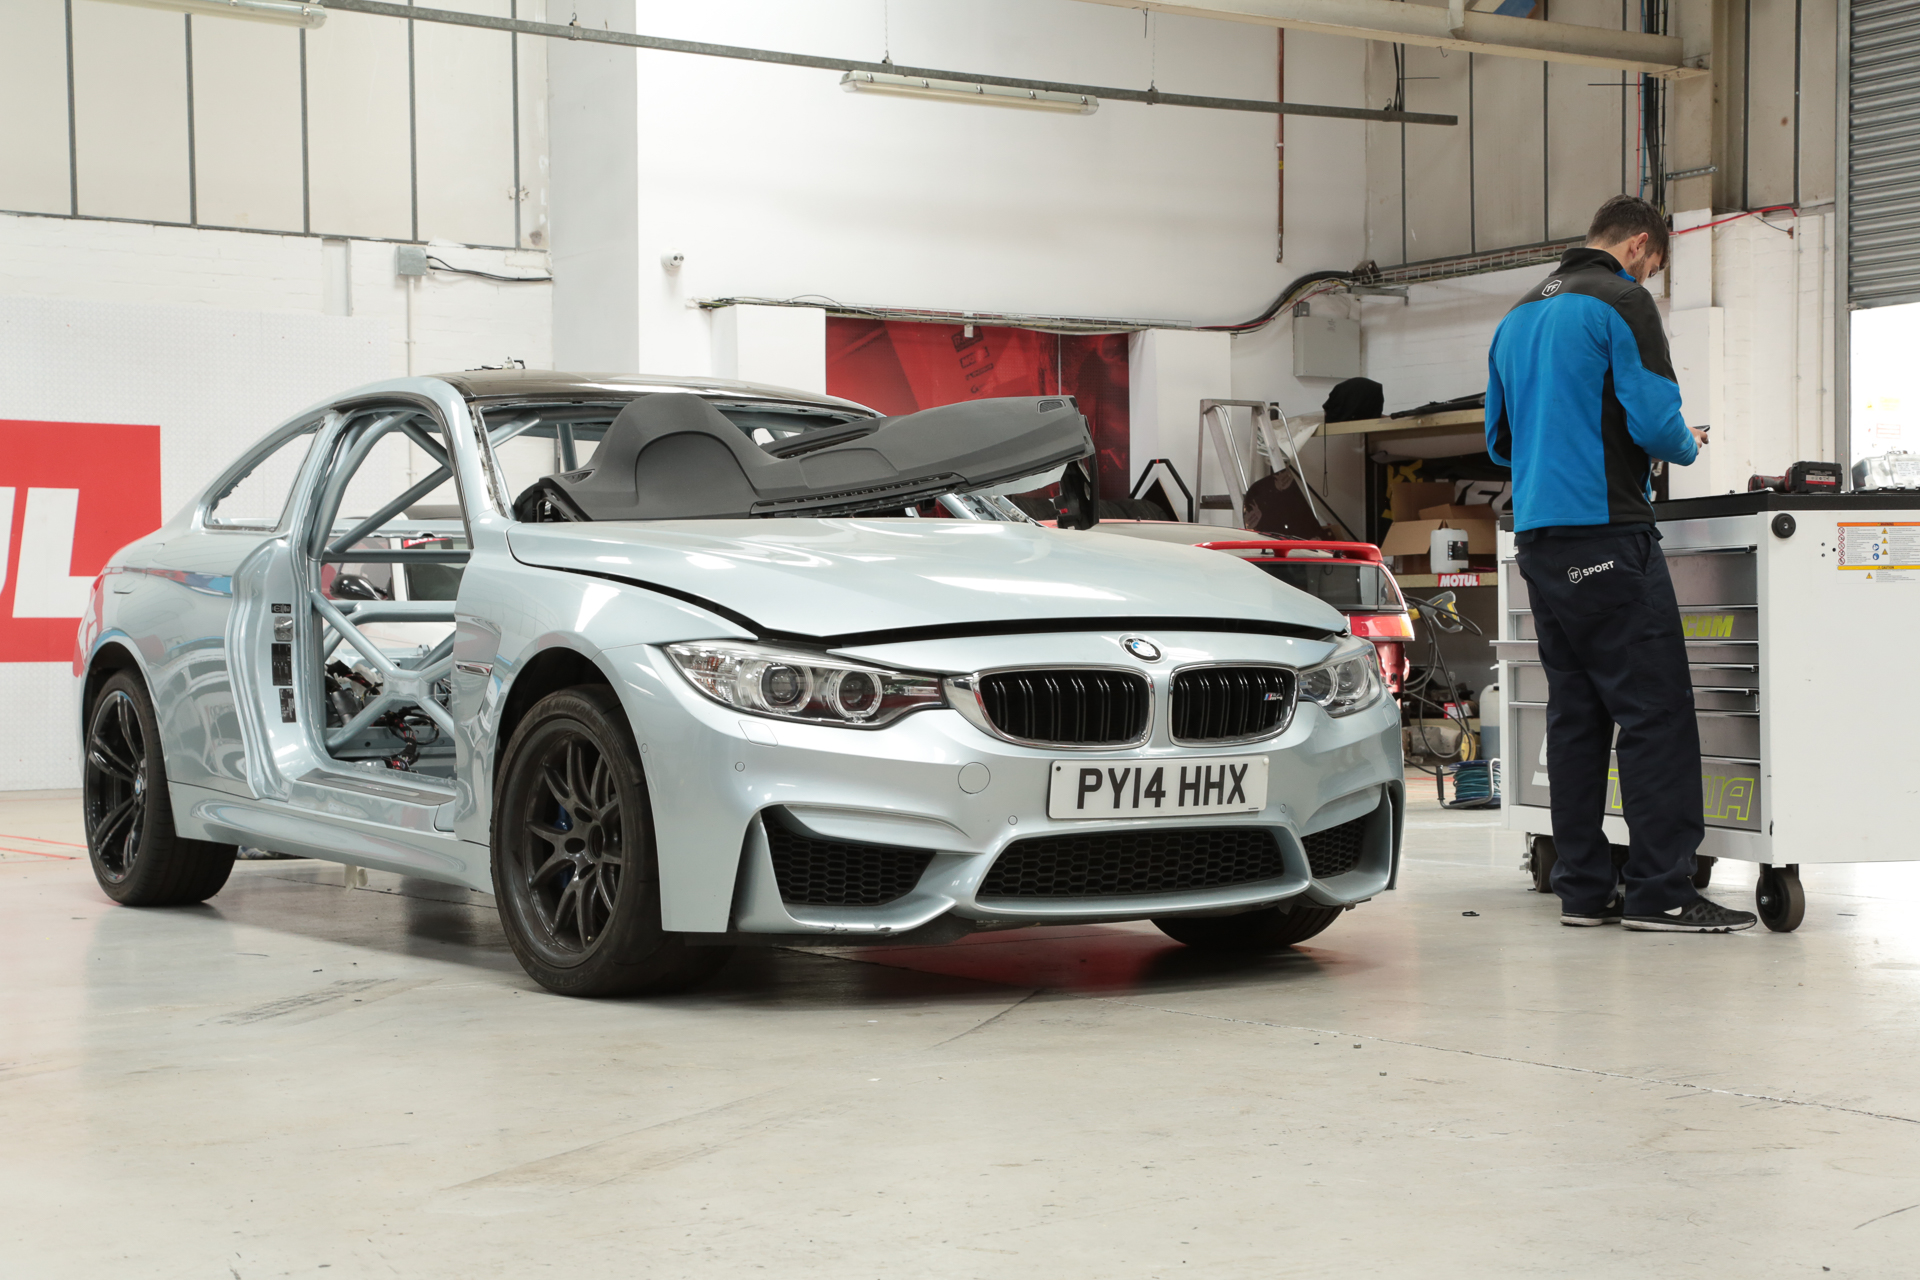
The festive period means all hands on deck for everyone here at Tegiwa, our office is sorting orders and helping customers, the warehouse team is packing an insane amount of parcels and in our workshop the build continues. The M4 has been getting closer and closer to completion day by day, seeing the process has been a real spur to work – convenient especially with the Autosport International deadline looming close.
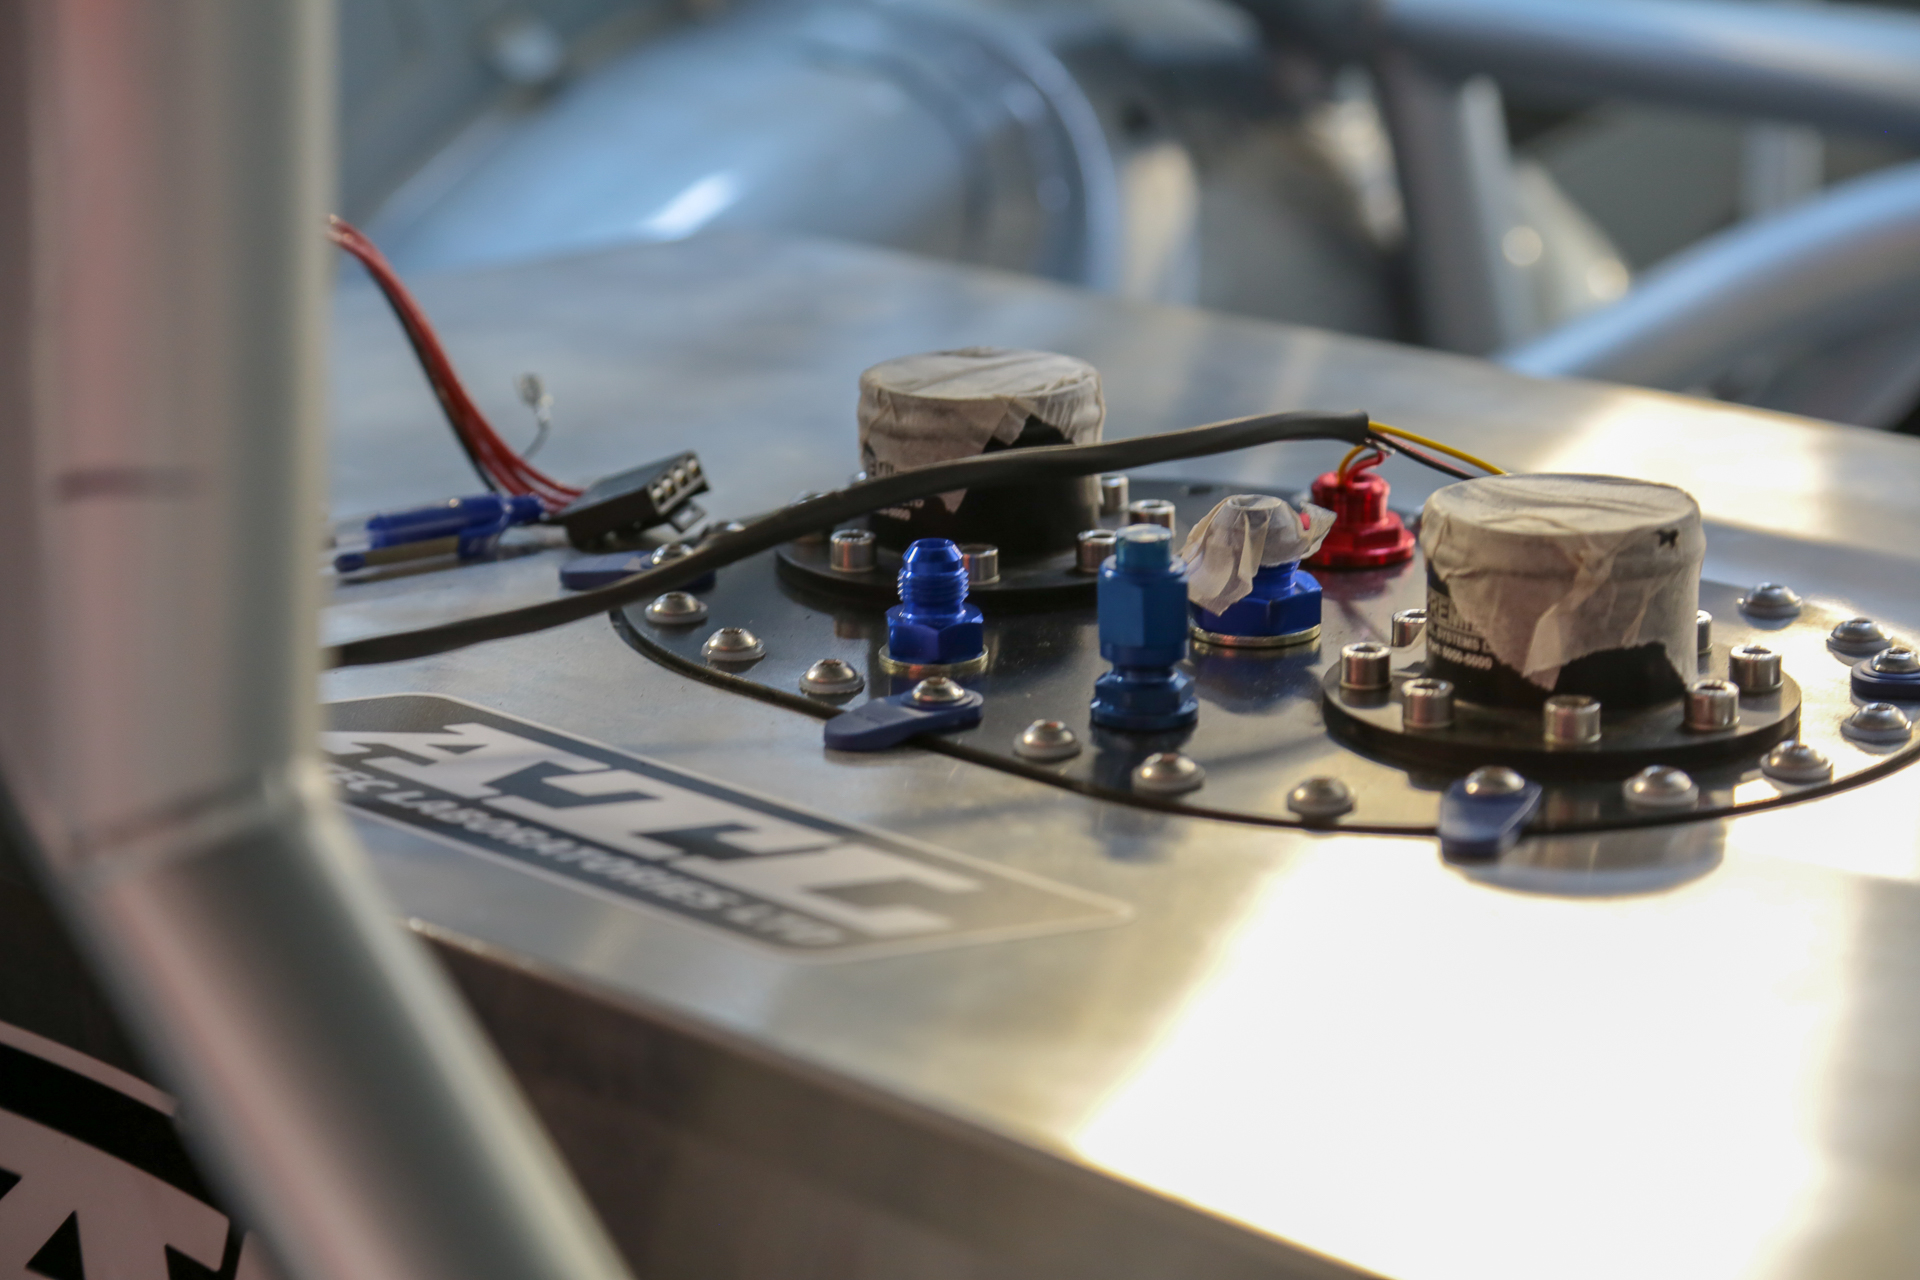

By now our Aero Tech Laboratories tank is in snug, and on the face of it the car is largely complete. What we’re missing now is primarily parts to button the car up, but prior to that there was a lot of wiring to figure out.
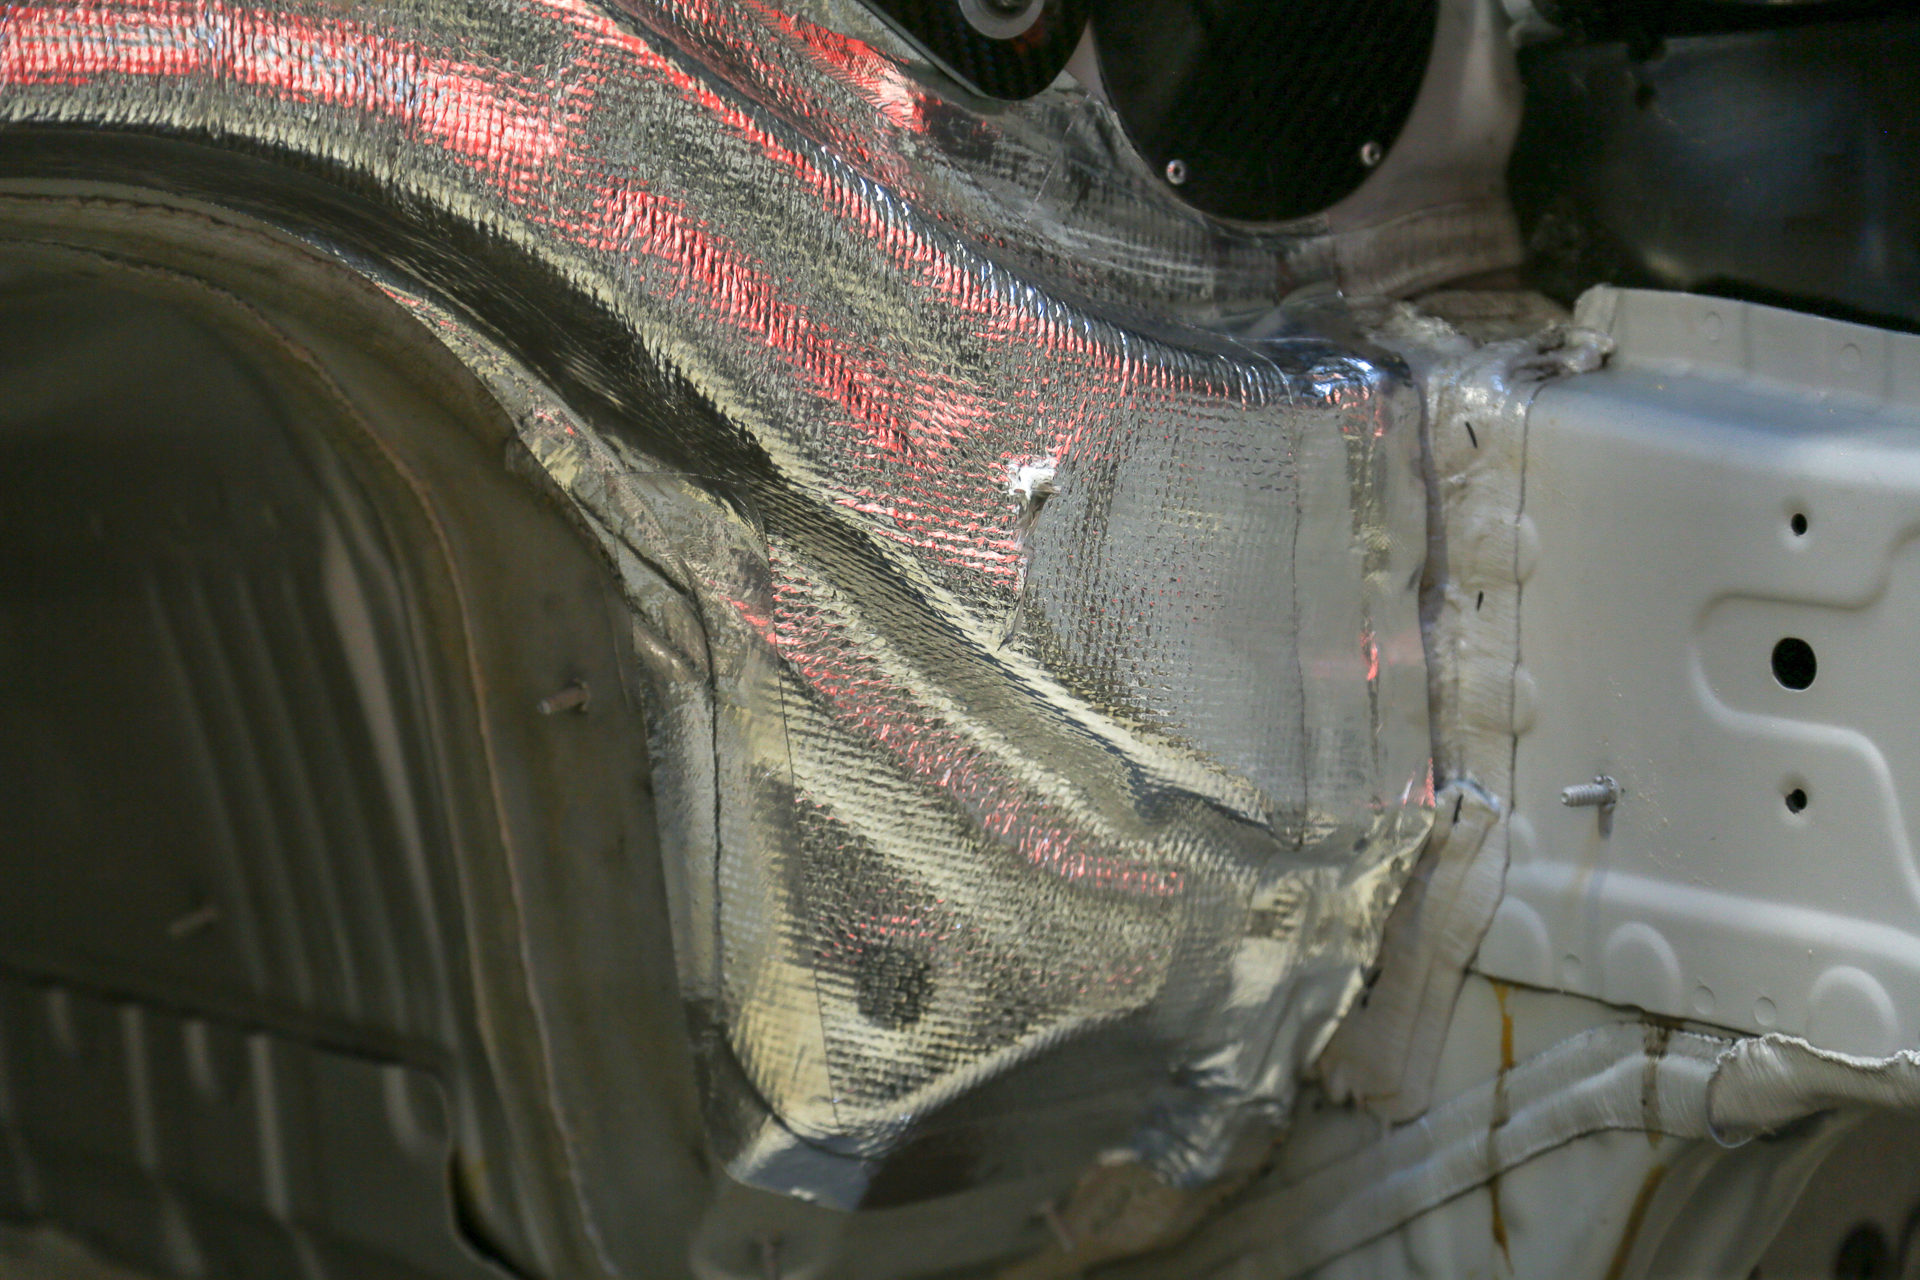
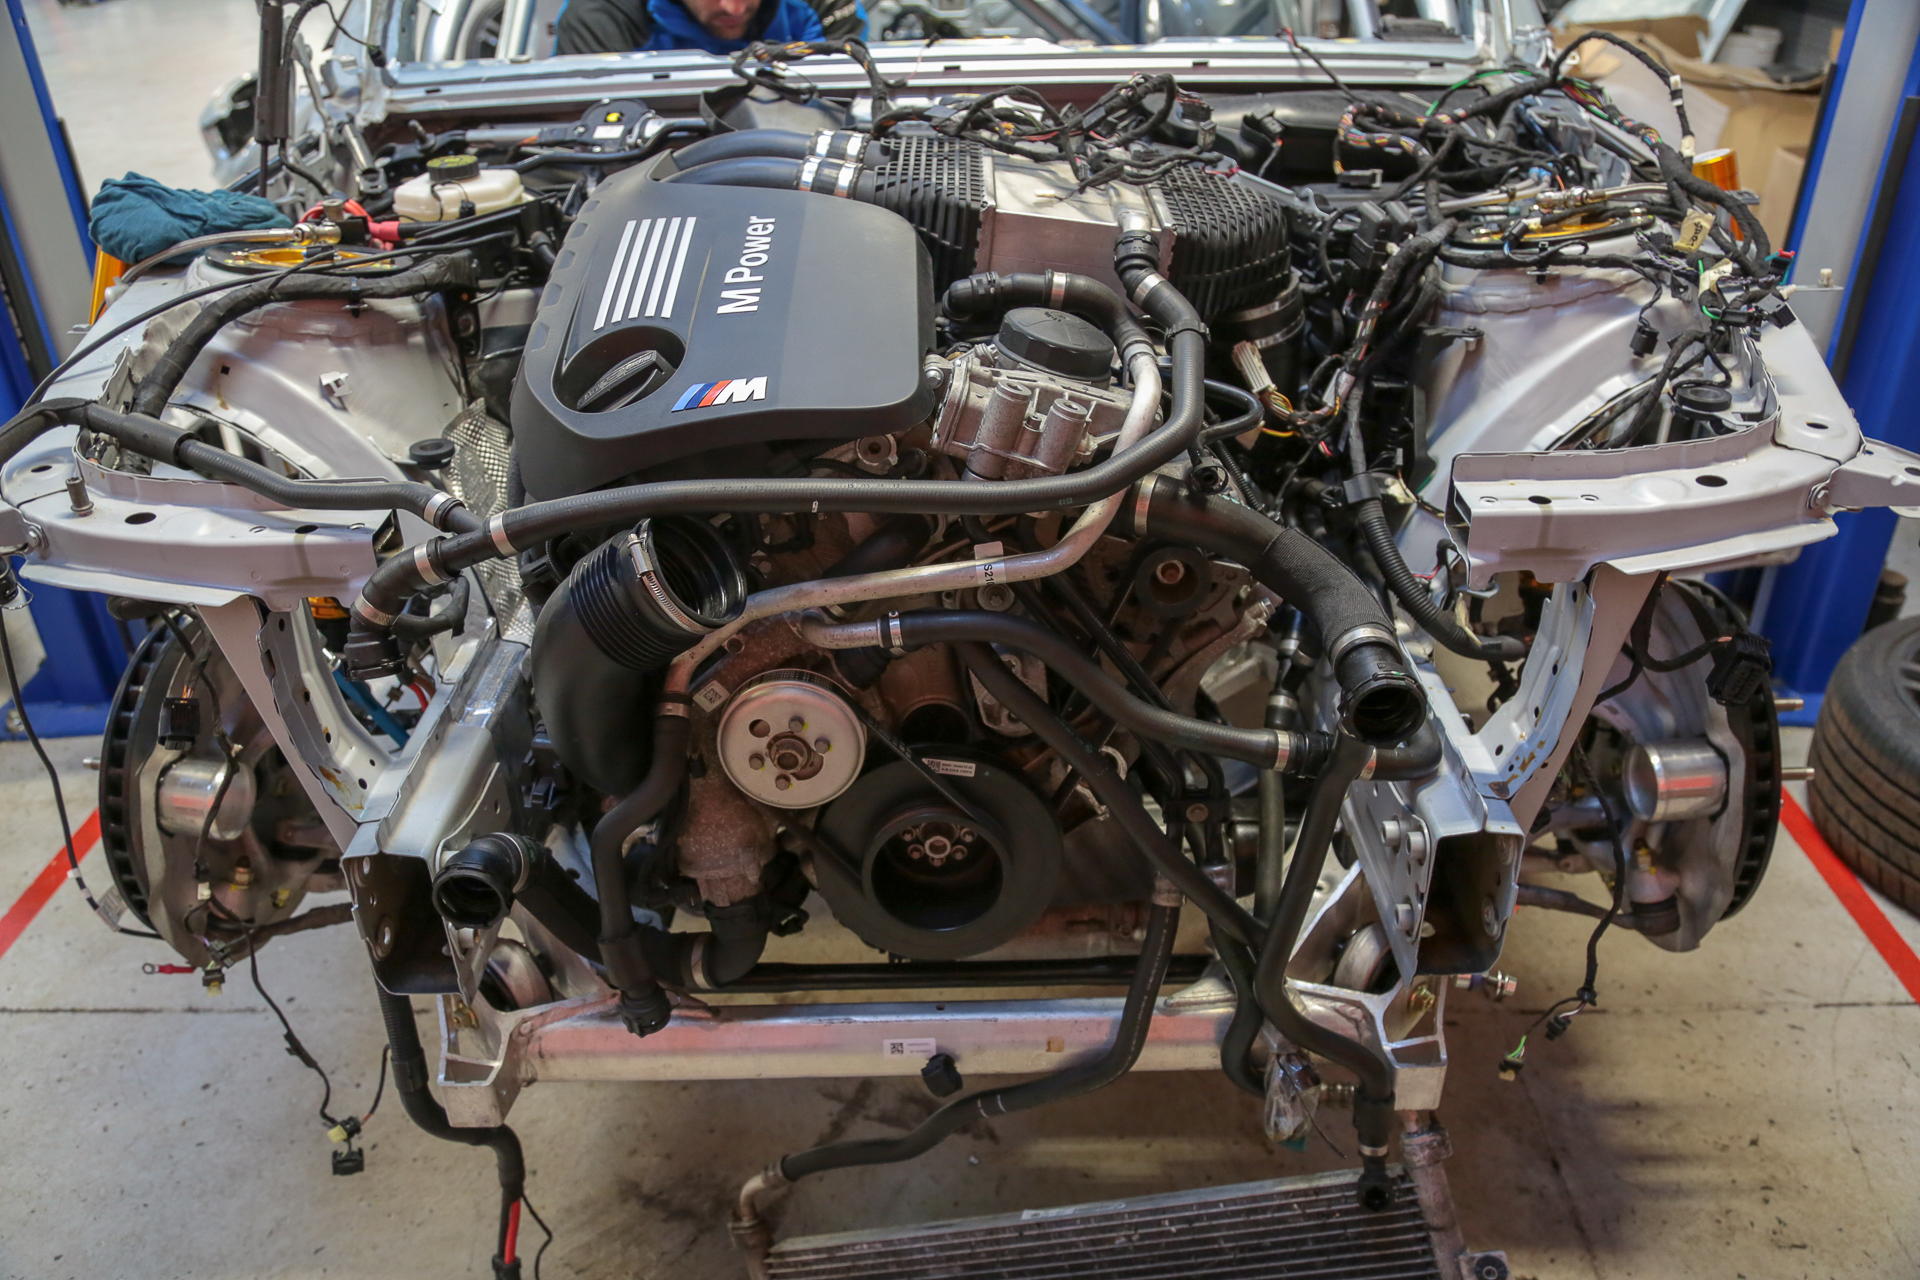
As I mentioned in the last blog, we had the motor out to get some crucial heat deflection material in the bay. Getting the engine itself out isn’t a particularly massive job when you have access to ramps etc, so with it out and the heat shields in we were ready to fit the engine and open the pandoras box of wiring that spans the length of the M4.
Wiring in any car is a hellish task, though these days there is a lot more of it. The task at hand is simple on paper, identify whats needed and whats not, then strip and fit. Simple right.
Some say its important to have a series of small jobs to stop you from burning out on one, regardless of the validity of that, there was still plenty to button up whilst the wiring was being done. To test fit still we had our new GRP doors, windows, as well as our spoiler and M4 style front splitter. With all of this in mind efficient use of time became a very, very big deal.
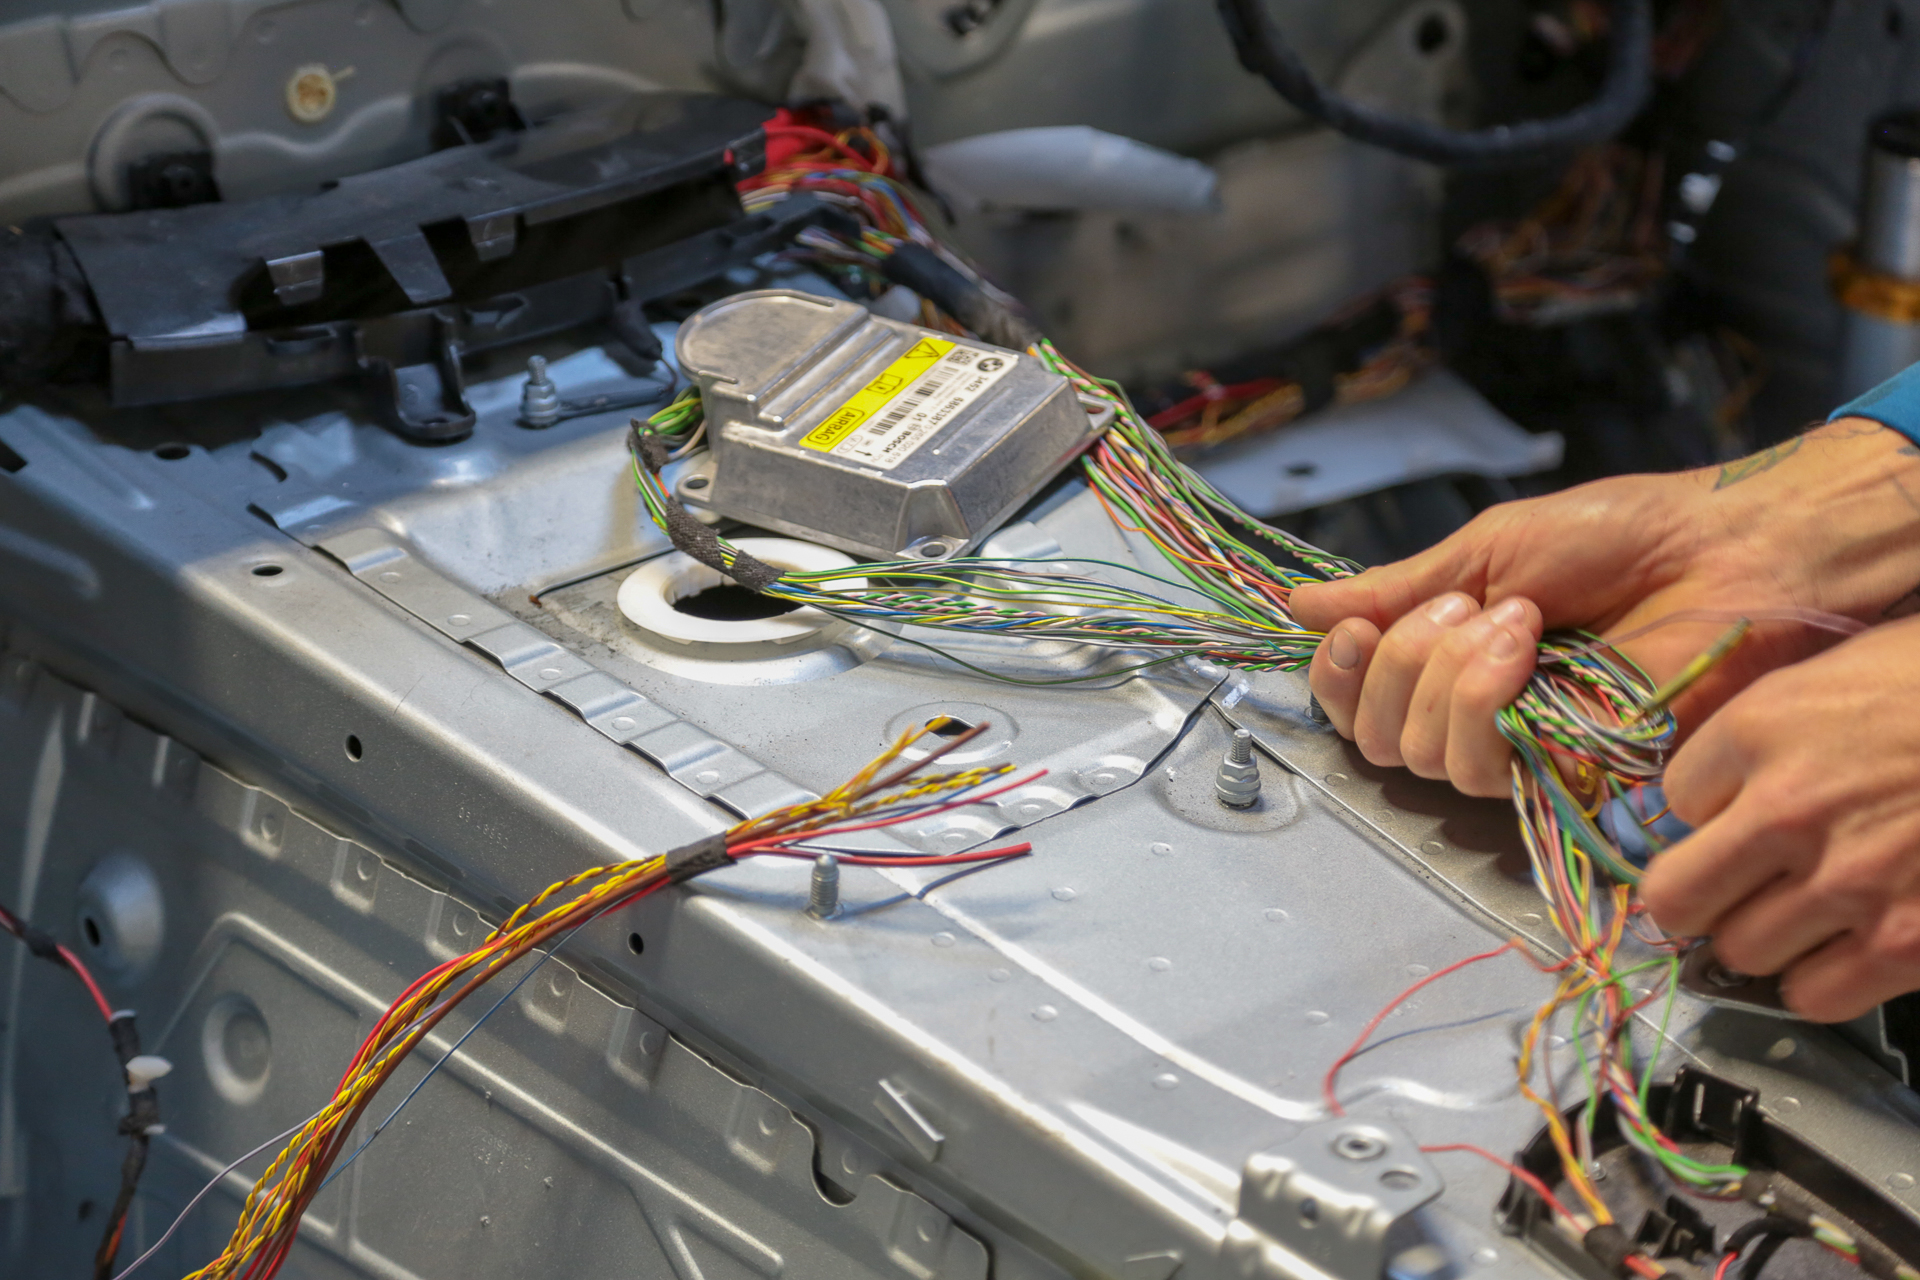
Wiring the engine back up was as simple as plugging it all back in, there was nothing to really strip front there. Then the cockpit, where it became substantially more complex, was tidied grouped and stripped where it could be. A few mistakes happened here and there, but with everything exposed it could be fixed after some testing. Seeing all of this come together was a real testament to the benefits of good research and organisation, and with wiring tucked away it made fitting fuel and brake lines a lot more manageable.
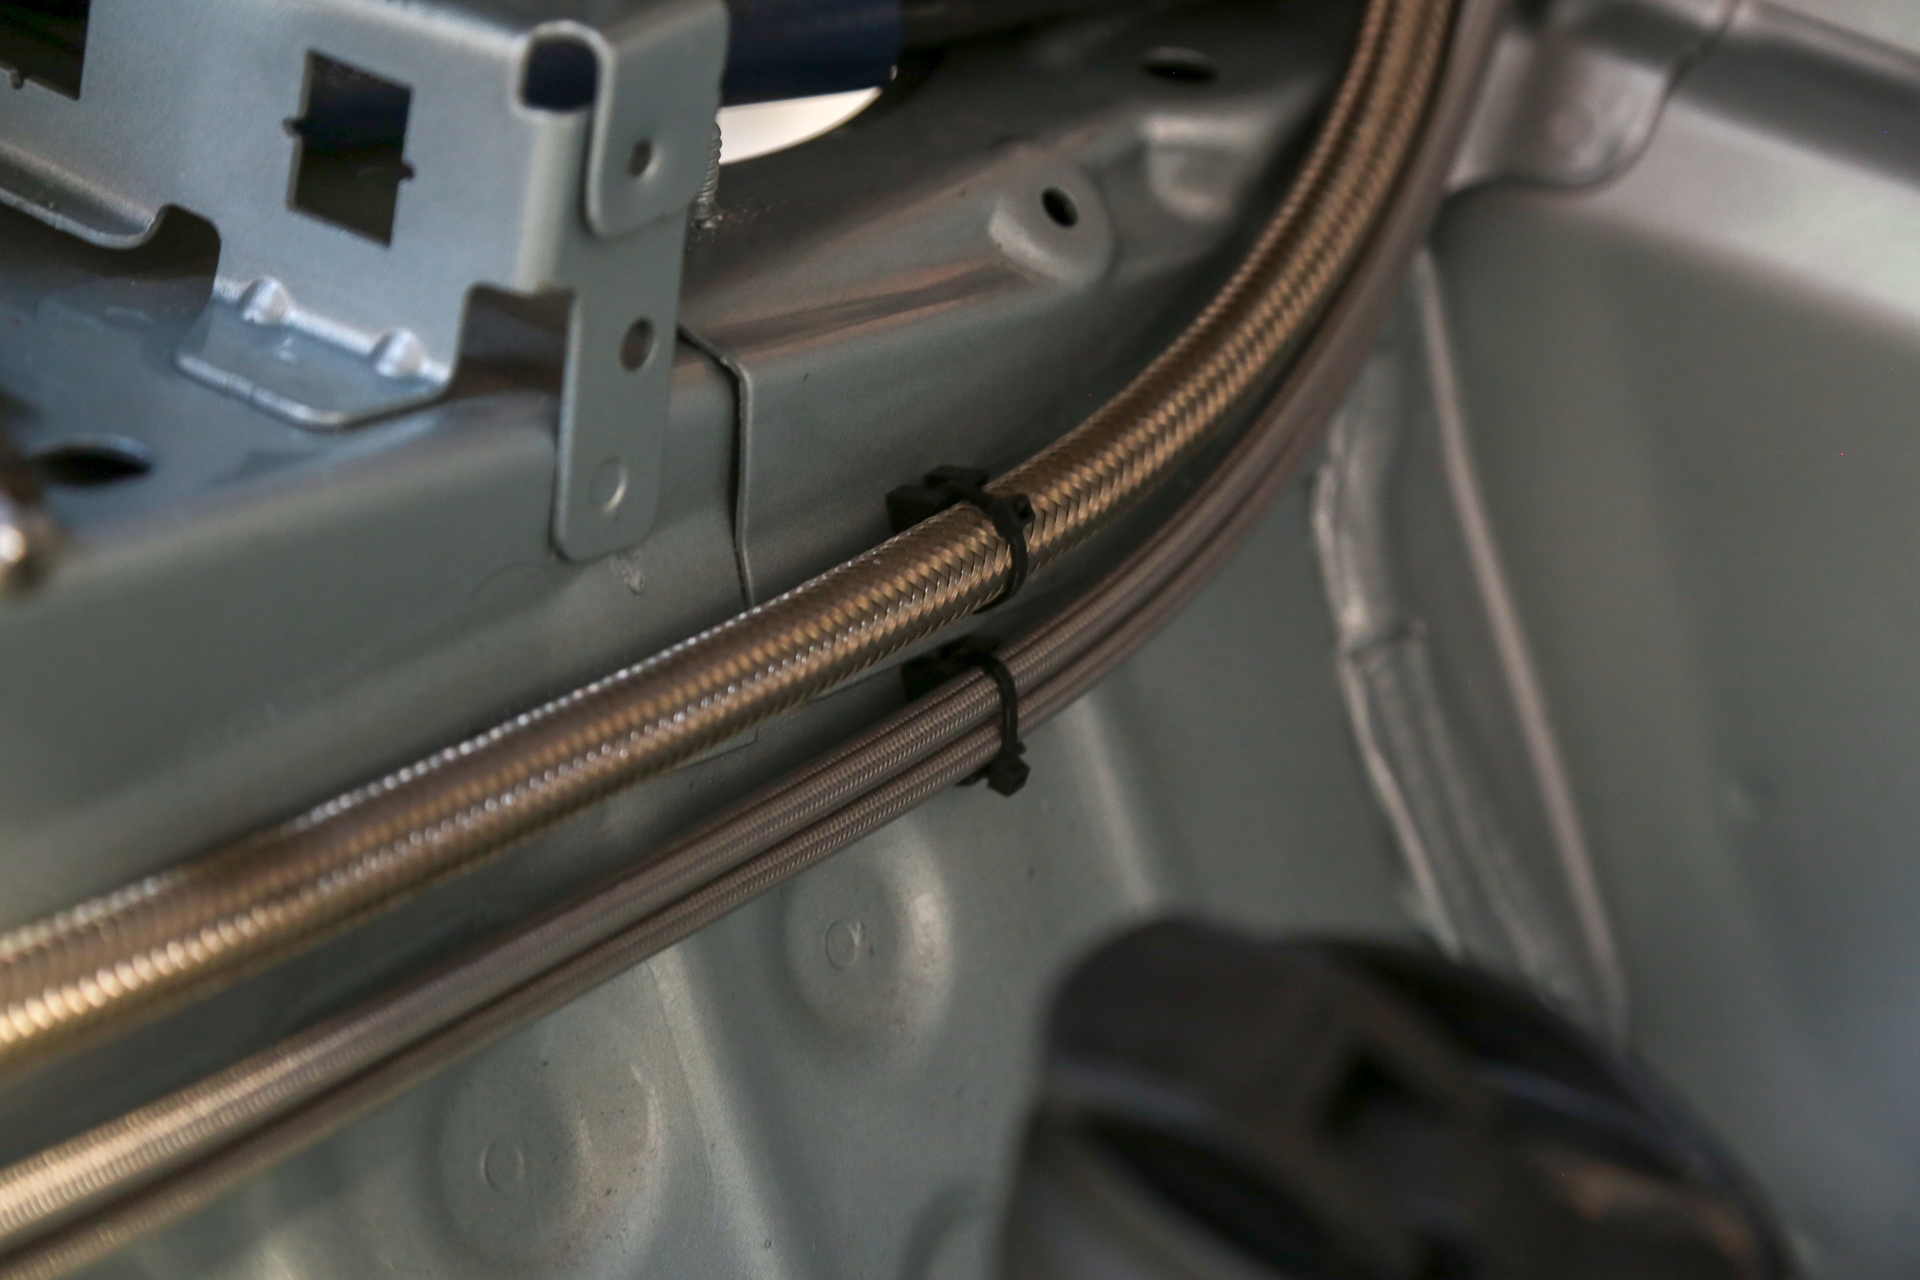
Speaking of, the brake system is now very much complete and the RPB lines we’re the cherry on top to adorn the Yellow Speed Racing big brake kit. Harnessing a factory hole in the bulkhead, a carbon panel was made to cover this, then the lines themselves went through. Little touches like that really smarten the engine bay as well as the interior, so taking that extra bit of time is always worth it – especially if the material cost is practically nothing.
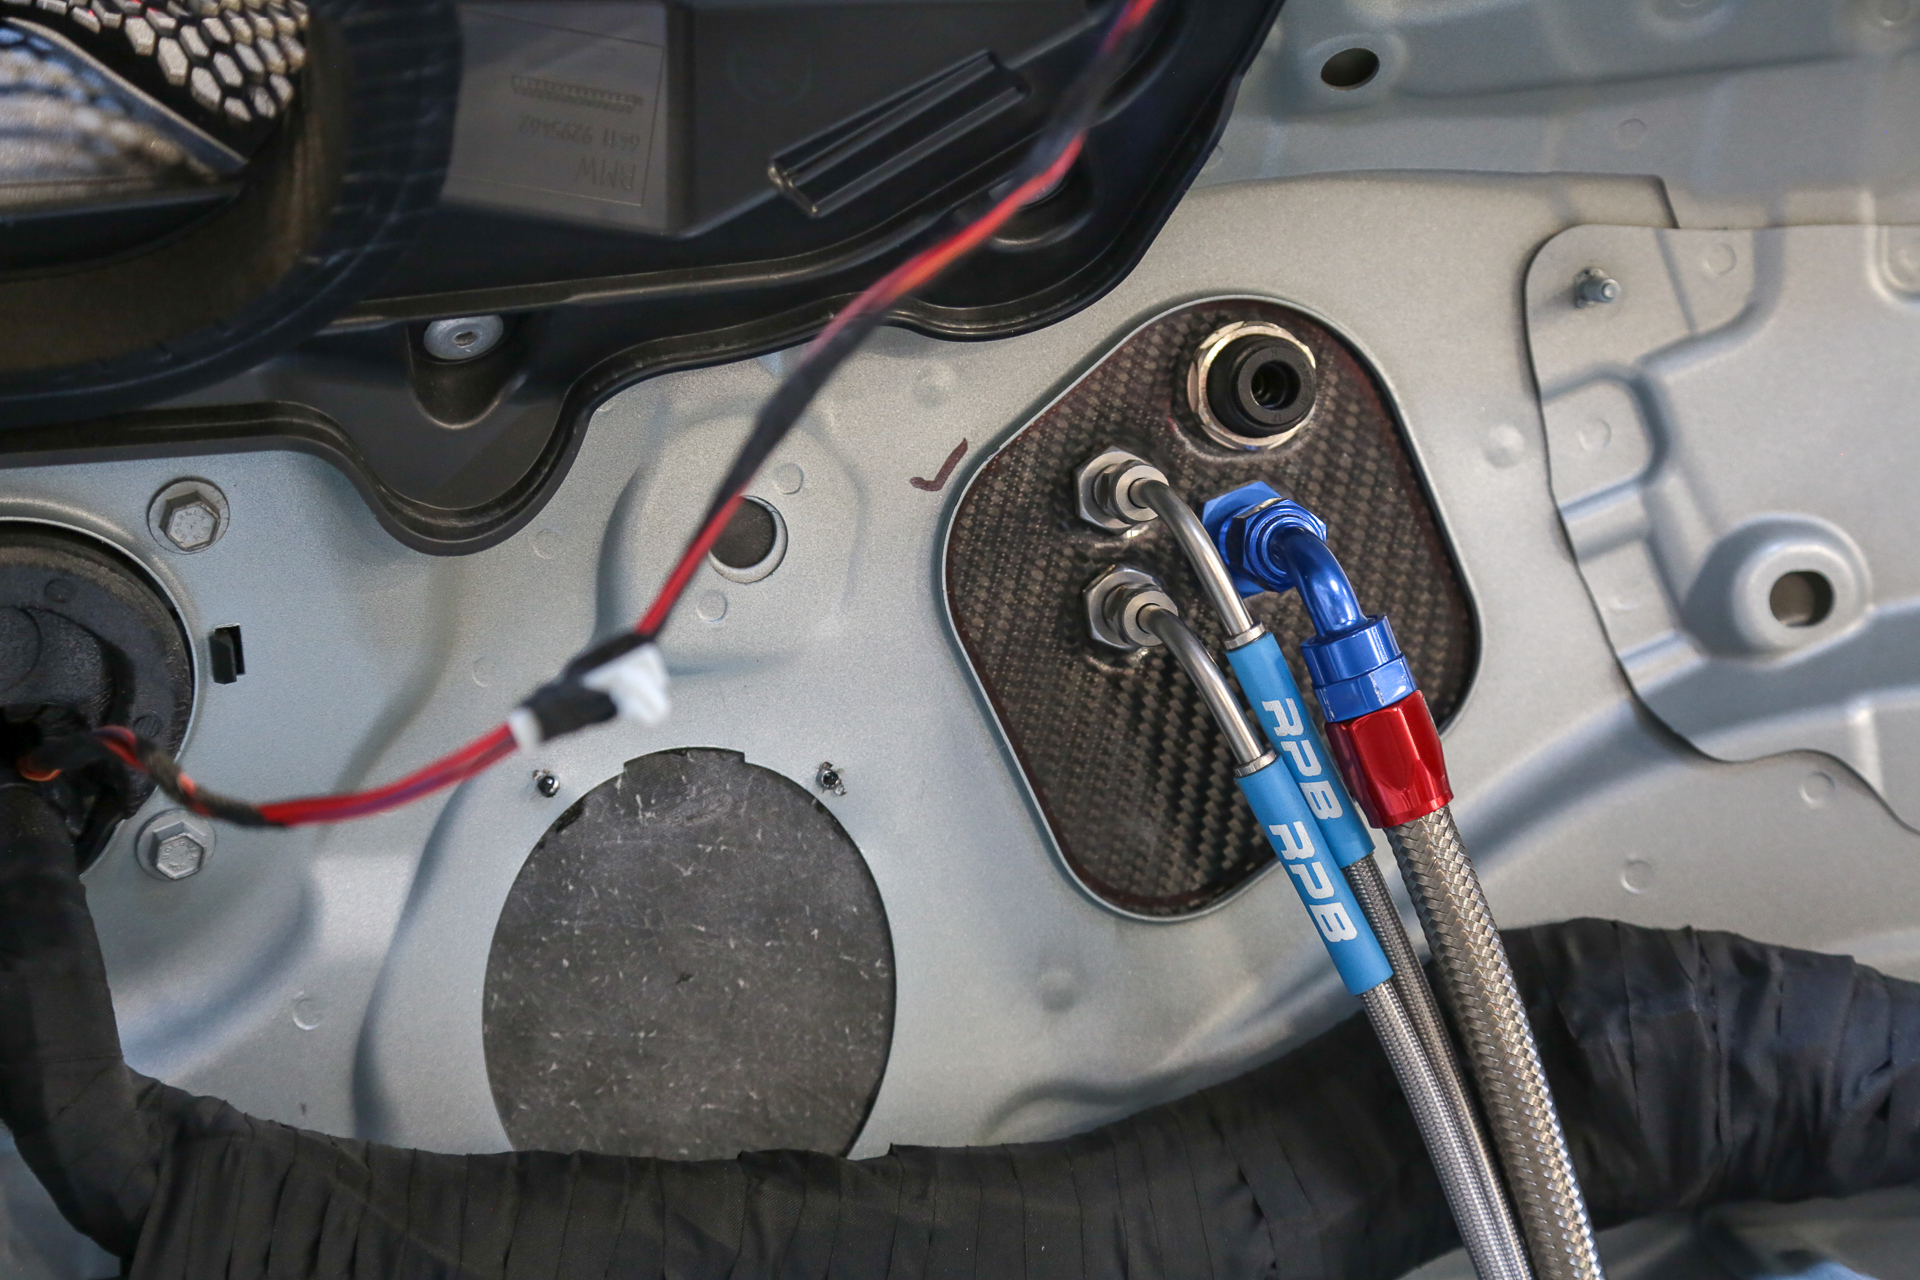
You can see front the image above that our fuel feed and return lines run through the same hole, again utilising stock locations and minimising drilling/cutting into the car itself. The fuel lines themselves run along the transmission tunnel then back in to the ATL tank – making a simple and bulletproof system.
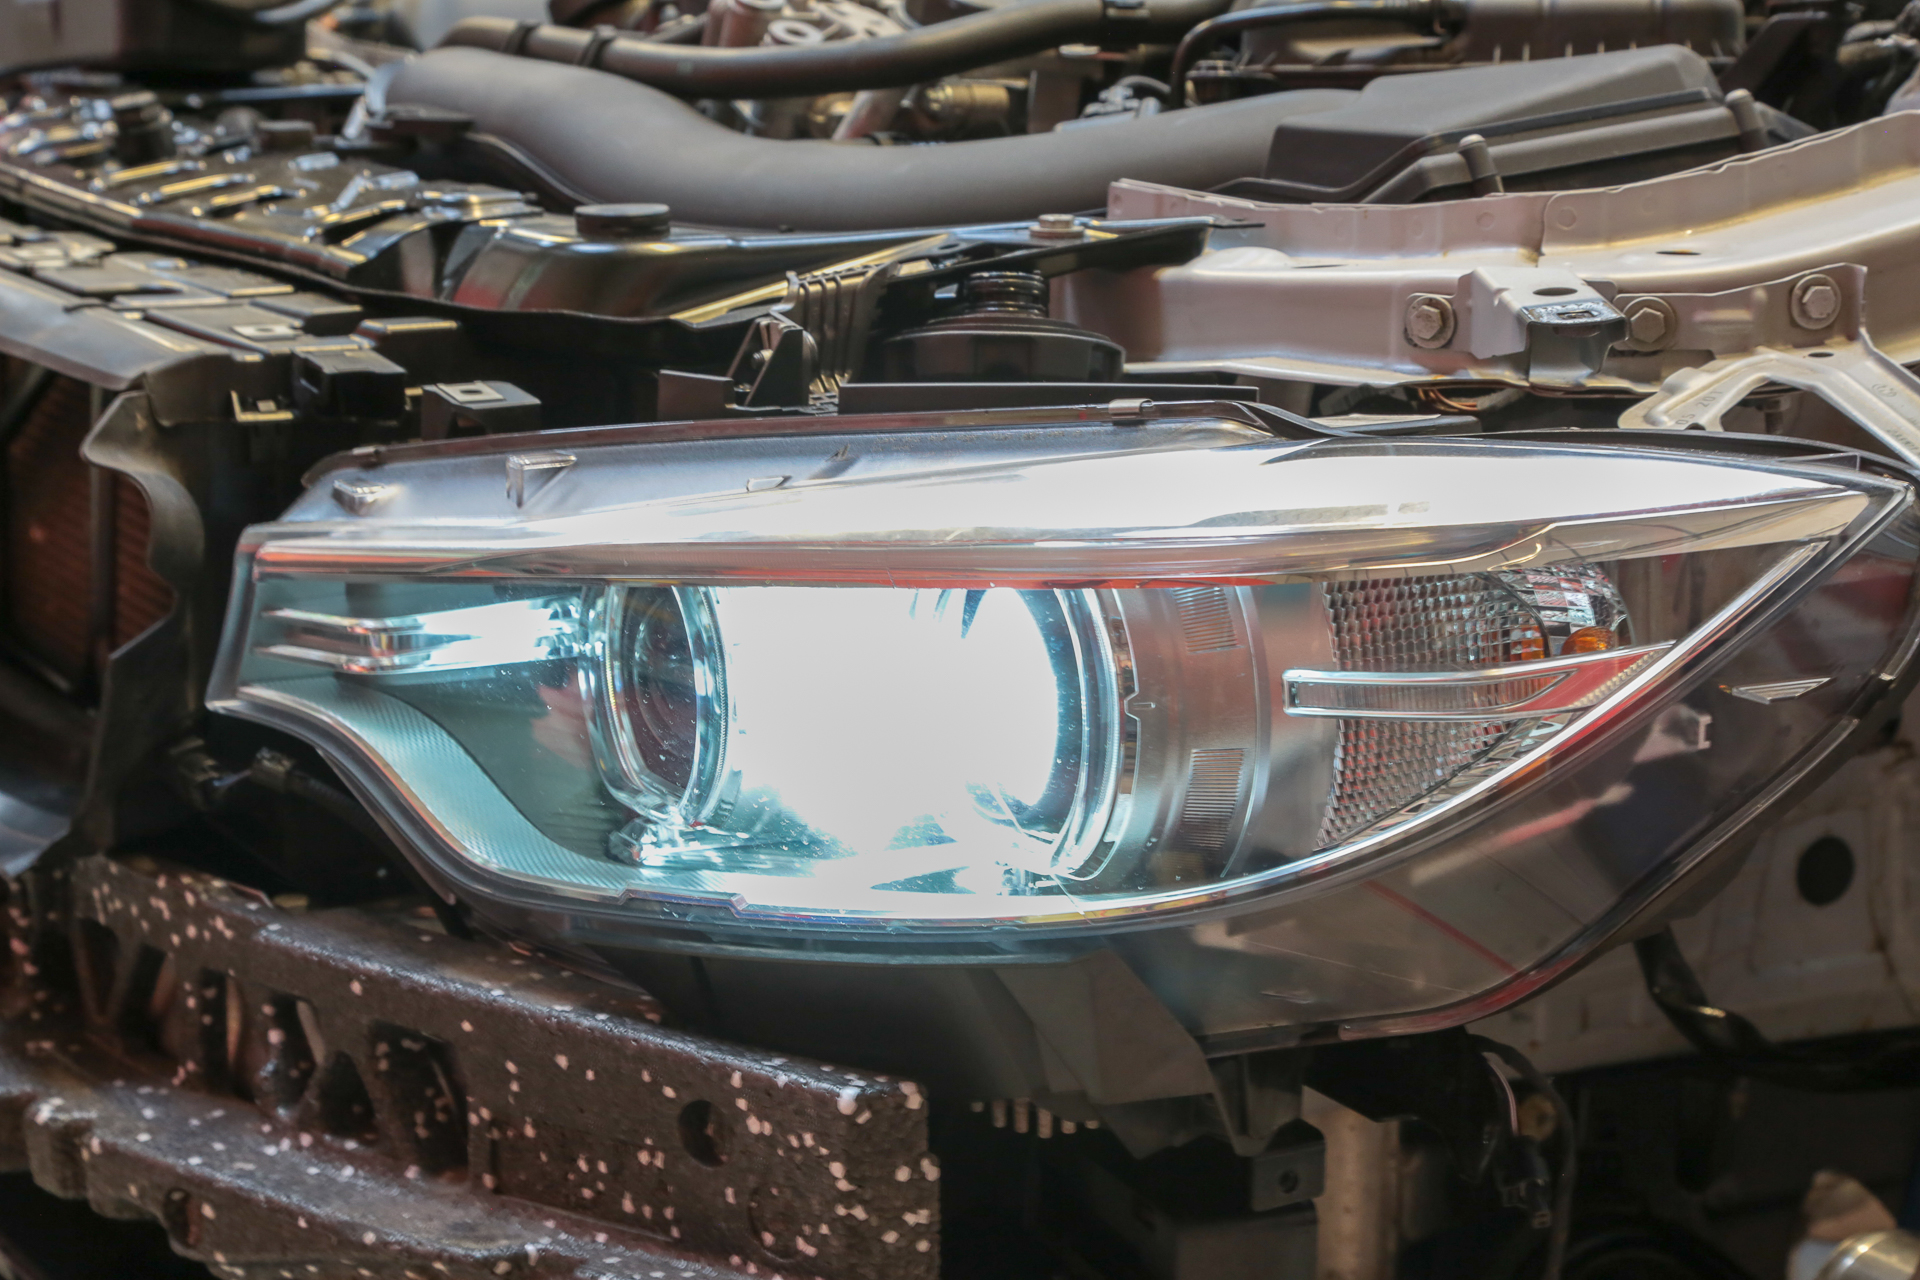
Returning briefly to wiring, one particular palaver was lighting, in the cars stripped state getting all lights functioning became a bigger hassle than it needed to be. This was swiftly dealt with, bringing a big sigh of relief when the LED’s came to life up front, and eventually the rear followed suit.
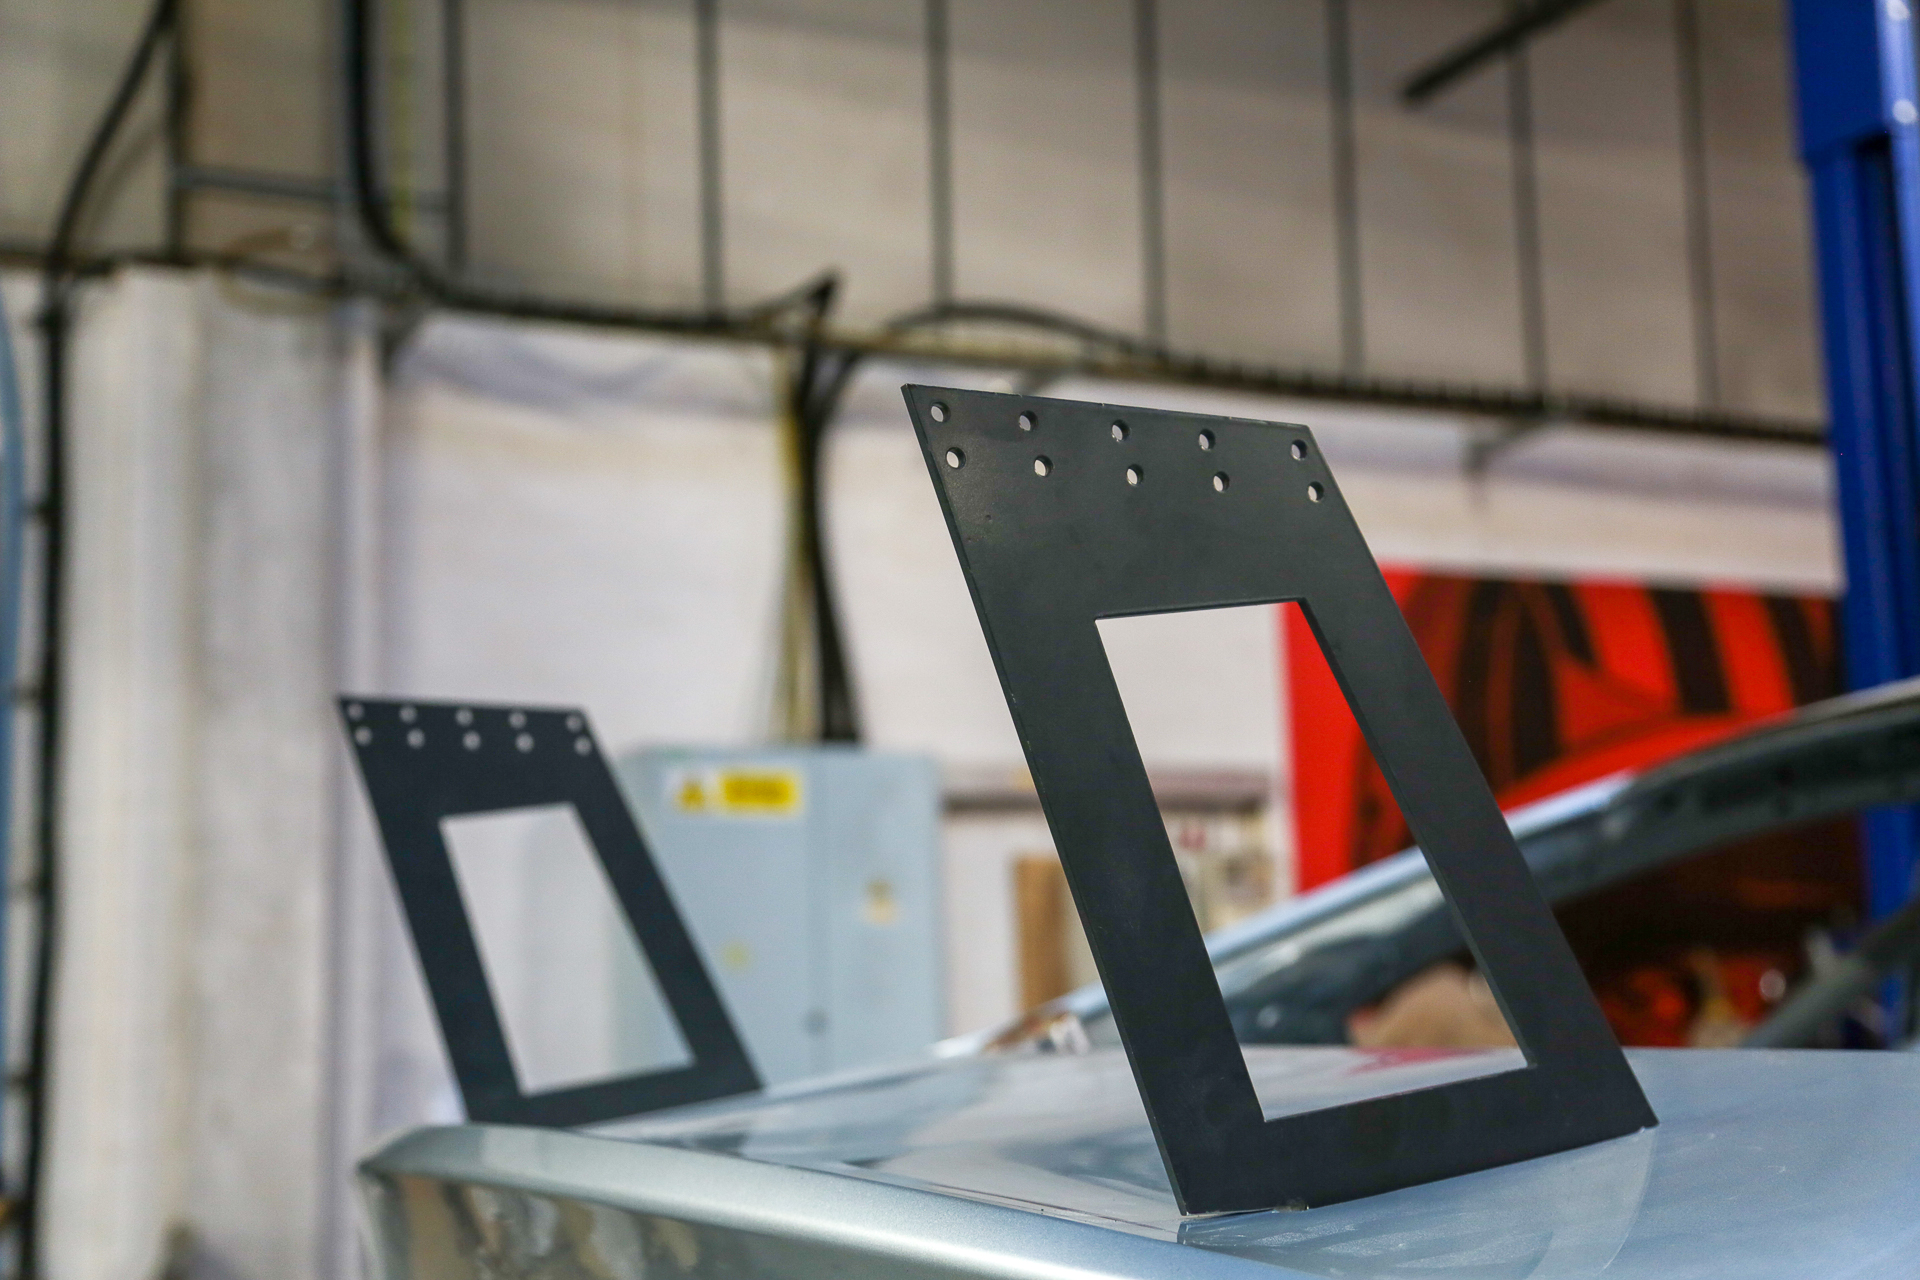
On the subject of the rear end, our spoiler mounts had been freshly fitted to the boot hinges. These require a bit more rigidity than your conventional boot mount spoiler, right now these are version 1’s. In time we’ll design a slightly more stylish counterpart but right now practicality is the most important part – form over function if you will.
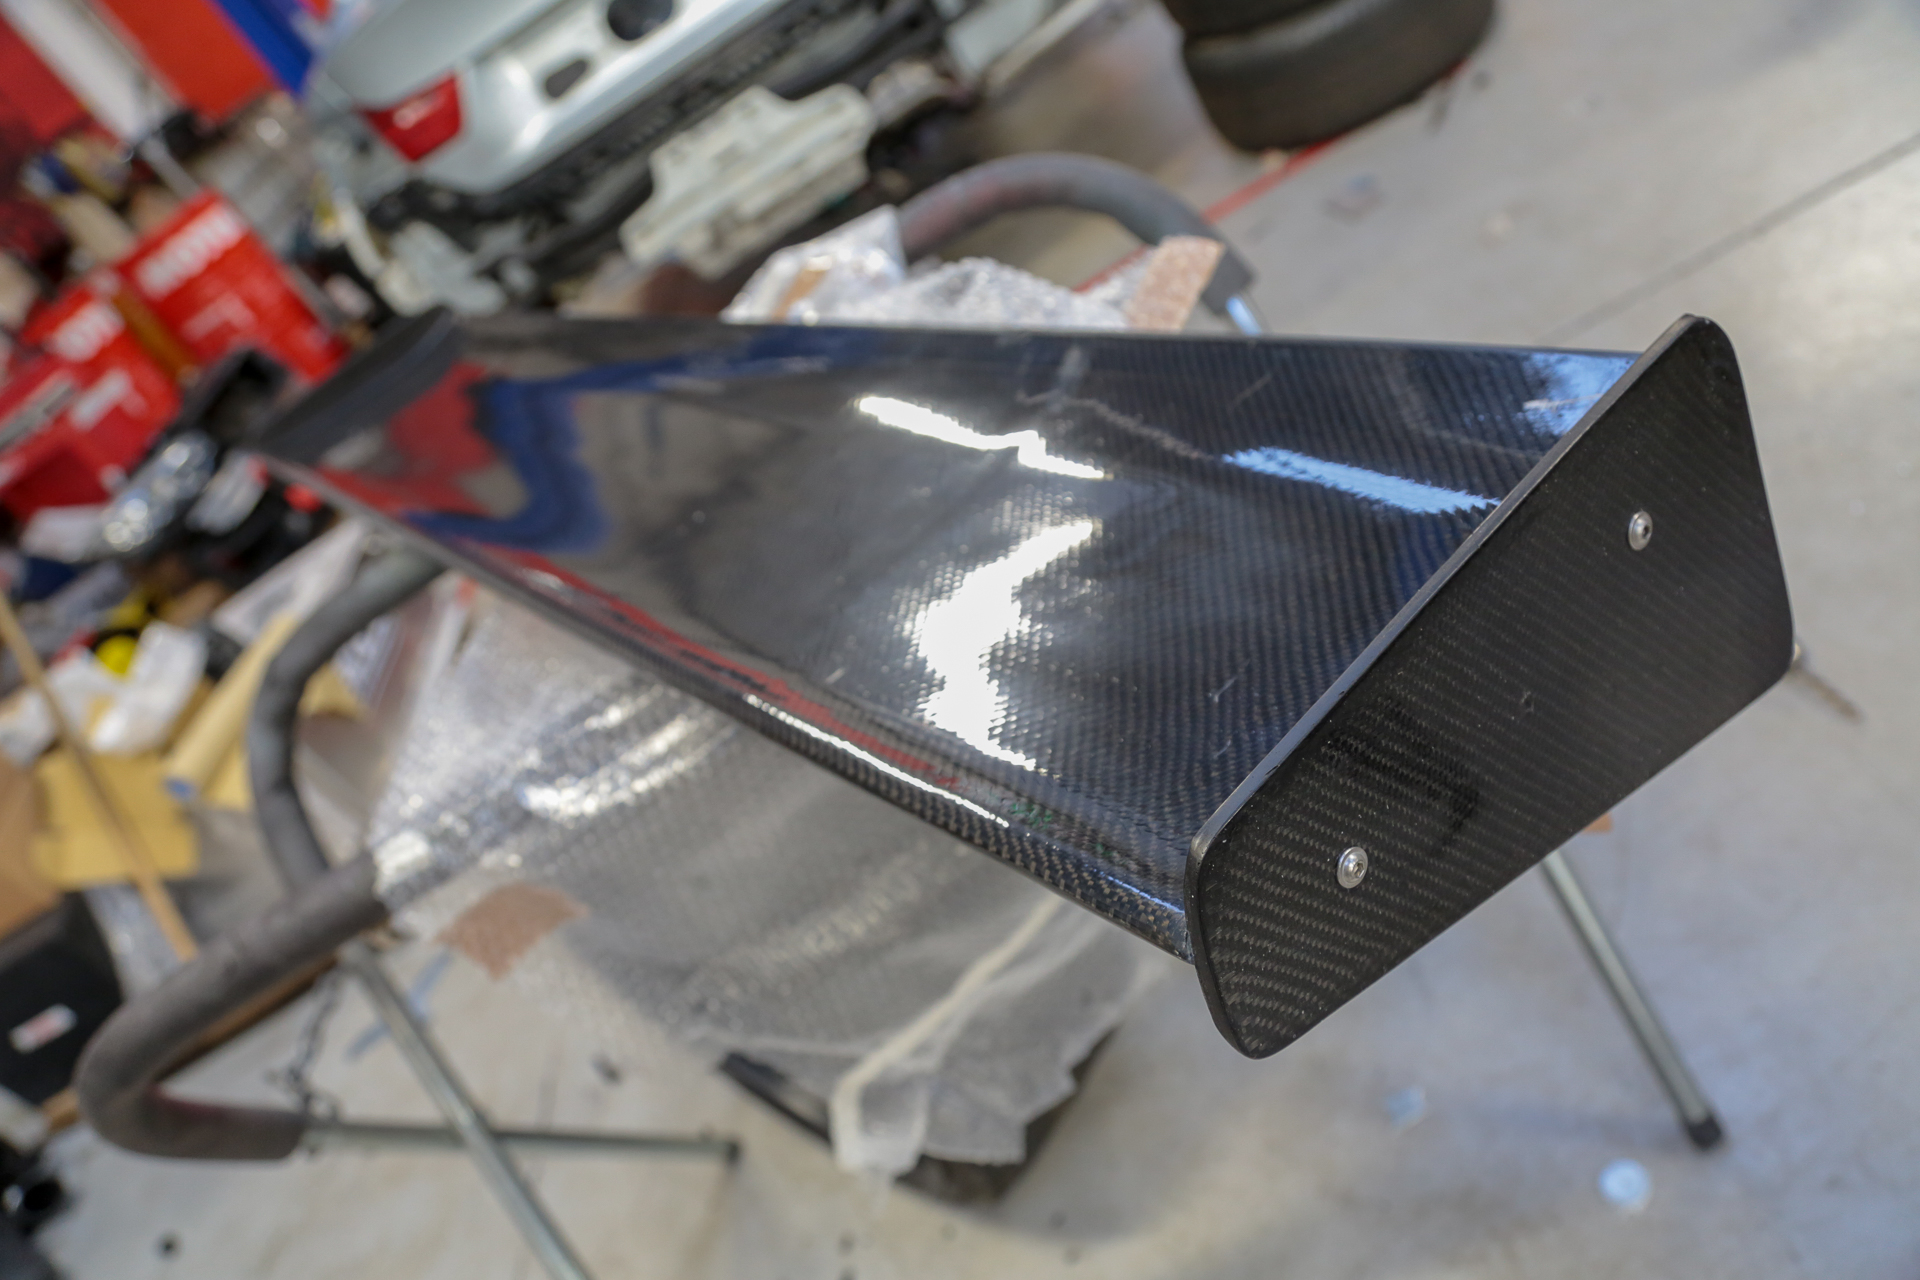
The design of the wing lets us adjust using the pitch using the bolts on the mounts you can see above, allowing for more or less downforce on the rear. Tiny adjustments can make a huge difference to the handling of your car, as you are regulating how hard the oncoming air is pushing down on the rear wheels… to put it simply.
 While we’re on aero, up front we have our new M4 GT4 style splitter (available in both Carbon and GRP/Carbon composite). Those of you with Instagram will have probably seen it fitted to the car already, it’s a great looking product and marries up to the car lovely.
One thing to consider however, we’re adding parts, therefore adding weight. This isn’t an ideal scenario and in some cases its unavoidable, that said there are some preventative measures that can shave a few precious pounds of the car.
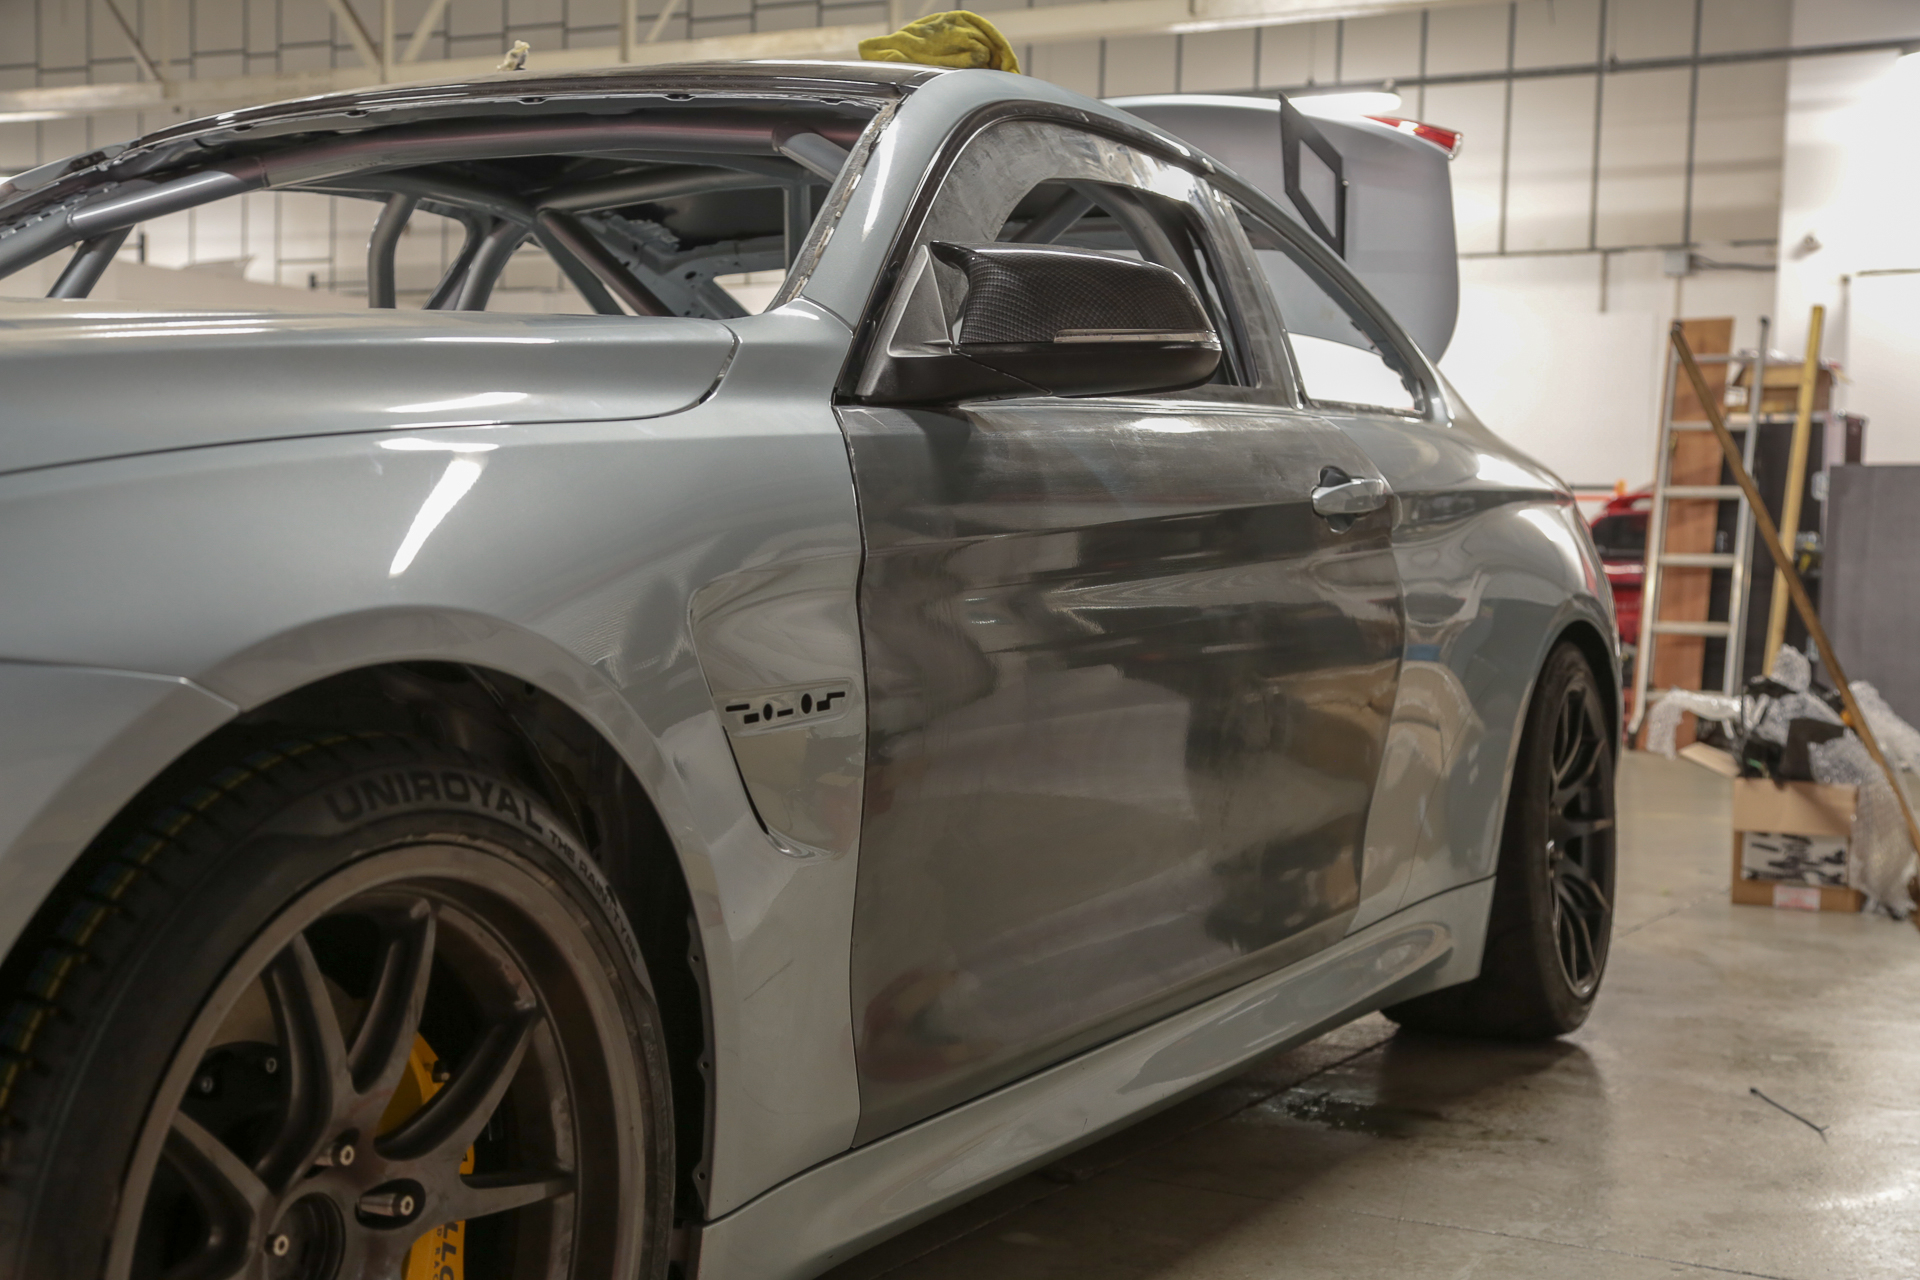 One such measure is replacing the heavy metal doors with these new GRP alternatives, saving a massive 44KG. The awesome part of these is that they retain ALL of the OEM fixtures, mirrors and trim. These are available to our customers now, can be found HERE and have the option of fitted lexan windows. The car is now fully fitted with lexan windows, another huge weight saver, but this is the real finishing touch with the car. Obviously with wiring aside, the car on the face of it is complete, now its down to Chris and the team at CN Signs LTD to get it wrapped.
After that its all systems go for Autosport International, the transport truck has been outfitted once again in preparation for the upcoming Club Enduro and Type R Trophy seasons. But its first task this year will be to transport this and one of our rentals to Birmingham for Autosport International 2019. Next time we catch up it’ll be past that though, and we’ll be finishing off with a nice photoshoot.

Until then, I’ll leave you with this… which you can see a bit clearer on the Tegiwa Euro Instagram. Very dramatic yes, but we’re proud of the work thats gone into it – and the final product very much deserves its own plug.
As usual you can find the gallery to the full build down below via my own personal Flickr.