
0 Item(s) in Cart
£0.00
You have no items in your shopping cart.


Details
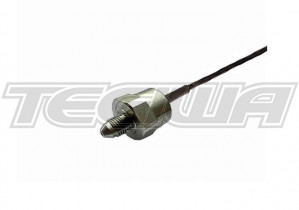
The Gyroscope sensor measures the angular rate change about a single axis. The use of this sensor allows generating accurate track maps for bike applications only. Aim data loggers, such as Drack, EVO 3, MyChron 3 bike, MXL, provide predefined channels for the connection of this sensor.

Installation notes
- The Gyroscope sensor is resistant to shock but can become critical to vibrations. For this reason we suggest You to fix it using a strip of neoprene, slightly pressed between the gyrospcope and the bikes point of installation.
- Make sure that the sensor is not installed too close to heat sources.
- Do not place the sensor near to sources of interference like ignition coils, alternators and plug leads;
- Ensure that, in static conditions, the top of the sensor is parallel to ground.
Software
Once the Gyroscope has been installed it is necessary to calibrate it. In order to correctly calibrate the sensor, please use Race Studio 2, the software properly developed by Aim to configure your data logger and analyze stored data.
Race Studio
In Race Studio 2 main window, reported below, You can choose the gauge where to install the sensor. Please select the gauge and press ?System manager? button.

Calibration
Once the configuration has been correctly transmitted to your gauge, is absolutely necessary to auto-calibrate the sensor. Please click on ?Calibrate? button: the below screenshot appears.

Press ?Click here to auto-calibrate all sensors of the list? button (highlighted with a red / blue arrow in the above figure): the software auto-calibrates automatically all channels of the ?to be auto-calibrated? box.
Please note: when auto-calibrating the sensor, the bike must be in a vertical position on the prop-stand.
Note: once the sensor has been auto-calibrated, it is necessary to re-transmit the configuration to the data logger pressing the proper button
Sensor configuration
In ?System Manager? main window, please press ?Channels? button to set the sensors you have installed on your vehicle. The following screenshot appears.

To set a sensor, You have to double-click in the box corresponding to ?Sensor type? column and to ?Ch_x? (where x represents the channel number) row: a menu like the one reported in the above figure appears. You c...
More Info
| Manufacturer | AIM |
|---|---|
| Fitment | See Title |
| Colour | N/A |
| Note | N/A |
- Be the first to review this product
You may also be interested in


AIM PROTPMS RCU DATA LOGGER (CAN) TYRE PRESSURE MONITORING UNIT
£2,600.00 Excl. Tax £3,120.00 Incl. Tax

© Tegiwa Imports Ltd | Registered in England Number 5798174
Finance provided by PayPal Credit. Terms and conditions apply. Credit subject to status, UK residents only, Tegiwa Imports LTD acts as a broker and offers finance from a restricted range of finance providers. PayPal Credit is a trading name of PayPal UK Ltd, Whittaker House, Whittaker Avenue, Richmond-Upon-Thames, Surrey, United Kingdom, TW9 1EH.

Finance provided by PayPal Credit. Terms and conditions apply. Credit subject to status, UK residents only, Tegiwa Imports LTD acts as a broker and offers finance from a restricted range of finance providers. PayPal Credit is a trading name of PayPal UK Ltd, Whittaker House, Whittaker Avenue, Richmond-Upon-Thames, Surrey, United Kingdom, TW9 1EH.